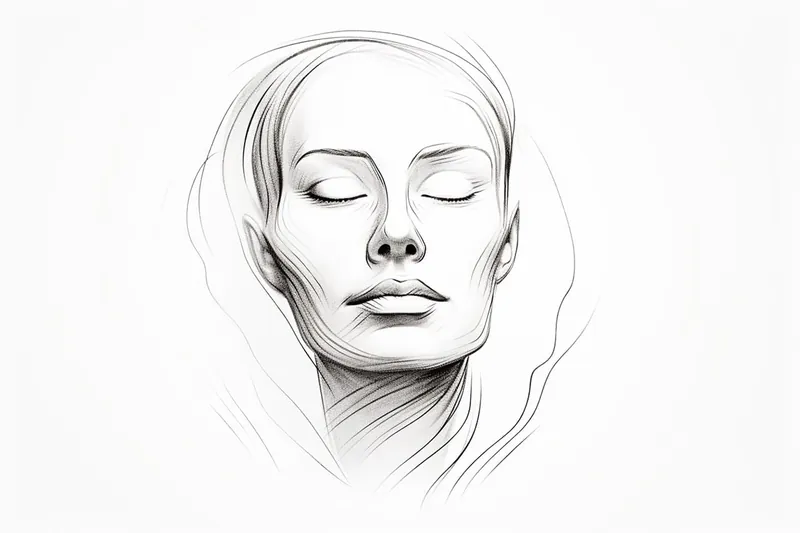
How to Draw a Head
Learn how to draw a head step-by-step with this helpful tutorial. Discover the techniques to capture proportions, features, and details for realistic portraits.
Materials You'll Need
- Pencil
- Paper
- Eraser
The human head is one of the most captivating and complex subjects in art, serving as the foundation for countless portraits and character designs throughout history. Learning how to draw a head allows artists to explore anatomy, emotion, and personality, all within a single subject. Whether you are passionate about drawing lifelike faces or interested in developing your own unique characters, mastering the basics of head construction is an essential step in your artistic journey. The head's structure—its proportions, angles, and subtle curves—plays a vital role in capturing the likeness and spirit of a person, making it a valuable skill for artists of all genres.
In this comprehensive tutorial on how to draw a head, we will break down the process into manageable steps, guiding you from simple shapes to more detailed features such as the eyes, nose, mouth, and ears. This approach is suitable for beginners as well as intermediate artists who want to strengthen their understanding of head anatomy and improve their portrait work. Along the way, you'll practice important techniques like measuring proportions, sketching guidelines, and adding shading to create depth and realism. By the end of this guide, you'll have built a solid foundation for drawing heads from various angles and with greater confidence.
Remember, learning to draw a head is a skill that develops with patience and consistent practice. Don't be discouraged by early attempts—each sketch is an opportunity to observe, learn, and grow. Grab your materials, follow along step by step, and most importantly, enjoy the creative process as you bring your drawings to life!
Materials Required
Before we begin, gather the following materials:
- Drawing paper or sketchbook
- Pencil (preferably with a range of hardness)
- Eraser
- Ruler
- Reference photo or model (optional but recommended)
Now that you have everything you need, let's get started!
Step 1: Basic Shape and Proportions
Start by sketching a rough oval shape to represent the overall size and position of the head. Remember, this is just a guideline, so feel free to adjust the shape as you go. Next, lightly draw a vertical line down the center of the oval to split it into two equal halves. This line will serve as a reference for ensuring the facial features are symmetrical.
Step 2: Dividing the Face
To create the proper proportions, divide the oval into four equal sections. The first horizontal line should be drawn about one-third of the way down from the top of the oval. This line represents the placement of the eyebrows. The second line should be drawn halfway between the eyebrows and the bottom of the oval and marks the position of the eyes. Finally, the third line is drawn at the bottom of the oval and represents the location of the mouth.
Step 3: Placing the Features
Using the reference lines, begin adding the facial features. Start by sketching the eyes within the middle section of the oval. Pay close attention to the shape and size of the eyes, as they are a key element in capturing a person's likeness. Remember to leave enough space between the eyes to properly place the nose.
Step 4: Adding the Nose
Draw a triangular shape for the nose, with its base resting between the eyes. Take note of the angles and proportions of the nose as they can greatly impact the overall appearance of the face. Add subtle shading to give it depth and dimension.
Step 5: Shaping the Lips
Sketch the lips along the bottom line of the oval, making sure to consider their size, shape, and symmetry. The upper lip is typically thinner, while the lower lip is fuller and often casts a small shadow onto the chin. Use gentle curves and lines to define the shape of the lips.
Step 6: Outlining the Jawline
Carefully draw the jawline and the area where the chin connects to the rest of the face. The jawline can vary greatly depending on the person, so pay attention to the reference you're using. Keep in mind that softer lines will create a more feminine look, while sharper angles will produce a more masculine appearance.
Step 7: Adding Hair
Tip: To enhance your head drawings, consider using a systematic approach to study facial anatomy by frequently analyzing and referencing real-life subjects or high-quality photographs. This practice will not only help you understand proportions and features better but also improve your ability to capture subtle expressions and nuances that bring your drawings to life. Regularly comparing your sketches against your references can also provide insights into areas for improvement, making your learning process more effective.
If desired, add hair to the top of the head. Keep in mind the shape of the head and how the hair falls naturally. Don't get too caught up in the details at this stage; focus on capturing the overall shape and flow of the hair.
Step 8: Refining the Details
Now that you have the basic structure in place, it's time to refine the details. Take a closer look at the reference photo or model and start adding more defined lines and shadows to bring out the characteristics of the face. Pay attention to the unique features that make each person distinct, such as freckles, wrinkles, or facial hair.
Step 9: Shading and Texturing
To add depth and dimension to your drawing, incorporate shading techniques. Use lighter or darker pencil strokes to create shadows and highlights, enhancing the three-dimensional effect. Take your time with this step, as shading can significantly impact the realism of your drawing.
Step 10: Final Touches and Clean-up
Evaluate your drawing as a whole and make any necessary adjustments. Erase any stray lines or smudges, and refine the details until you're satisfied with the result. Remember, practice makes perfect, so don't be discouraged if your first attempts aren't flawless. Keep experimenting and refining your technique.
Mistake Alert: A common pitfall when drawing the head is flattening its form by neglecting the underlying three-dimensional structure, causing faces to look unnatural or "stuck" to the page. This often happens when artists jump straight into outlining features like eyes and mouth without first establishing the basic volumes of the skull. To avoid this, start by lightly sketching the head as a sphere or oval, then add center lines and guidelines for the jaw, eye line, and nose, wrapping them around the form to show the direction and tilt. Building the head in three dimensions from the start will help you place features accurately and maintain a sense of depth, making your portraits feel much more lifelike.
Conclusion
Drawing a head may seem challenging initially, but with practice and patience, you can master this fundamental skill. By understanding the basic proportions and features, you can create realistic and expressive portraits. Remember to start with a rough guideline, gradually add details, and pay close attention to the unique characteristics of each individual. So pick up your pencil and start drawing!
Fun Facts About Head
- The human head contains over 20 bones that form the skull, protecting the brain and supporting facial structure.
- On average, an adult human head weighs about 5 kilograms (11 pounds), according to NCBI.
- The head houses four of the five primary senses: sight, hearing, smell, and taste, as explained by the CDC.
- Facial muscles in the head allow humans to make over 10,000 unique expressions.
- The human brain, located in the head, is the most complex organ in the body, with about 86 billion neurons.
- Hair grows from follicles embedded in the scalp, and the average person has about 100,000 hair follicles on their head.
- The human head is uniquely adapted for upright posture, with the foramen magnum (spinal cord opening) positioned at the skull's base.
- Each ear on the head helps with balance as well as hearing, thanks to the vestibular system.
Suggestions for Scenes and Settings for Head Drawings
- Draw a head in profile, illuminated by dramatic side lighting to emphasize the planes and shadows of the face.
- Sketch a head from an unconventional angle, such as from above (bird's-eye view) or below (worm's-eye view).
- Capture a head mid-expression—laughter, surprise, or deep concentration—to practice conveying emotion.
- Depict a head wearing an elaborate headdress, helmet, or hat to explore how accessories interact with facial features.
- Draw a head partially obscured by hands, hair, or fabric for a sense of mystery and depth.
- Illustrate a series of heads showing aging, from childhood to old age, to study changes in facial structure over time.
- Render a stylized or exaggerated head, inspired by cartoons or caricatures, to experiment with character design.
- Draw a head reflected in a mirror or distorted in water for a creative perspective challenge.
- Create a double-portrait with two heads interacting, such as a conversation or a shared laugh, to practice compositional balance.
- Sketch a head with dramatic, colorful lighting—such as neon or sunset hues—to play with mood and atmosphere.