How to Draw a Harpy
Learn how to draw a harpy with this step-by-step tutorial. Create your own captivating harpy artwork by following clear instructions and using your creativity.
Materials You'll Need
- Pencil
- Paper
- Eraser
Harpies are captivating figures in mythology, often described as fearsome creatures with the body and wings of a bird and the head and torso of a woman. Their roots can be traced back to ancient Greek legends, where they were depicted as wind spirits or agents of punishment, swooping down from the sky with their powerful wings and sharp talons. Over time, harpies have become popular subjects in fantasy art, literature, and games, thanks to their dramatic appearance and the sense of movement and mystery they evoke. Learning how to draw a harpy allows artists to explore a fascinating blend of human and avian anatomy, making them an exciting challenge for anyone interested in mythical creatures.
If you're drawn to fantasy illustration, character design, or simply want to expand your artistic repertoire, mastering how to draw a harpy is a rewarding project. Harpies present a wonderful opportunity to practice key drawing skills, such as capturing dynamic poses, rendering detailed feathers, and expressing emotion through facial features. This tutorial is suitable for artists of all skill levels, from beginners looking to improve their figure drawing to more advanced artists eager to experiment with imaginative creatures. We'll break down each step, covering basic shapes, proportions, and techniques for adding texture and drama to your harpy artwork.
Don't worry if this is your first time drawing a mythical creature—just remember that every artist improves with practice and patience. Follow along, and by the end, you'll have the confidence and skills to create your own unique harpy illustration, ready to take flight on the page. Gather your materials, clear your workspace, and let's embark on this creative adventure together!
Materials Required
Before we begin, gather the following materials:
- A pencil
- Paper
- Eraser
- Fine-tip black marker or pen
- Colored pencils or markers (optional)
Now that you have your materials ready, let's dive into the step-by-step process of drawing a harpy.
Step 1: Basic Sketch
Start with a light pencil sketch to outline the basic shape of your harpy. Begin by drawing a vertical line in the center of your paper. This will serve as the guideline for the body. Then, draw a small circle at the top of the line for the head. Connect the circle to the guideline with a curved line on each side to form the neck and torso. Add a round shape at the bottom for the hips.
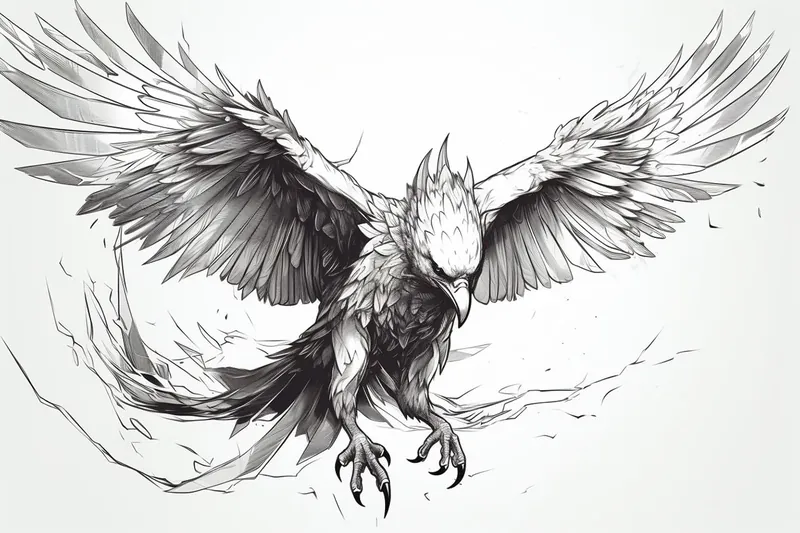
Step 2: Wings
Extend two long, curved lines from the upper back of your harpy to represent the wings. These lines should curve downward and slightly overlap the body. Harpy wings are usually large and feathery, so make sure to capture that flowing look by adding some wavy lines inside the main wing structure.
Step 3: Facial Features
Now it's time to add the facial features. Draw two almond-shaped eyes on the head, leaving space between them for the nose. Beneath the eyes, sketch a small curved line for the beak. Give your harpy a fierce expression by drawing a narrow, upside-down "V" shape for the eyebrows. Fill in the eyes with small circles for pupils and add some eyelashes to enhance the overall look.
Step 4: Upper Body Details
Refine the upper body of your harpy by adding more details. Draw two curved lines from the shoulders to create the arms, and then add hands with sharp talons at the end of each arm. Make the hands look more bird-like by adding some lightly sketched feathers. For the chest area, draw two curved lines that start from the base of the neck and gently curve outward to form the bust.
Step 5: Lower Body and Legs
Next, it's time to draw the lower body and legs of your harpy. Continue the guideline down from the hips and sketch two lines to represent the thighs. Add another set of lines below to create the legs. Harpies generally have bird-like legs, so make sure to include sharp claws at the end. Add some simple feather details to the legs and thighs to enhance their appearance.
Step 6: Tail and Feathers
Give your harpy a majestic tail by drawing a long, flowing shape that extends from the hips. This could be similar to the tail of a bird or have a more elaborate design. Then, add some feather details to the tail to make it look more realistic. You can achieve this by drawing V-shaped lines along the tail's edges.
Step 7: Finalize the Outline
Tip: As you work through the steps of drawing a harpy, take time to study real birds and their movements to better understand how to convey the dynamic poses and anatomy of your creature. Observing the way feathers layer and catch light can enhance the realism of your drawing, allowing you to bring depth and texture to both the wings and the overall figure. Don't hesitate to reference images of birds in flight to capture that sense of motion and grace in your artwork.
Once you are satisfied with the overall shape and positioning of your harpy, go ahead and darken the outline using a fine-tip black marker or pen. This will make your harpy stand out more and create a clean and finished look. Erase any unnecessary pencil marks that are no longer needed.
Step 8: Adding Color (Optional)
If you'd like, you can bring your harpy to life with some vibrant colors. Use colored pencils or markers to carefully color in your drawing. Consider using earthy tones for the bird-like parts of the harpy, and perhaps a bold color for the hair or any clothing the harpy may be wearing. Be creative and experiment with different color combinations to make your harpy truly unique.
Challenge: Push your creativity by drawing your harpy in the midst of a dramatic scene—perhaps soaring through a stormy sky, clutching something valuable in her talons, or interacting with other mythical creatures like griffins or sirens. Consider how the environment might affect her pose and expression: wind whipping her hair and feathers, lightning illuminating her silhouette, or other characters reacting to her presence. Pay special attention to how her bird and human features work together in action, and use dynamic gestures to convey movement and emotion. This is a fantastic opportunity to experiment with storytelling, composition, and mood, challenging yourself to bring your harpy's world to life in a unique and memorable way!
Conclusion
Congratulations! You have successfully learned how to draw a harpy. By following these step-by-step instructions and using your creativity, you have created a captivating piece of art. Remember, practice makes perfect, so don't be afraid to try drawing harpies in different poses or styles. Have fun and keep exploring your artistic skills!
Fun Facts About Harpy
- The word "harpy" comes from the ancient Greek "harpyiai," meaning "snatchers" or "swift robbers," referencing their role as agents of punishment in mythology.
- In Greek mythology, harpies were originally considered wind spirits before evolving into fearsome bird-women who abducted people and things.
- Harpies are famously known for tormenting the blind prophet Phineus by stealing or defiling his food, as told in the story of Jason and the Argonauts.
- Depictions of harpies have changed over time, ranging from beautiful maidens with wings to monstrous creatures with sharp talons and fierce faces.
- Harpies have inspired countless works of art, literature, and modern fantasy games, including appearances in Dungeons & Dragons and Magic: The Gathering.
- In Dante's "Inferno," harpies are described as tormentors of souls in the Wood of the Suicides, blending classical myth with medieval literature.
- The harpy eagle, a real bird named after the mythical creature, is one of the largest and most powerful eagles in the world.
- Harpies are often used symbolically to represent stormy winds, sudden misfortune, or relentless pursuit in both ancient and modern storytelling.
Suggestions for Scenes and Settings for Harpy Drawings
- A harpy perched atop jagged sea cliffs, her wings spread wide as storm clouds swirl around her.
- A dramatic mid-air chase between a harpy and a mythical hero soaring above ancient ruins.
- An elegant harpy singing atop a moonlit tree branch in an enchanted forest, surrounded by glowing fireflies.
- A harpy nesting with her chicks in a high mountain eyrie, with sweeping views of valleys below.
- A harpy emerging from swirling mists at dawn, feathers glistening in the early morning light.
- A group of harpies in flight, silhouetted against a blood-red sunset, creating a sense of movement and unity.
- A close-up of a harpy clutching a magical artifact in her talons, her gaze intense and mysterious.
- A tranquil scene of a harpy bathing in a hidden waterfall, with delicate feather details highlighted by sunlight.
- A harpy perched on a crumbling statue in a forgotten city, vines and moss entwined around her legs.
- A harpy soaring above a battlefield, her expression fierce as she surveys the chaos below.