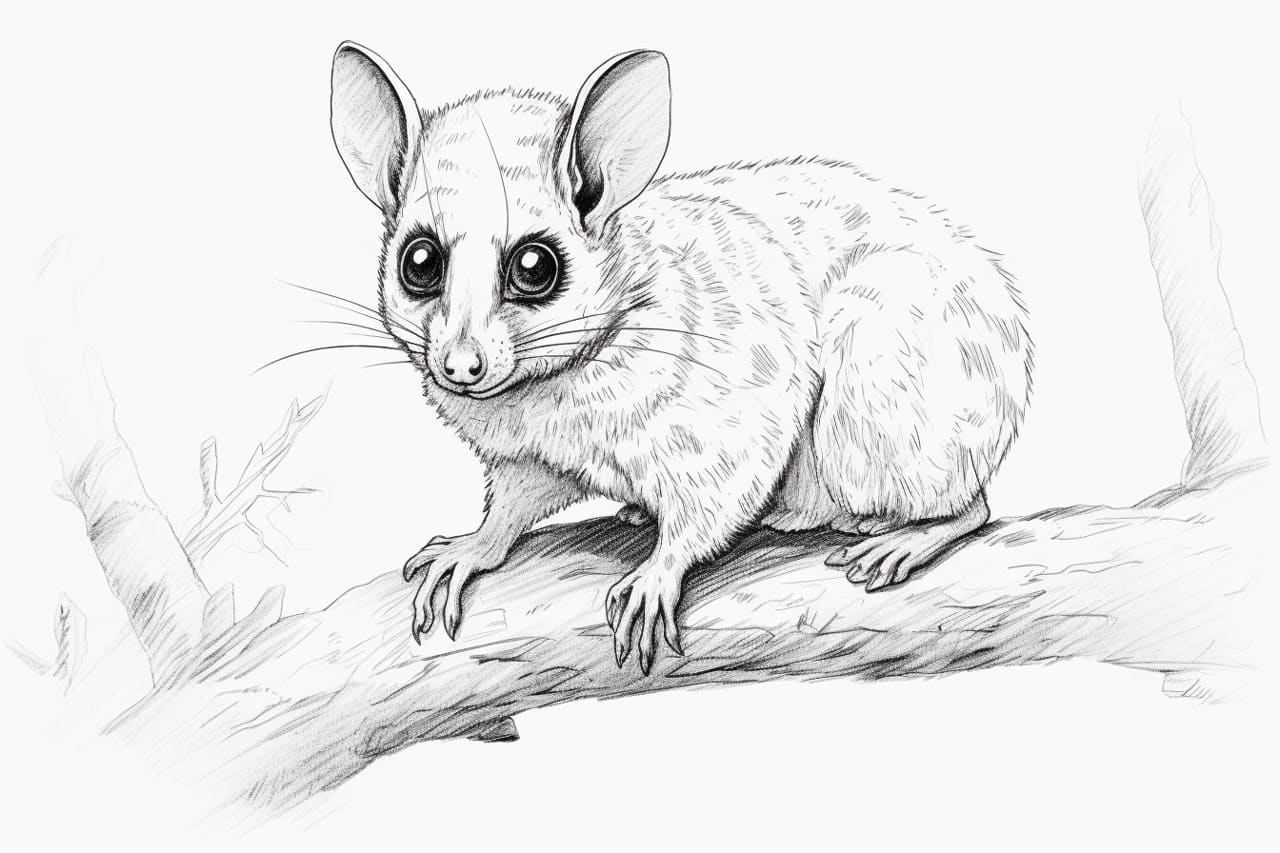
Welcome to the world of art where we explore the fascinating creatures that inhabit our planet through the power of drawing. Today, we embark on a journey to capture the elusive and graceful Colugo on paper. Also known as the “flying lemur,” this creature possesses a remarkable ability to glide through the treetops with ease. With its large, saucer-like eyes and intricate wing membranes, the Colugo is truly a sight to behold. Join me as we delve into the art of drawing this remarkable creature, paying close attention to its unique features and graceful movements. Let’s unleash our creativity and bring the Colugo to life on our canvas!
Materials Required
To draw a Colugo, you will need the following materials:
- Drawing paper or sketchbook
- Pencils (varying degrees of hardness for shading)
- Eraser
- Colored pencils or markers (optional for adding color)
- Reference images of Colugos for accuracy
These materials will help you create a detailed and accurate drawing of a Colugo.:
How to Draw a Colugo: a Step-by-step Guide
Step 1: Gather Your Materials
- Get a pencil for sketching.
- Have an eraser handy for corrections.
- Grab some drawing paper or a sketchbook.
Step 2: Reference Image
- Find a clear reference image of a Colugo for inspiration and guidance.
Step 3: Basic Shapes
- Start by lightly sketching the basic shapes of the Colugo’s body. Use an oval for the head and a larger oval for the body.
Step 4: Features
- Add details like the large eyes and small ears on top of the head.
- Sketch the long, slender limbs and the webbed skin between the fingers and toes.
Step 5: Fur Texture
- Add the fur texture by drawing short, soft lines covering the Colugo’s body.
Step 6: Facial Features
- Focus on the facial features by adding a small nose and mouth.
- Give the Colugo a curious or gentle expression by adjusting the eyes and eyebrows.
Step 7: Tail
- Draw the tail extending from the body, tapering towards the end.
Step 8: Final Touches
- Refine the details, making sure the proportions are correct and the lines are clean.
- Erase any unnecessary guidelines and darken the final lines.
Step 9: Shade and Highlight
- Add shading to give the Colugo depth and dimension. Pay attention to light source for realistic shading.
- Use a blending tool or your fingers to smooth out the shading.
- Add highlights to areas where light would naturally hit, like the top of the head and limbs.
Step 10: Background (Optional)
- Consider adding a simple background to place your Colugo in its environment, like a tree branch or leaves.
Step 11: Final Touches
- Take a step back and assess your drawing. Make any final adjustments or additions to enhance the overall look.
Step 12: Share Your Artwork
- Share your drawing of the Colugo with others to showcase your skills and creativity.
Step 13: Practice and Experiment
- Keep practicing drawing Colugos or other animals to improve your skills and develop your unique style. Experiment with different techniques and mediums for variety.
Conclusion
Congratulations on completing your drawing of a Colugo! You have done a fantastic job capturing the unique characteristics of this fascinating creature. Your attention to detail and skillful use of shading have truly brought the Colugo to life on paper. Remember, practice makes perfect, so keep honing your artistic skills and exploring different subjects. Your dedication and passion for art will continue to shine through in your work. Keep up the great work, and never stop creating!
Fun Facts About Colugoes
- Colugoes, also known as flying lemurs, are not actually lemurs at all. They belong to their own distinct order called Dermoptera.
- Despite their name, colugoes cannot fly. They have a patagium, a thin membrane of skin that stretches between their limbs and tail, allowing them to glide through the air.
- Colugoes are excellent gliders, able to travel up to 230 feet (70 meters) in a single glide.
- These unique creatures are primarily nocturnal, spending their days sleeping in tree hollows or curled up in the branches.
- Colugoes have a specialized diet consisting mainly of leaves, fruits, and flowers, making them herbivores.
- They are known for their large, expressive eyes, which help them navigate the dark forest canopy at night.
- Colugoes are solitary animals, only coming together to mate and raise young.
- Female colugoes give birth to a single offspring after a gestation period of around 60 days. The young colugo, known as a pup, clings to its mother’s belly for several months before becoming more independent.
- Colugoes are found in Southeast Asia, including regions of Malaysia, Indonesia, Thailand, and the Philippines.
- These fascinating creatures have been around for millions of years, with fossil records dating back to the Eocene epoch.
Suggestions for Scenes and Settings for Colugo Drawings
Certainly! Here are some specific suggestions for scenes and settings for drawings of Colugos:
- Colugo hanging upside down from a tall tree branch at night, with a full moon shining in the background.
- Colugo gliding gracefully through a dense tropical rainforest, with lush green foliage all around.
- Colugo perched on a tree trunk, blending in with the moss and lichen-covered bark.
- Colugo leaping between trees in a misty, fog-covered forest.
- Colugo peeking out from a tree hollow, with its large eyes looking curiously at the viewer.
- Colugo grooming itself while sitting on a branch, with its delicate membrane wings partially spread out.
- Colugo in mid-glide, with the wind ruffling its fur and wings as it moves through the forest canopy.
- Colugo interacting with other wildlife in its habitat, such as birds or insects.
- Colugo with its young clinging to its belly, showcasing the bond between parent and offspring.
- Colugo in a serene setting, such as a tranquil stream or waterfall, enjoying a moment of peace and quiet in nature.
I hope these suggestions inspire your drawings of Colugos!