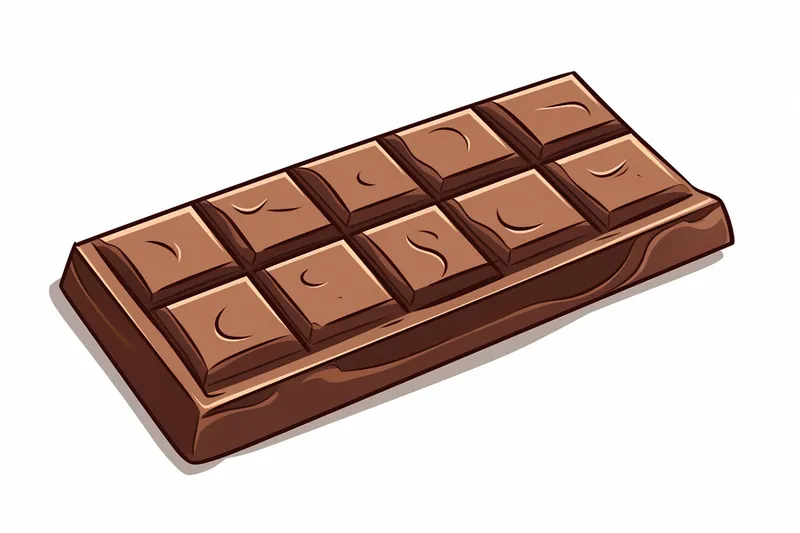
How to Draw a Chocolate Bar
Learn how to draw a chocolate bar in this step-by-step tutorial. Follow these instructions to create a delicious-looking illustration that will make anyone's mouth water.
Materials You'll Need
- Pencil
- Paper
- Eraser
Chocolate bars have a special place in the hearts of many, symbolizing comfort, celebration, and a touch of indulgence. Their iconic rectangular shape, segmented squares, and inviting, glossy surface make them an appealing and instantly recognizable subject for artists of all ages. Not only do chocolate bars spark fond memories of treats and special occasions, but they also offer a wonderful opportunity to practice capturing reflections, textures, and depth in your artwork. Whether you're a fan of sweet snacks or you simply appreciate the classic look of a chocolate bar, learning to draw one can be both fun and rewarding.
In this tutorial on how to draw a chocolate bar, you'll discover the steps needed to create a realistic and eye-catching illustration of this beloved treat. You might want to draw a chocolate bar for a variety of reasons—perhaps to design a greeting card, decorate a food-themed art project, or simply to improve your drawing skills with a familiar and enjoyable subject. By focusing on the details that make a chocolate bar unique, such as the crisp lines of its wrapper or the subtle highlights on its surface, you'll gain valuable experience with shading, perspective, and composition.
This guide is designed for artists of all skill levels, from complete beginners to more advanced creators looking to refine their techniques. You'll learn how to break down the chocolate bar into basic shapes, add realistic shadows and highlights, and use simple tools like pencils and erasers to bring your drawing to life. Along the way, you'll practice essential techniques such as measuring proportions with a ruler, layering shading for depth, and using erasers to create shine for that tempting, mouthwatering effect. If you're just starting out, don't worry—each step is clearly explained, so you can follow along at your own pace.
So, gather your drawing materials and get ready to embark on a deliciously creative journey. Remember, every artist improves with practice, and there's no better way to develop your skills than by working on a subject as delightful as a chocolate bar. Follow along with this guide on how to draw a chocolate bar, and soon you'll have a realistic illustration you can be proud of. Enjoy the process, experiment with your own touches, and most importantly, have fun!
Materials Required
Before we begin, make sure you have the following materials handy:
Now that you have everything you need, let's dive into the process of drawing a delightful chocolate bar!
Step 1: Outline the Shape
Start by drawing a horizontal line in the center of your paper. This line will act as a guide for the overall proportions of the chocolate bar. Using the ruler, draw two vertical lines on each side of the horizontal line, making sure they are parallel and equidistant from the center line. These lines will define the width of the chocolate bar.
Step 2: Add the Edges
At the top and bottom of the vertical lines, add two parallel horizontal lines to create the edges of the chocolate bar. Make sure these lines are parallel to each other and equidistant from the center line as well. You should now have a rectangular shape that represents the basic outline of the chocolate bar.
Step 3: Define the Sections
To make the chocolate bar look more realistic, divide it into smaller sections. Draw horizontal lines across the width of the chocolate bar, evenly spaced apart. These lines will create the distinct sections found in a chocolate bar. Make sure the lines are straight and parallel to each other.
Step 4: Add Texture to the Surface
To give the chocolate bar a realistic texture, add some lines and shapes to represent the uneven surface. Draw a series of diagonal lines across each section, varying the length and angle to create a random pattern. Then, add small irregular shapes and curves within the sections to represent the chocolate's texture. This will make your drawing look more like a real chocolate bar.
Step 5: Enhance the Details
Now it's time to add some finer details to your drawing. Start by adding a thin border around the edges of the chocolate bar to make it more defined. Then, carefully darken the sections by shading them with your pencil. Gradually build up the darkness, paying attention to the areas where the light would hit and create shadows. This will add depth and dimension to your chocolate bar.
Step 6: Add the Wrapper
To complete the drawing, add a wrapper to your chocolate bar. Draw two curved lines on each side of the chocolate bar, following the shape of the sections and extending beyond the edges. Then, connect the ends of these lines with two straight lines at the top and bottom. This will create the illusion of a wrapped chocolate bar. Add some folds and creases to the wrapper to make it look more realistic.
Step 7: Color (optional)
If you wish to add some color to your drawing, use colored pencils or markers to enhance the chocolate bar's appearance. Choose shades of brown for the chocolate and add a touch of silver or gold for the wrapper. Remember to blend the colors smoothly to create a realistic look.
Tip: When drawing a chocolate bar, start by lightly sketching the overall rectangle and dividing it into even segments using a ruler for crisp, straight lines—this helps keep your proportions accurate and each piece uniform. To capture the chocolate's glossy surface, use a kneaded eraser to gently lift out highlights on the raised segments after shading with a soft pencil (like a 2B or 4B). Pay close attention to where light naturally hits the chocolate, usually along the edges and tops of the segments, and build up the darker shadows in the creases between them for extra depth. For an added touch of realism, consider adding tiny imperfections or subtle texture to the chocolate by softly stippling with your pencil, which mimics the way light scatters on the surface.
Conclusion
Congratulations! You have successfully drawn a delicious chocolate bar. By following these step-by-step instructions, you have learned how to create the basic outline, add texture and details, and even color your drawing. With practice, you can refine your skills and create even more realistic and mouthwatering chocolate bar illustrations. So keep drawing, and have fun satisfying your artistic cravings!
Fun Facts About Chocolate Bars
- The first solid chocolate bar was created in 1847 by Joseph Fry in England.
- Chocolate bars were included in soldiers' rations during World War II.
- The world's largest chocolate bar weighed over 12,000 pounds.
- Milk chocolate, a popular chocolate bar variety, was invented by Daniel Peter in 1875.
- Some chocolate bars contain up to 600 flavor compounds, making chocolate more complex than red wine.
- The iconic Hershey's Milk Chocolate Bar was first introduced in 1900.
- Chocolate bars can help boost your mood due to the presence of serotonin and endorphin-releasing compounds.
- Kit Kat bars are produced in over 20 countries and come in more than 300 flavors worldwide.
- Dark chocolate bars are rich in antioxidants, which may benefit heart health.
Suggestions for Scenes and Settings for Chocolate Bar Drawings
- A chocolate bar partially unwrapped with shiny foil reflecting light, sitting on a picnic blanket in a sunny park.
- A stack of chocolate bars arranged artistically on a dessert plate, surrounded by strawberries and mint leaves.
- A close-up of a chocolate bar breaking apart, with gooey caramel or nougat oozing from inside.
- A whimsical scene of tiny mice or cartoon characters trying to carry away a giant chocolate bar.
- A chocolate bar sitting on a wooden table next to a steaming mug of hot cocoa, with marshmallows scattered around.
- A fantasy chocolate factory conveyor belt with rows of chocolate bars, some wrapped and some unwrapped, rolling past.
- A chocolate bar with a personalized wrapper, like a birthday or holiday theme, surrounded by confetti and party decorations.
- A realistic hand reaching for a chocolate bar from a box filled with different types of candies.
- A chocolate bar melting in the sun, with drips and a glossy surface, on a beach towel with seashells.
- A vintage-style advertisement poster featuring a chocolate bar, complete with retro fonts and decorative borders.