How to Draw a Charizard
Learn how to draw a Charizard in this step-by-step tutorial. This helpful guide provides clear instructions, ensuring your Charizard drawing turns out impressive.
Materials You'll Need
- Pencil
- Paper
- Eraser
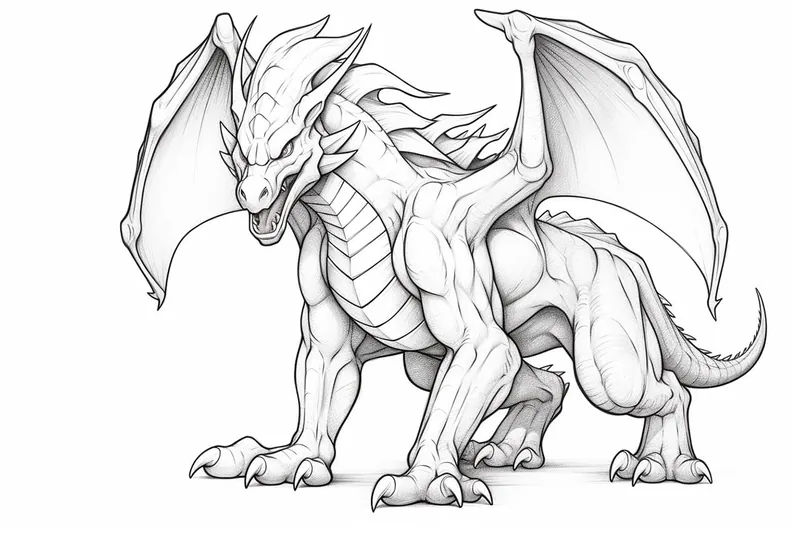
Charizard is one of the most beloved and recognizable Pokémon, famed for its fierce dragon-like appearance, flaming tail, and powerful wings. As the final evolution of Charmander, Charizard holds a special place in the hearts of Pokémon fans around the world, symbolizing strength, courage, and adventure. Whether you grew up watching the animated series, playing the games, or collecting the trading cards, learning how to draw a Charizard is a fun way to connect with your favorite franchise and bring this iconic creature to life on paper.
Many artists, both beginners and experienced, are drawn to Charizard's dynamic pose, expressive face, and unique combination of reptilian and dragon-like features. Attempting how to draw a Charizard can help you improve your skills in sketching anatomy, mastering proportions, and experimenting with shading and texture. This tutorial breaks down the process into easy-to-follow steps, making it accessible for artists of all skill levels. Along the way, you'll practice basic shapes, refine your lines, and add details that make your Charizard truly stand out.
Don't worry if you're new to drawing or if you've tried before and found it challenging—every artist starts somewhere, and with patience and practice, you'll be amazed at how much you can improve. Follow along, enjoy the creative process, and get ready to create your own fiery and impressive Charizard artwork!
Materials Required
To begin, gather the following materials:
- A piece of paper
- Pencil
- Eraser
- Fine-tipped black marker or pen
- Colored pencils or markers (optional)
Now that you have all your materials ready, let's dive into the steps of drawing Charizard!
Step 1: Basic Shapes
Start by drawing a large circle in the middle of your paper. This will be the base for Charizard's head. Then, draw a slightly curved line extending from the bottom of the circle, creating the neck. Next, draw a smaller circle on the upper right side of the head circle to represent the snout. Finally, add two small circles below the head circle for the body.
Step 2: Facial Features
Inside the snout circle, draw a horizontal line for the mouth. Add a small triangle shape at the tip of the snout for the nose, and two tiny circles above it for the nostrils. Now, let's work on the eyes. Draw two large oval shapes on the head circle, leaving a small gap in between for the brow ridge. Inside each eye, draw a smaller oval for the iris, leaving a small white highlight at the top-right side of each iris.
Step 3: Detailing the Head
To give Charizard its iconic fiery look, draw some flames on either side of the head. Start by drawing a wavy line extending from the back of the head, curving upwards at the end. Repeat this step on the other side, making sure the flames are symmetrical. Next, draw a series of spikes along the top of Charizard's head and neck, curving upwards. Finally, add some small teeth along the bottom of the mouth, showing a hint of its fierce nature.
Step 4: Wings and Arms
Moving on to the body, draw the first wing on the left side. Start by drawing a curved line that starts from the left side of the body circle and extends outwards. Then, draw a series of large, triangular-shaped feathers along the top of the line, creating the wing structure. Repeat this step on the right side, making sure the wings are symmetrical. Now, let's add the arms. Draw two slightly curved lines extending from the body circle, ending with small circles representing the hands.
Step 5: Legs and Tail
Let's bring Charizard to life by drawing its legs and tail! Start with the hind leg on the left side. Draw two slightly curved lines extending from the body circle, creating the leg structure. Repeat this step on the right side, making sure the legs are symmetrical. Then, draw the tail by extending a curved line from the back of the body circle, curving upwards at the end. Add some small spikes along the top of the tail to give it texture.
Step 6: Refining and Inking
Tip: As you work through each step of drawing Charizard, consider using reference images to guide your proportions and details, especially for the unique features like its wings and flames. Keeping a few images of Charizard from different angles handy can help ensure accuracy and inspire your creativity, allowing you to capture its character more vividly in your artwork.
Now that the basic structure of Charizard is complete, refine the lines and add details to enhance its appearance. Erase any unnecessary construction lines and darken the main outlines of Charizard's body using your pencil. Once you're satisfied with the pencil outline, go over the final lines with a fine-tipped black marker or pen. Take your time and make sure to keep the lines smooth and clean.
Step 7: Coloring (Optional)
If you want to add color to your artwork, now is the perfect time to do so! Use colored pencils or markers to bring Charizard to life. Charizard's body is primarily orange with a cream-colored underbelly. Its wings have a gradient of orange and yellow, with purple hues on the top. The eyes are bright blue, and the flames are a vibrant yellow or red. Let your creativity guide you as you choose the colors and shading for your Charizard drawing.
Mistake Alert: A common mistake when drawing Charizard is making the head too large or the body too small, which throws off the creature's powerful and dynamic proportions. This often happens because beginners focus on Charizard's expressive face and horns first, losing sight of how the head connects to the robust, muscular body and thick tail. To prevent this, lightly sketch the entire figure using basic shapes—ovals for the body and circles for the head—before adding any details. Step back and compare your sketch to reference images, checking that the head is about one-third the size of the torso and that the limbs and tail feel balanced. Remember, keeping your initial lines loose and erasable will make it much easier to adjust proportions and capture Charizard's fierce, athletic look.
Conclusion
Congratulations! You have successfully learned how to draw Charizard step-by-step. By following these simple instructions and using your own artistic flair, you can create a stunning Charizard drawing that showcases your skills. Keep practicing, exploring different styles, and adding your personal touch to your artwork. With time and dedication, your drawing abilities will continue to grow and improve. Enjoy the process and have fun capturing the fiery essence of Charizard on paper!
Fun Facts About Charizard
- Charizard is the final evolution of Charmander, first introduced in Pokémon Red and Blue.
- Despite its dragon-like appearance, Charizard is a Fire/Flying type, not a Dragon type, according to the official Pokédex.
- Charizard can Mega Evolve into two different forms: Mega Charizard X and Mega Charizard Y.
- In the Pokémon anime, Ash's Charizard is famous for its rebellious personality.
- Charizard was the first Pokémon to appear on a holographic card in the Pokémon Trading Card Game.
- Charizard is one of the few Pokémon to have appeared in every Super Smash Bros. game since Super Smash Bros. Brawl.
- Charizard's fiery tail is said to burn hotter if it is experiencing strong emotions, according to Pokédex entries.
- Charizard was voted the most popular Pokémon in a 2020 poll by The Pokémon Company.
- Charizard is the only Pokémon to have two different Mega Evolutions.
- Charizard's Japanese name is Lizardon.
Suggestions for Scenes and Settings for Charizard Drawings
- Charizard soaring dramatically above a volcanic landscape, with lava flows and smoke in the background.
- A close-up of Charizard unleashing its iconic Flamethrower attack, flames illuminating its fierce expression.
- Charizard perched protectively on a rocky cliff, wings spread wide against a twilight sky.
- A battle scene with Charizard facing off against another powerful Pokémon, such as Blastoise or Dragonite.
- Charizard flying over a lush forest, casting a large shadow on the trees below.
- A peaceful moment with Charizard resting beside its trainer, enjoying a sunset after an adventurous day.
- Charizard as a guardian of a treasure hoard in a dragon's cave, surrounded by sparkling gems and gold.
- Charizard mid-flight, swooping through stormy clouds with lightning illuminating its wings.
- A retro-style scene inspired by the original Pokémon Red/Blue games, with pixelated backgrounds and classic vibes.
- Charizard teaching a young Charmander how to control its flame, symbolizing growth and mentorship.