How to Draw a Bow on a Present
Learn how to draw a bow on a present like a professional artist. Follow our step-by-step guide to create stunning bows that will impress everyone. Perfect for gift wrapping!
Materials You'll Need
- Pencil
- Paper
- Eraser
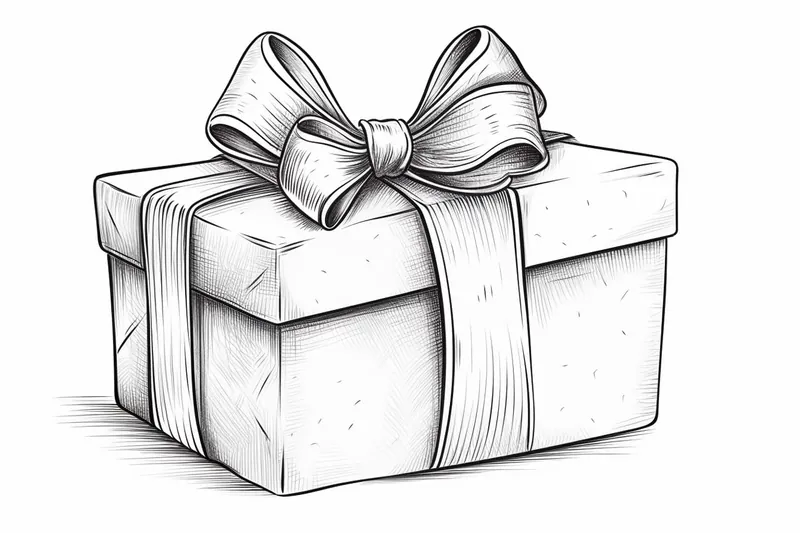
Drawing a beautifully crafted bow can add a charming and personalized touch to your artwork, especially when illustrating gifts, festive scenes, or decorative elements. Understanding how to draw a bow on a present or any other surface involves mastering the subtle curves and folds that give bows their elegant, three-dimensional look. Whether you're creating a handmade card, enhancing a digital design, or simply practicing your drawing skills, learning to depict bows can elevate your artistic repertoire. Bows symbolize celebration, thoughtfulness, and creativity, making them a delightful subject to explore.
This tutorial on how to draw a bow on a will guide artists of all skill levels through the process, breaking down the complex shapes into manageable steps. From sketching the initial loops and tails to adding shading and highlights that create depth, you'll develop techniques that enhance your ability to render soft, flowing ribbons convincingly. Drawing bows challenges your understanding of perspective, symmetry, and light, making it an excellent exercise to improve your observation and rendering skills. Whether you are a beginner eager to learn basic forms or an experienced artist aiming to refine your technique, this step-by-step guide has something valuable to offer.
With patience and practice, you'll soon be capable of drawing realistic and eye-catching bows that add a sophisticated flair to your gifts and illustrations. Embrace the learning process, enjoy experimenting with different styles, and remember that every artist starts with simple shapes before creating stunning art. So, gather your pencils and sketchpad, and let's embark on this creative journey together—mastering how to draw a bow on a will undoubtedly enhance your creative projects and bring joy to both you and those who see your work.
Materials Required
Before we begin, make sure you have the following materials handy:
- A sheet of paper
- Pencils (preferably in various shades)
- Eraser
- Ruler (optional)
- Colored markers or pencils (optional)
- Fine-tip black pen (optional)
Now that you have gathered all the materials, let's dive into the step-by-step instructions.
Step 1: Create the Base of the Bow
Start by drawing a horizontal line near the top of the paper. This line will serve as the base of your bow. Use a ruler if you want to ensure a straight and neat line.
Step 2: Draw the Left Side of the Bow
From the left end of the horizontal line, draw a diagonal line pointing upwards and to the right. This line will form the left side of the bow. Make sure the angle is around 45 degrees.
Step 3: Mirror the Right Side of the Bow
On the right end of the horizontal line, draw a diagonal line that mirrors the one you drew in the previous step. This line should point upwards and to the left, creating a symmetrical shape.
Step 4: Connect the Ends
To complete the outline of the bow, draw a curved line that connects the ends of the two diagonal lines. This curve should be wide and smooth, resembling a half-circle.
Step 5: Add Dimension to the Bow
To make the bow look more realistic, add depth and dimension. Start by shading the left side of the bow with a slightly darker shade of pencil. This will create the illusion of shadows.
Step 6: Shade the Curved Center
Using the same darker shade of pencil, add shadowing to the curved center of the bow. Start shading from the top and gradually darken towards the bottom of the curve. This will give the bow a three-dimensional appearance.
Step 7: Enhance the Depth
To further enhance the depth of the bow, add highlights. Use a lighter shade of pencil to lightly shade the areas where the light would naturally hit, such as the top of the bow and the edges of the curves.
Step 8: Fine-tune the Details
Take a step back and assess your bow drawing. Look for any areas that need refinement or adjustments. Use an eraser to correct any mistakes or smudges. Pay attention to the shape and symmetry of the bow, making sure it looks balanced and visually pleasing.
Step 9: Add Color (Optional)
If you want to add color to your bow, now is the time! Choose your favorite colored markers or pencils and carefully color in the bow. Opt for vibrant hues or stick to classic colors like red, green, or gold for a festive touch.
Step 10: Outline with a Fine-tip Pen (Optional)
For a polished and defined look, you can outline your bow drawing with a fine-tip black pen. This step is entirely optional but can add an extra level of professionalism to your artwork. Trace over the pencil lines, making them bolder and crisper.
Conclusion
Congratulations! You have learned how to draw a beautiful bow on a present. With a little practice, you'll be able to create stunning bows that will make your gift wrapping stand out. Remember to experiment with different colors, shades, and styles to make each bow unique. Give your presents a personal touch by drawing custom bows that reflect your artistic style. So grab your pencils and start practicing! Happy drawing!
Fun Facts About Bow on a Present
- The tradition of decorating gifts with bows dates back to the Victorian era, symbolizing thoughtfulness and care in gift-giving.
- Bows are often made from ribbons, which were originally handmade from silk and other natural fibers.
- The art of tying a perfect bow is considered a skill, with some people specializing in elaborate bow designs for luxury packaging.
- Red bows are especially popular during Christmas because the color red symbolizes warmth and celebration. Country Living
- Drawing bows helps artists practice symmetry, shading, and perspective, enhancing their overall drawing skills. Artists Network
- Ribbon bows can be made from various materials including satin, grosgrain, and organza, each giving a different texture and appearance.
- In some cultures, the bow on a present is believed to bring good luck and positive energy to the recipient.
- Ribbon bows are also used in fashion and hair accessories, showing their versatility
Suggestions for Scenes and Settings for Bow on a Present Drawings
- A cozy holiday setting with a bow-adorned present under a twinkling Christmas tree.
- A birthday celebration scene featuring a stack of colorful wrapped gifts, each topped with unique bows.
- A rustic picnic with a beautifully wrapped present adorned with a natural burlap bow and greenery accents.
- A whimsical fairy tale scene where a glowing bow on a present hints at magical surprises inside.
- An elegant wedding gift wrapped in soft pastel paper with a delicate lace bow, placed on a decorated table.
- A child's room with handmade presents featuring playful, oversized bows in bright, cheerful colors.
- A vintage-inspired setting with a present wrapped in kraft paper and tied with a classic satin bow and handwritten tag.
- A minimalist modern gift box with a sleek monochrome bow, set against a clean, simple background.
- A festive outdoor market stall with various wrapped gifts showcasing bows made of different textures like velvet, silk, and ribbon.
- A fantasy-themed present wrapped in shimmering paper with a bow shaped like wings or mythical creatures.