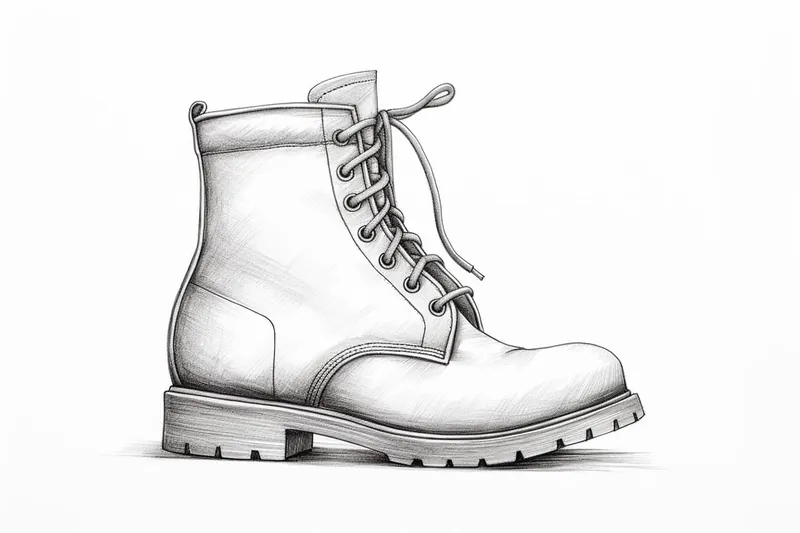
How to Draw a Boot
Learn how to draw a boot with this step-by-step tutorial. Create realistic and detailed boots with these easy-to-follow instructions. Perfect for beginners.
Materials You'll Need
- Pencil
- Paper
- Eraser
Drawing footwear, such as boots, offers a unique opportunity to explore both form and texture in your artwork. Boots are not only functional items of clothing but also carry a rich variety of styles and details that make them intriguing subjects to draw. From rugged hiking boots to sleek fashion designs, capturing their shape and character can enhance your artistic skills and add a new dimension to your portfolio. Learning how to draw a boot allows you to focus on proportions, intricate stitching, folds, and the way light interacts with different materials like leather or fabric.
This tutorial is designed to guide artists of all levels through the process of creating a realistic and detailed boot drawing. Whether you're a beginner eager to practice basic shapes and shading or an intermediate artist looking to refine your technique, understanding how to draw a boot will help you improve your observation and rendering skills. We will break down the complex structure into manageable steps, emphasizing perspective, contour lines, and textural details that bring your drawing to life. By the end of this guide, you will have a solid grasp of how to portray depth, dimension, and surface qualities that make boots so visually interesting.
So grab your pencil, paper, and eraser, and prepare to embark on a rewarding artistic journey. With patience and practice, mastering how to draw a boot can be both enjoyable and educational, ultimately boosting your confidence to tackle even more challenging subjects in the future. Let's get started and create a drawing that truly stands on its own!
Materials Required
To draw a boot, you will need the following materials:
- Paper - A sturdy drawing paper will work best for this project.
- Pencil - Choose a pencil with a medium lead for sketching and shading.
- Eraser - A good quality eraser will be useful for correcting mistakes.
- Ruler - A straight ruler or a T-square can help with drawing straight lines.
- Reference - It's always helpful to have a reference image of a boot to guide you through the process. You can use a photograph, a real boot, or search online for reference images.
Now that we have all the materials ready, let's move on to the step-by-step instructions.
Step 1: Draw the Basic Shape of the Boot
Start by drawing a vertical line on your paper. This line will serve as the center of the boot. Then, sketch a small oval shape at the top of the line. This will be the opening of the boot. Next, draw a larger oval shape at the bottom of the line to represent the sole of the boot.
Step 2: Add the Upper Part of the Boot
From the top of the opening, draw two curved lines that meet at a point slightly above the center of the vertical line. These lines will form the front of the boot. Then, extend two parallel lines from the sides of the sole, curving slightly inward. These lines will create the sides of the boot.
Step 3: Define the Boot's Shaft
From the point where the curved lines meet, draw a slightly curved line extending upwards. This will form the back of the boot. Then, connect the ends of the back and front lines with two curved lines, creating the shaft of the boot. Make sure to leave some space at the top for the boot opening.
Step 4: Refine the Shape of the Boot
Now that you have the basic outline of the boot, it's time to refine the shape. Use your reference to guide you in adding details and curves to make the boot look more realistic. Pay attention to the curves and angles of the boot's upper part, the shaft, and the sole.
Step 5: Add Details to the Boot
To make the boot look more realistic, start adding details. Draw a seam line on the front of the boot, following the shape of the upper part. Add stitching details along the sides of the boot shaft and around the opening. You can also sketch some texture lines on the sole to represent the grip.
Step 6: Shade the Boot
To give the boot dimension and depth, add shading. Determine the light source in your drawing and shade accordingly. Use light, feathery strokes to gradually darken areas that are farther away from the light source. Pay attention to the shadows cast by the different parts of the boot and use darker shading in those areas.
Step 7: Erase and Refine
After shading, take a step back and evaluate your drawing. Use an eraser to clean up any stray lines or smudges. Adjust the shading as needed and refine any details that require additional attention.
Congratulations! You have successfully drawn a boot. With practice, you will become more comfortable with the process and be able to create boots of different styles and designs.
Conclusion
Drawing a boot may seem challenging at first, but by following the step-by-step instructions outlined in this guide, you can create a realistic and detailed boot. Remember to take your time, use a reference image, and practice regularly to improve your drawing skills. So grab your materials and start drawing boots today!
Fun Facts About Boot
- The word "boot" originates from the Old French word "bote", meaning a kind of footwear.
- Boots were originally designed for protection and durability, especially for soldiers and workers, before becoming a fashion statement.
- The tallest boots ever made measured over 17 feet high and were created as a promotional item in the United States. Guinness World Records
- In many cultures, boots symbolize strength and resilience, often worn by warriors and hunters.
- Leather boots are prized for their durability and ability to mold to the wearer's feet over time, enhancing comfort.
- Hiking boots are specially designed with ankle support and rugged soles to protect feet on rough terrain.
- Boots have been a staple in fashion, with styles ranging from cowboy boots to high-heeled fashion boots.
- Military boots often include features like waterproofing, insulation, and reinforced toes for protection.
Suggestions for Scenes and Settings for Boot Drawings
- A rugged hiking boot resting on a rocky trail surrounded by pine trees and mountain scenery.
- A stylish leather boot placed on a vintage wooden floor with soft sunlight streaming through a nearby window.
- A pair of worn-out cowboy boots standing beside a rustic fence on a dusty farm landscape.
- A sleek fashion boot displayed on a glossy urban sidewalk with reflections of city lights.
- A sturdy work boot partially submerged in mud near a construction site with scattered tools around.
- An elegant ankle boot on a plush carpet next to a cozy fireplace with flickering flames.
- A boot covered in snowflakes resting near a frozen pond in a winter forest scene.
- A colorful rain boot splashing in a puddle on a rainy day with umbrella and raindrops visible.
- A vintage military boot placed on an old map and compass, evoking a sense of adventure.
- A climbing boot hanging from a backpack on a rocky cliff edge overlooking a vast canyon.