How to Draw a Blue Whale
Learn how to draw a blue whale with this step-by-step drawing tutorial. Capture the grace and grandeur of this magnificent marine mammal in your artwork.
Materials You'll Need
- Pencil
- Paper
- Eraser
The blue whale, renowned as the largest creature to ever inhabit our planet, inspires awe and admiration with its sheer size and graceful presence beneath the waves. These gentle giants can grow up to 100 feet long and weigh as much as 200 tons, making them a fascinating subject for artists and nature enthusiasts alike. Their streamlined bodies, distinctive mottled blue-gray skin, and enormous flippers offer a wonderful opportunity to explore shape, proportion, and texture in your artwork. Learning how to draw a blue whale is not only a chance to appreciate the beauty of marine life but also to practice capturing the essence of a truly majestic animal.
Whether you are a beginner hoping to improve your skills or an experienced artist looking for a new challenge, drawing a blue whale can enhance your understanding of anatomy, scale, and shading techniques. This tutorial will guide you step-by-step, breaking down the drawing process into manageable parts so you can create a realistic and captivating representation of this ocean giant. Understanding how to draw a blue whale will also help you develop confidence in sketching large mammals and tackling more complex forms in the future. All you need is some basic drawing materials and a willingness to experiment—so dive in, and let your creativity flow as you bring the blue whale to life on your page!
Remember, every artist starts somewhere, and each drawing is a step forward in your creative journey. Don't worry about perfection—focus on enjoying the process and learning as you go. With a little patience and practice, you'll be amazed at how much progress you can make. Let's get started and see just how magnificent your blue whale drawing can become!
Materials Required
To begin drawing a blue whale, you will need the following materials:
- Drawing paper or sketchbook
- Pencil
- Eraser
- Fine-tipped marker or pen
- Colored pencils or markers (optional)
Step 1: Understanding the Structure
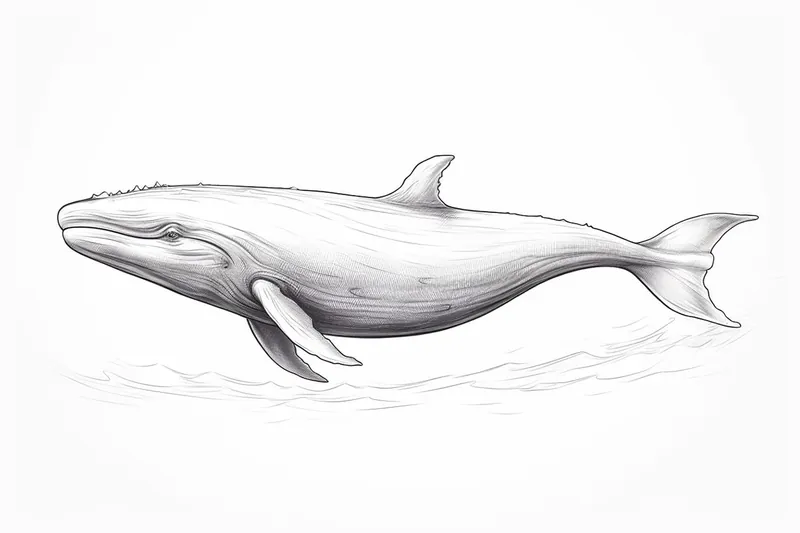
Before we dive into drawing, let's take a moment to understand the basic structure of a blue whale. A blue whale has a long and streamlined body with a large head and a distinctive, curving mouth called a baleen. It has a small dorsal fin and a fluke at the end of its tail. Familiarizing yourself with these features will help you accurately depict the whale in your artwork.
Step 2: Sketching the Body
Start by lightly sketching an elongated oval shape for the body of the blue whale. This will serve as a foundation for the rest of the drawing. Keep in mind that blue whales can reach lengths of up to 100 feet, so feel free to adjust the size of your oval accordingly.
Step 3: Adding the Head and Mouth
Next, sketch a smaller oval shape at one end of the body to represent the head. Blue whales have a distinctively large head, so make sure it is proportionate to the body. From the underside of the head, draw a gentle curve to represent the lower jaw. Extend the curve towards the back of the head to create the mouth, which should be shaped like a curving triangle.
Step 4: Outlining the Body and Tail
Using your initial sketches as a guide, start outlining the body of the blue whale. Curve the lines smoothly to create a sleek appearance. Remember to include the tiny dorsal fin near the middle of the body. Once you reach the end of the body, draw a large, triangular shape for the tail or fluke.
Step 5: Adding Details
Now that the basic form of the blue whale is complete, it's time to add some detail. Draw a small, almond-shaped eye on the side of the head, towards the front. On the upper side of the head, sketch a few lines to represent the blowhole. These lines should be slightly curved and positioned above the eye.
Step 6: Refining the Outline
Tip: As you work through the drawing steps, consider using reference images of blue whales to better understand their unique features and proportions; this will enhance your accuracy and help you capture the majestic essence of these incredible creatures. Additionally, don't hesitate to experiment with different styles or techniques as you develop your drawing, allowing your artistic voice to shine through while you learn.
Take a look at your initial sketch and identify any areas that need adjustment. Use an eraser to gently remove any unwanted lines or mistakes. Refine the outlines by going over them with a darker pencil or a fine-tipped marker. Pay attention to the flow of the body and make sure the proportions are accurate.
Step 7: Adding Texture and Shading
To give your blue whale drawing more depth, consider adding some texture and shading. Use short, curved lines to create a sense of texture along the body, particularly around the mouth and baleen. Lightly shade the areas under the body and tail to add dimension. You can also use colored pencils or markers to add color to your drawing, following references to recreate the blue whale's characteristic blue-gray coloration.
Did You Know?: Blue whales have hearts so massive that a small child could actually crawl through one of their arteries! Despite their enormous size, blue whales feed almost exclusively on tiny shrimp-like creatures called krill, consuming up to four tons of krill each day during feeding season. Their mottled skin patterns are unique to each individual, much like fingerprints in humans, making them recognizable to scientists studying them in the wild. As you draw your blue whale, imagine the incredible journey these gentle giants undertake across oceans, and consider how their vast scale and delicate features tell the story of life in the deep sea.
Did You Know?: Blue whales have an incredible heart that can weigh as much as a small car—about 400 pounds! This massive organ pumps blood through their enormous bodies, which can be over 100 feet long. When you're drawing a blue whale, consider the scale not just in size, but also in how their anatomy is designed for life in the ocean. Their heart is vital for circulating oxygen and nutrients, allowing them to dive deep and swim long distances. Understanding these fascinating biological features can deepen your appreciation for their graceful movements and help you capture their majesty on paper. So, as you sketch, remember that you're not just drawing a whale; you're representing an extraordinary creature that plays a vital role in our planet's marine ecosystems!
Conclusion
Fun Facts About Blue Whale
- The blue whale is the largest animal ever known to have lived on Earth, even bigger than the largest dinosaurs.
- A blue whale's heart can weigh as much as a small car, up to 400 pounds.
- Blue whales can reach lengths of up to 100 feet and weigh as much as 200 tons.
- Their calls are the loudest of any animal, reaching up to 188 decibels and traveling hundreds of miles underwater.
- Blue whales feed almost exclusively on tiny shrimp-like animals called krill, consuming up to 4 tons per day during feeding season.
- Despite their massive size, blue whales are filter feeders, using baleen plates to strain food from the water.
- Blue whales can live up to 90 years, with some individuals estimated to be over 100 years old.
- Their tongues alone can weigh as much as an elephant—about 2.7 tons.
Suggestions for Scenes and Settings for Blue Whale Drawings
- A blue whale gliding gracefully alongside a school of tiny fish for scale.
- An underwater scene showing a blue whale mother with her calf swimming in the deep blue ocean.
- A dramatic view of a blue whale breaching the surface, sending a huge spray of water into the air.
- A close-up drawing focusing on the unique mottled patterns and textures of the blue whale's skin.
- A blue whale peacefully swimming beneath a boat, highlighting the massive difference in size.
- A group of blue whales migrating through icy Antarctic waters with icebergs in the background.
- A majestic blue whale exhaling a spout of mist through its blowhole at sunrise or sunset.
- An overhead view showing a blue whale swimming near the ocean floor, surrounded by coral and sea life.
- A blue whale with its mouth open, filtering krill and tiny sea creatures through its baleen.
- A fantastical scene where a blue whale swims among glowing jellyfish in a bioluminescent sea at night.