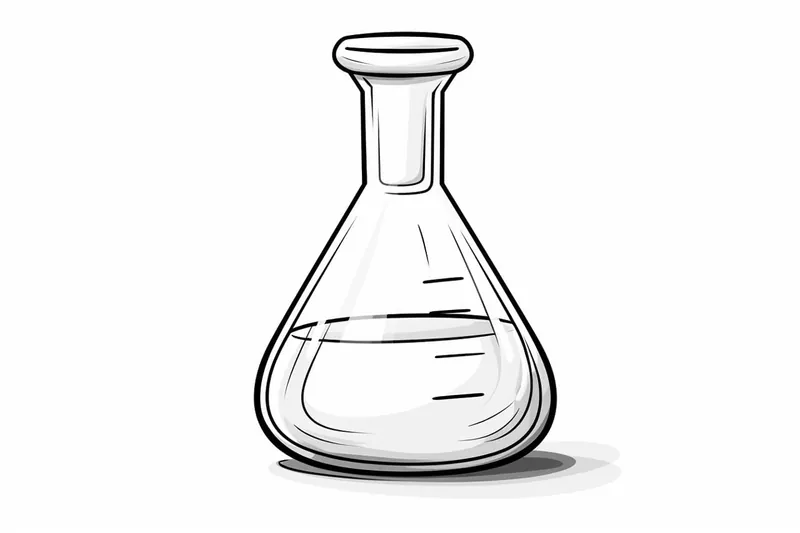
How to Draw a Beaker
Learn how to draw a beaker step-by-step with this easy-to-follow tutorial. Create a realistic and detailed beaker drawing using simple instructions and the right materials.
Materials You'll Need
- Pencil
- Paper
- Eraser
Welcome to this comprehensive step-by-step guide on how to draw a beaker! Beakers are essential laboratory glassware used to hold, mix, and heat liquids, making them iconic symbols in both scientific and educational contexts. Drawing a beaker offers a fantastic opportunity to practice capturing transparency, reflections, and the subtle shapes of curved glass surfaces—skills that are valuable for any artist interested in realism or technical illustration. Whether you are an aspiring artist fascinated by scientific objects, a student looking to enhance your observational drawing skills, or simply someone wanting a creative challenge, this tutorial will help you bring this everyday scientific tool to life on paper.Tackling how to draw a beaker involves understanding basic shapes like cylinders and ovals, as well as mastering shading techniques to depict the glass's reflective qualities and the liquid inside accurately. This tutorial is designed for beginners to intermediate artists, offering clear, manageable steps that build your confidence and technical abilities. You'll learn how to construct the beaker's proportions correctly, add realistic details such as measurement markings, and create depth through light and shadow. By the end of this guide, you will not only have a beautiful drawing but also improved skills in perspective, shading, and texture rendering.Remember, drawing is a journey that improves with practice and patience. Don't be discouraged if your first attempt doesn't look perfect—each sketch brings you closer to mastering the craft. So, gather your pencils, paper, and erasers, and let's embark on this creative adventure together. With this tutorial on how to draw a beaker, you'll develop a rewarding skill and a unique piece of artwork to be proud of!
Materials Required
- Drawing paper: Use a smooth and sturdy paper that can withstand the various techniques involved in drawing.
- Pencil: A set of drawing pencils with different lead grades, ranging from H (hard) to B (soft).
- Eraser: A kneaded eraser is highly recommended for its versatility and ability to lift graphite without damaging the paper.
- Ruler: A straightedge ruler will help you achieve precise and straight lines.
- Compass: This will be useful for drawing the circle at the base of the beaker.
Now that we have everything ready, let's get started!
Step 1: Outline the Beaker Shape
Begin by lightly sketching the outline of the beaker. Start by drawing a vertical line with a slight curve at the top, representing the spine of the beaker. Then, on both sides of the spine, draw two parallel lines that taper towards the bottom, creating the beaker's sides. Remember to leave some space at the top for the pouring spout.
Step 2: Draw the Base
At the bottom of the beaker, draw a horizontal line to form the base. Then, using a compass, draw a circle that connects with the horizontal line, representing the beaker's bottom. Make sure the circle is centered and proportionate to the rest of the beaker.
Step 3: Add the Spout
On the left side of the beaker's top, draw a slightly curved line extending upwards to create the spout. The spout should have a gradual slope and connect smoothly with the beaker's body.
Step 4: Outline the Lip
Draw a curved line above the spout to outline the lip of the beaker. The lip can slightly protrude from the beaker's body, creating a realistic effect.
Step 5: Add Measurement Lines
To make the beaker look more authentic, add a few measurement lines. These lines can be drawn horizontally across the beaker's body, indicating different volume levels. Start with the uppermost line, near the lip, and draw subsequent lines at regular intervals.
Step 6: Refine the Outline
Now, it's time to refine the outline of the beaker. Carefully trace over your initial sketch, making the lines more defined and confident. Pay attention to the curves, angles, and proportions to achieve a balanced and accurate shape.
Step 7: Shade the Beaker
Begin shading the beaker to give it depth and dimension. Determine the direction of the light source, and imagine where the shadows would fall. Use a lighter pressure when shading the areas that receive more light, gradually increasing the pressure for the darker areas. This will create a smooth transition between light and shadow.
Step 8: Add Reflections and Highlights
To enhance the three-dimensional look of the beaker, add reflections and highlights. Leave small areas untouched or lightly shade them to represent the reflection of light. Use an eraser to lift off graphite and create highlights on the beaker's curved surfaces.
Step 9: Texture the Beaker
To make the beaker appear more realistic, add some texture to its surface. Use short, diagonal strokes to create a subtle texture effect, mimicking the glass or plastic material of the beaker.
Step 10: Finalize the Drawing
Take a step back and evaluate your drawing. Make any necessary adjustments or refinements to ensure the beaker looks realistic and proportionate. Erase any stray lines or smudges, and clean up the drawing as needed.
Congratulations! You have successfully drawn a beaker. Remember, practice is key to improving your drawing skills, so don't be discouraged if your first attempt isn't perfect. With time and patience, you'll be able to create even more intricate and detailed drawings.
Conclusion
In this step-by-step tutorial, we learned how to draw a beaker using a series of simple and straightforward instructions. By following these steps and using the right materials, you can create a realistic and visually appealing drawing of a beaker. Remember to start with a light sketch, refine the outline, add shading and highlights, and finalize your drawing with texture and detail.
Tip: To enhance your drawing of a beaker, consider using reference images to observe how light interacts with glass and liquids. Pay close attention to the way reflections and shadows change with different light sources, as this can significantly improve the realism of your artwork. Experiment with various shading techniques, such as blending or hatching, to capture the nuanced textures and transparencies of the beaker, and don't hesitate to adjust your approach based on what you see in your references.
So grab your materials and give it a try! Drawing a beaker can be a fun and rewarding project for artists of all levels. Happy drawing!
Fun Facts About Beakers
- The beaker is one of the most common pieces of laboratory glassware, used for mixing, stirring, and heating chemicals.
- Beakers typically have a spout to make pouring liquids easier and reduce spills.
- Most laboratory beakers are made from borosilicate glass, which can withstand high temperatures and thermal shock.
- Beakers come in various sizes, ranging from a few milliliters to several liters, to accommodate different experimental needs.
- Graduated markings on beakers provide approximate volume measurements but are less precise than volumetric glassware.
- Plastic beakers made from materials like polypropylene are used when chemical resistance or shatterproof containers are needed.
- The design of the beaker dates back to the 19th century and has remained largely unchanged due to its simplicity and functionality. Chemical Heritage Foundation
- Beakers are often used in educational settings to teach students basic laboratory techniques and safety.
Suggestions for Scenes and Settings for Beaker Drawings
- A classic chemistry lab setup with a beaker boiling a colorful liquid over a burner.
- A close-up view of a beaker filled with bubbling, translucent liquid reflecting light.
- A beaker on a cluttered scientist's desk surrounded by notes, pencils, and other lab equipment.
- A futuristic laboratory scene featuring a beaker with glowing, neon fluids inside.
- A beaker placed on a wooden table with droplets of water on its surface, showcasing condensation.
- A whimsical scene with the beaker turned into a tiny terrarium containing plants and miniature creatures.
- An artistic interpretation showing a cracked beaker with colorful liquid spilling out in abstract shapes.
- A beaker half-submerged in water, illustrating transparent reflections and distortions.
- A step-by-step drawing progression collage of a beaker from simple outline to fully shaded realism.
- A vintage science classroom setting with an old-fashioned beaker alongside antique scientific instruments.