How to Draw a Bathroom
Learn how to draw a bathroom in this step-by-step tutorial. Create a realistic and detailed drawing with expert guidance. Perfect for both beginners and experienced artists.
Materials You'll Need
- Pencil
- Paper
- Eraser
Welcome to this comprehensive tutorial on how to draw a bathroom! Bathrooms are unique spaces that combine functionality with design, offering a great subject for artists interested in architectural and interior drawing. Whether you want to capture the sleek lines of modern fixtures or the cozy charm of a vintage setup, learning how to draw a bathroom will enhance your ability to depict real-life spaces with accuracy and style. This challenging yet rewarding subject involves understanding perspective, proportions, and the interplay of light and shadow on various surfaces like tiles, glass, and metal.
This tutorial is designed for artists of all skill levels—beginners will appreciate the clear, step-by-step instructions that break down the process into manageable stages, while more advanced drawers can refine their technique by focusing on details and textures. You'll learn how to use simple tools like pencils, rulers, and erasers to create a convincing three-dimensional space on paper. By studying how to draw a bathroom, you'll develop valuable skills such as spatial awareness, line work, and shading, which can be applied to many other drawing subjects.
So, whether you're looking to improve your interior drawing skills or simply want to create a beautiful and realistic bathroom illustration, this guide is the perfect place to start. Gather your materials, keep your reference images handy, and get ready to bring a detailed bathroom scene to life. Remember, practice is key, and every line you draw brings you closer to mastering the art of architectural sketching. Let's dive in and explore the fascinating world of bathroom design through drawing!
Materials Required:
- Pencil (HB or 2B)
- Eraser
- Ruler
- Paper (preferably white or sketch paper)
- Reference image of a bathroom (optional)
Step 1: Plan Your Drawing
Before we begin, it's a good idea to plan out your drawing. Think about the perspective you want to use and the layout of the bathroom. Consider the position of the sink, toilet, bathtub, and any other elements you wish to include. Take your time to visualize your drawing before putting pencil to paper.
Step 2: Start with Basic Shapes
Begin by drawing the outline of the bathroom using basic shapes. Draw a rectangle for the walls and another smaller rectangle for the floor. Use light, loose lines to create a rough sketch of the space. Don't worry about details at this stage, we'll add those later.
Step 3: Define the Walls and Floor
Tip: As you work through your bathroom drawing, consider using a lightbox or tracing paper to help you refine your shapes and maintain accurate proportions, especially when transitioning from basic outlines to detailed features. This technique can enhance the clarity of your drawing and allow for smoother adjustments without compromising the initial sketch.
Using your ruler, refine the outlines of the walls and floor. Straighten any uneven lines and ensure the corners are square. Erase any unnecessary lines from the initial sketch and darken the outlines of the walls and floor to make them more distinct.
Step 4: Draw the Fixtures
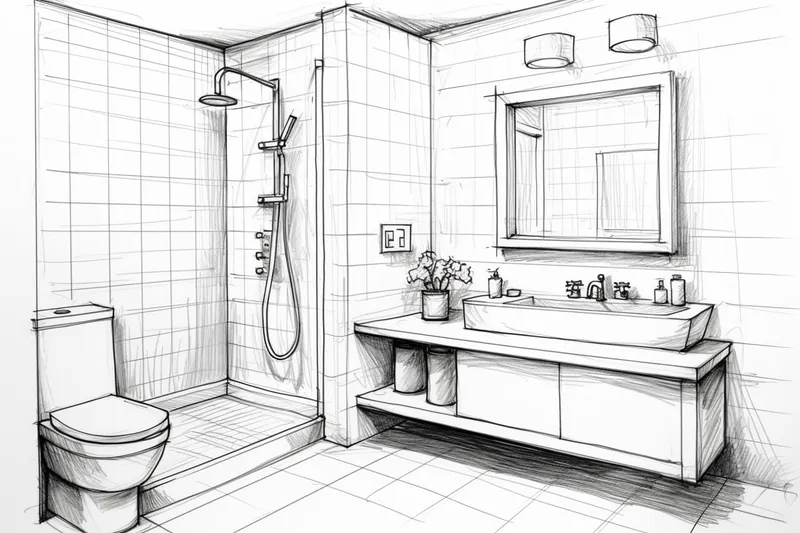
Now it's time to add the fixtures to your bathroom. Start by drawing the sink. Using your ruler, draw a rectangular shape for the sink basin and add a curved line on top for the faucet. Next, draw the toilet by creating a rounded rectangle shape and adding a seat and lid. Finally, draw the bathtub by sketching a rectangular shape with curved corners.
Step 5: Add Details
To make your bathroom drawing more realistic, it's important to add details. Start by drawing the mirror above the sink. Use straight lines to create the frame and a curved line for the reflection. Next, add the handles and knobs to the sink, toilet, and bathtub. Don't forget to draw the faucet handles and the showerhead if you have one.
Step 6: Textures and Patterns
Textures and patterns can add interest and depth to your drawing. Use short, light strokes to indicate the texture of the walls and floor. If there are tiles in your reference image, carefully draw the lines and patterns to represent them. Pay attention to small details like grout lines and reflections on reflective surfaces.
Step 7: Shadows and Highlights
Shadows and highlights can bring your drawing to life. Observe your reference image or imagine the light source in your bathroom. Use shading techniques to create shadows in areas that are not directly hit by the light. Similarly, use lighter shading or leave areas white to create highlights on surfaces that are reflective or receive direct light.
Step 8: Fine-Tune Your Drawing
Take a step back and evaluate your drawing. Look for any areas that need adjustments or refinement. Use your eraser to correct any mistakes or clean up any stray lines. Make sure all the proportions are accurate and that the perspective is consistent throughout the drawing.
Step 9: Final Touches
Once you are happy with the overall drawing, it's time to add the final touches. Use darker shading or a pen to emphasize certain areas or lines. Add more details such as towels, toiletries, or plants to bring your bathroom to life. Take your time with these final touches to ensure a polished and finished drawing.
Conclusion
Congratulations on completing your drawing of a bathroom! By following these step-by-step instructions, you have successfully created a detailed and realistic representation of a bathroom. Remember to practice regularly to improve your skills and try experimenting with different perspectives and styles. We hope you enjoyed this tutorial and found it helpful. Happy drawing!
Fun Facts About Bathrooms
- The modern flush toilet was invented in 1596 by Sir John Harington, a godson of Queen Elizabeth I.
- Bathrooms were once considered private spaces, and the word "bathroom" originally referred only to rooms with a bathtub.
- The average person spends about three years of their life in the bathroom.
- Japanese toilets often include advanced features like heated seats, bidet functions, and even music to enhance privacy.
- Tile patterns in bathrooms not only add aesthetic appeal but also help prevent slips by providing textured surfaces.
- In ancient Rome, public baths were social hubs where people gathered to relax, exercise, and conduct business.
- Water-saving toilets can reduce household water use by up to 30%, making them an eco-friendly bathroom upgrade.
- Mirrors in bathrooms were once considered luxury items and were often framed with ornate designs to showcase wealth.
Suggestions for Scenes and Settings for Bathroom Drawings
- A modern minimalist bathroom with sleek fixtures and large glass shower doors, emphasizing clean lines and reflective surfaces.
- A cozy vintage bathroom featuring clawfoot bathtub, antique mirror, and patterned tiles, highlighting intricate details and textures.
- A luxurious spa-like bathroom with a freestanding tub, plants, soft lighting, and natural stone walls for a tranquil atmosphere.
- A compact urban apartment bathroom showcasing smart use of space with stacked fixtures and clever storage solutions.
- A bright and airy bathroom with large windows, white tiles, and subtle pops of color through towels and accessories.
- An industrial-style bathroom with exposed pipes, concrete walls, and metal fixtures, focusing on rugged textures and shadows.
- A rustic bathroom in a cabin setting with wooden walls, a stone sink, and a warm, natural color palette.
- A futuristic bathroom design with unconventional shapes, neon lighting accents, and high-tech fixtures.
- A bathroom in an old-fashioned Victorian home with ornate moldings, patterned wallpaper, and vintage plumbing fixtures.
- An outdoor bathroom setup surrounded by nature, featuring natural materials and an open-air design.