How to Draw a Baby
Learn how to draw a baby using step-by-step instructions in this clear and concise drawing tutorial. Capture the innocence and charm of these tiny beings on paper.
Materials You'll Need
- Pencil
- Paper
- Eraser
Babies are known for their delicate features, soft curves, and expressive faces, making them a captivating subject for artists of all skill levels. Whether you're interested in capturing a cherished family memory, creating a heartwarming gift, or simply practicing your portrait skills, learning how to draw a baby can be both a rewarding and enjoyable experience. Babies embody innocence and wonder, and translating these qualities onto paper challenges artists to focus on subtle details such as chubby cheeks, big eyes, and gentle expressions that define their unique charm.
This tutorial is designed to break down the process of how to draw a baby into manageable steps, making it accessible for beginners while still offering valuable tips for more experienced artists. You will learn how to map out basic proportions, sketch soft facial features, and use shading techniques to create a sense of depth and realism. Drawing a baby requires patience and careful observation, but with guidance and practice, you'll gain the confidence to portray these tiny subjects with lifelike results. So, gather your drawing materials, keep an open mind, and let's embark on this artistic journey together—remember, every masterpiece starts with the first line!
Materials Required
To start your baby drawing, you will need the following materials:
- A pencil (preferably HB or 2B for easy erasing)
- Eraser
- Drawing paper (smooth surface is preferable)
- Fine-tipped markers or colored pencils (optional for adding color)
Now that you have your materials ready, let's delve into the step-by-step instructions for drawing a baby.
Step 1: Basic Shapes
Begin by sketching the basic shapes that will serve as the foundation for your baby drawing. The oval shape for the baby's head should be slightly tilted, giving it a natural and relaxed appearance. Ensure that the oval for the body is proportionate to the head, connecting them with a graceful curved line for the neck. Pay attention to the proportions, as they are crucial for achieving a lifelike representation.
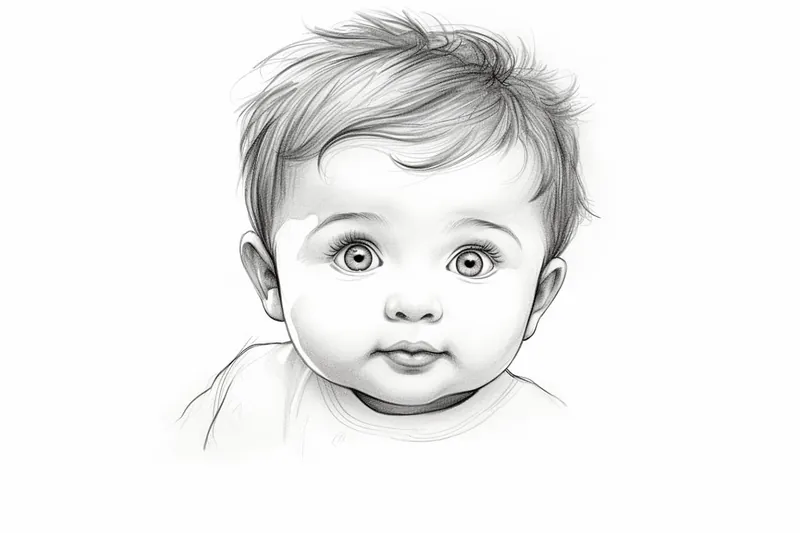
Step 2: Facial Features
The facial features are the soul of your baby drawing. Within the head shape, draw two large and expressive oval shapes for the eyes. These eyes should be gentle and reflective, capturing the innocence and curiosity of a baby. Leave just enough space between them for the nose, which can be indicated with a simple, soft curve. Beneath the nose, draw a small, delicate line for the mouth, hinting at a sweet, content smile.
Step 3: Eyes, Nose, and Mouth
To breathe life into the eyes, within the oval shapes, draw smaller circles for the irises. Add tiny, gleaming dots at the center of each iris to create a sense of vitality. Babies have soft, plump cheeks, so consider gently rounding the contours of the face around the eyes. For the nose, refine the triangle shape, making it petite and cute. When defining the mouth, pay attention to the proportions. Ensure that the lips are soft and subtly curved, capturing the baby's tender expression.
Step 4: Adding Details
To make your baby's face even more captivating, add subtle details. Lightly sketch fine, wispy eyelashes at the corners of the eyes, emphasizing their delicacy. The eyebrows should be barely there, drawn with soft, light lines just above the eyes. Remember to keep these features understated to maintain the innocence and purity of the baby's visage.
Step 5: Hair and Ears
Tip: When drawing a baby, take the time to study and reference real-life images or photographs to capture the unique softness and proportions of their features accurately. Observing actual babies can help you understand the delicate curves and gentle expressions that define their charm, allowing you to translate those subtle details onto paper more effectively. Regular practice with these references will enhance your ability to depict their innocence and wonder in your artwork.
Babies often have fine, downy hair that is endearing to depict. Use short, delicate strokes from the top of the head to create wispy baby hair. Keep the lines light and airy, emphasizing the softness of the hair. For the ears, draw them as small, rounded shapes located just below the eyes, ensuring they are proportionate to the head.
Step 6: Neck and Body
Refine the neck by adding gentle, curving lines to convey its soft contours. Extend curved lines from the bottom of the head to represent the shoulders and arms. Babies typically have chubby bodies, so emphasize their adorable plumpness by adding subtle curves to the body shape. Define the hands with small, round circles at the ends of the arms, symbolizing their tiny, grasping fingers.
Step 7: Clothing
To complete your baby drawing, focus on the clothing. Create a neckline within the body shape, extending it slightly beyond the shoulders. Sketch the sleeves of the baby's outfit with graceful, flowing lines, and don't forget to add some folds and creases to the clothing to give it texture and dimension. Babies' clothing is often snug, so consider drawing it close to the body.
Mistake Alert: One common mistake when drawing babies is unintentionally making their facial features too sharp or angular, which can make them look older or less gentle than intended. This often happens because artists are used to drawing adults, whose faces have more defined bone structure and angles. To avoid this, pay close attention to the soft, rounded shapes in a baby's face—notice how the cheeks are full, the chin is small and subtle, and there are minimal hard lines. Use light, curved strokes to build up the features gradually, and remember to keep edges soft, especially around the jawline and nose. Taking a step back to compare your drawing with your reference can help you spot any areas that need to be softened for a more youthful, cherubic look.
Conclusion
Congratulations! You have successfully learned how to draw a baby. By following these step-by-step instructions and practicing regularly, you can improve your skills and create beautiful baby drawings. Remember to start with basic shapes, add facial features and details, and finish with clothing and other elements. Enjoy the process and have fun capturing the innocence and beauty of these precious little ones on paper!
Gallery of Baby Drawings


Fun Facts About Baby
- Babies are born with about 270 bones, but as they grow, some fuse together, leaving adults with 206 bones.
- Newborns can recognize their mother's voice from birth, thanks to hearing development in the womb.
- Babies are born with the ability to swim reflexively, a skill known as the "diving reflex."
- At birth, a baby's brain is about one-quarter the size of an adult's but doubles in size during the first year.
- Babies have more taste buds than adults, not just on their tongue but also on the sides and roof of their mouth.
- Newborns typically sleep for 14 to 17 hours a day, but only in short bursts.
- Babies are born with very poor eyesight and can only see about 8 to 12 inches in front of them.
- All babies are born with a natural instinct to grasp objects placed in their hands, known as the palmar grasp reflex.
Suggestions for Scenes and Settings for Baby Drawings
- A baby peacefully sleeping with a favorite stuffed animal or blanket.
- A playful baby crawling on a soft rug, reaching for a colorful toy.
- A giggling baby sitting in a high chair, covered in food during mealtime.
- A baby's first steps, with a parent's hands reaching out for support.
- A baby wrapped in a cozy towel after a bath, with droplets of water and a rubber duck nearby.
- A baby gazing out a window, watching raindrops or birds outside.
- A baby surrounded by building blocks or plush toys, playing on a nursery floor.
- A baby wearing a whimsical hat or costume, ready for a family photo.
- A baby bundled up in a stroller, enjoying a walk in the park during autumn.
- A baby reaching out to touch a flower or butterfly in a garden setting.