How to Draw a 3D Room
Learn how to draw a 3D room with this step-by-step tutorial. Create a realistic, three-dimensional space using simple techniques and basic shapes.
Materials You'll Need
- Pencil
- Paper
- Eraser
Welcome to this comprehensive tutorial on how to draw a 3d room! Drawing a three-dimensional room is an exciting way to develop your artistic skills while exploring the fundamentals of perspective, depth, and spatial relationships. A 3D room illustration allows you to create the illusion of space on a flat surface, making your artwork more dynamic and visually captivating. Whether you want to design interior scenes, create backgrounds for comics, or simply challenge yourself with a fun new project, mastering this technique is a valuable addition to your creative toolkit.In this guide, we'll break down the process into easy-to-follow steps that are suitable for beginners and intermediate artists alike. You'll learn how to establish vanishing points, draw accurate proportions, and add details that bring the room to life. The techniques involved will help you understand how light and shadow interact with objects in a confined space, enhancing the realism of your drawing. By the end of the tutorial, you'll not only have a solid grasp of the principles behind three-dimensional drawing but also the confidence to experiment with your own room designs.So, if you've ever wondered how to draw a 3d room that looks realistic and engaging, this tutorial is the perfect place to start. Grab your pencils, paper, and erasers, and prepare to transform a simple sketch into a compelling visual experience. Remember, every artist starts with a single line—take your time, enjoy the process, and watch your skills grow with each stroke!
Materials Required
Before we begin, gather the following materials:
- Paper: Choose a suitable paper size, preferably larger than 8.5 x 11 inches, to allow enough space for your drawing.
- Pencils: Use a range of graphite pencils with different lead weights, such as HB, 2B, 4B, and 6B, to achieve varying shades and tones.
- Erasers: Have both a kneaded eraser and a regular eraser on hand. The kneaded eraser works well for lifting graphite and creating highlights, while the regular eraser is useful for correcting mistakes.
- Ruler: A straight ruler will help you achieve straight lines and maintain proper proportions.
- Optional: Colored pencils or markers can be used to add a pop of color to your drawing, but they are not required for the basic 3D room sketch.
Now that you have your materials ready, let's dive into the step-by-step process of drawing a 3D room.
Step 1: Start with Basic Shapes
Begin by lightly sketching the basic shapes that will form the foundation of your room. Start with a large rectangle in the center of your paper, representing the back wall of the room. This rectangle will be the vanishing point for your perspective drawing.
Next, draw two smaller rectangles on each side of the back wall, representing the side walls. These rectangles should taper inward slightly to create the illusion of depth. Finally, draw a rectangle at the bottom, connecting the side walls, to depict the floor.
Step 2: Add Depth with Vanishing Point
Now, it's time to add depth to your 3D room by creating a vanishing point. This point will serve as the focal point from which all lines will converge to create the illusion of perspective.
To find the vanishing point, draw a dot in the center of your back wall rectangle. Then, using your ruler, draw converging lines from the corners of the side walls to the vanishing point. These lines will guide you in creating the depth and angles of your room.
Step 3: Sketch the Ceiling and Horizon Line
Tip: When drawing your 3D room, take the time to observe real spaces around you for reference; pay attention to how light interacts with surfaces and the way objects are arranged. This practice can enhance your understanding of perspective and proportions, allowing you to incorporate realistic details and textures into your drawing, ultimately bringing your artistic vision to life.
With the vanishing point established, draw a horizontal line across the paper, intersecting the vanishing point. This line represents the horizon and will serve as a reference for the position of objects within the room.
Next, draw a rectangle or shape above the back wall to represent the ceiling. Ensure that the lines of the ceiling converge towards the vanishing point, maintaining the perspective of the room.
Step 4: Outline the Details
Now that you have the basic structure of your room, it's time to add details such as doors, windows, and furniture.
Using your ruler and the guidelines established by the converging lines, outline the position of doors and windows on the side walls. Remember to draw these elements in a way that follows the perspective of the room.
If you want to add furniture or other objects to your room, sketch their basic shapes using simple lines. Don't worry about adding too many details at this stage; we will refine them in later steps.
Step 5: Refine the Details and Add Texture
Once you are satisfied with the overall composition of your room, start refining the details. Use darker pencils to add depth and shading to the walls, floor, and ceiling. Pay attention to the areas where light would hit and create highlights, as well as the shadows cast by objects.
To create texture, experiment with different pencil strokes. For example, you can use crosshatching or stippling techniques to suggest textures like brick walls or wooden floors.
Continue adding details to the furniture and objects in the room. Use darker tones and shadows to give them a three-dimensional appearance.
Step 6: Bring Your Room to Life with Color (Optional)
If you want to take your drawing to the next level, consider adding color to your 3D room. Use colored pencils or markers to fill in the walls, floor, furniture, and objects with appropriate hues. Remember to consider the lighting and shadows when selecting colors to maintain the realism of your drawing.
Conclusion
Congratulations on completing your 3D room drawing! By following these step-by-step instructions, you have learned how to create a realistic and visually captivating room on paper. Remember to practice and experiment with different perspectives and room layouts to further develop your artistic skills.
Now that you have the basics, you can apply these techniques to create more complex 3D scenes and designs. So, grab your pencils and keep exploring the world of 3D drawing!
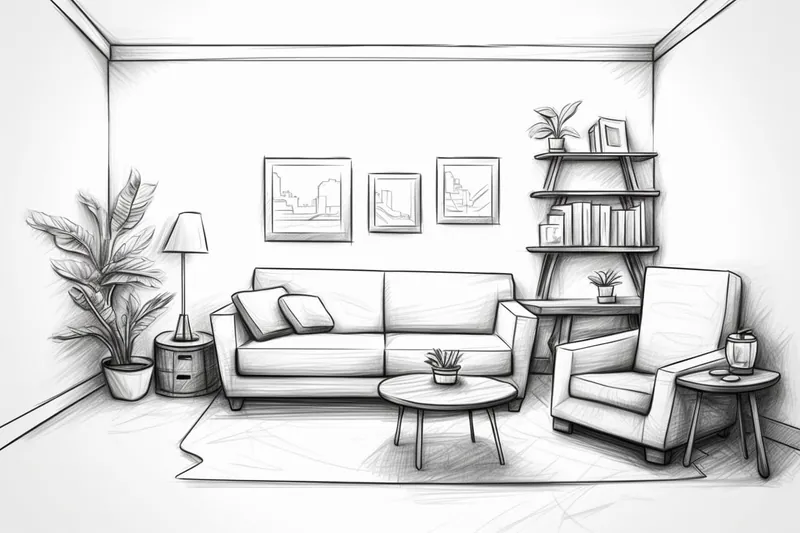
Gallery of 3D Room Drawings


Fun Facts About 3D Rooms
- The concept of 3D rooms in art relies heavily on linear perspective, a technique developed during the Renaissance to create depth on flat surfaces.
- Vanishing points, essential for drawing 3D rooms, are points where parallel lines appear to converge, as explained by Khan Academy.
- Mastering 3D room drawing helps artists understand spatial relationships, which is crucial for creating realistic art and design.
- 3D room drawings often use a horizon line to represent the viewer's eye level, a concept detailed by Draw Paint Academy.
- Adding light and shadow in 3D room drawings enhances realism by simulating how light interacts with objects, a principle covered by Artists Network.
- Using different pencil grades, such as HB and 6B, allows artists to create depth and texture in 3D rooms, as recommended by Yonderoo.
- 3D room drawing is a foundational skill for many creative fields, including interior design, animation, and video game development, as noted by Creative Bloq.
- Experimenting with textures like brick or wood in 3D room drawings can enhance realism, a technique discussed by Artists Network.
Suggestions for Scenes and Settings for 3D Room Drawings
- A cozy reading nook with a large window, a comfy armchair, bookshelf, and soft lighting.
- A modern minimalist living room featuring sleek furniture, a low coffee table, and abstract art on the walls.
- An artist's studio filled with canvases, paint supplies, an easel, and scattered sketches on the floor.
- A futuristic room with holographic displays, sleek metallic surfaces, and neon accents.
- A rustic cabin interior showcasing wooden beams, a stone fireplace, and vintage furniture.
- A child's colorful playroom with toys, wall decals, and a small table with art supplies.
- A vintage Victorian parlor with ornate wallpaper, a grand piano, and antique furniture.
- A cluttered home office with bookshelves, a computer desk, scattered papers, and a cozy rug.
- A small urban apartment kitchen with modern appliances, a breakfast bar, and hanging plants.
- A serene meditation room with cushions, candles, plants, and soft natural light streaming in.