Drawing an all-terrain vehicle (ATV) offers a unique combination of excitement and creativity that can engage artists of all skill levels. These rugged machines, built for off-road exploration, boast striking shapes and functional designs that present an interesting challenge on paper. Whether it’s the way the wheels grip the ground or the angular frame that defines their robust character, an ATV is a feast for the eyes and for the imagination.
In this guide, we will take a comprehensive look at the essential components involved in drawing an ATV. You’ll start by grasping the vehicle’s overall structure and proportions before moving on to more intricate details, such as texture and shadowing. Drawing an ATV not only enhances your observational skills but also allows you to experiment with different artistic techniques, bringing the dynamic spirit of these vehicles to life on paper.
So, whether you’re a novice eager to sharpen your drawing abilities or a seasoned artist seeking a fresh subject to tackle, this step-by-step tutorial will help you unlock your potential. Grab your drawing supplies and get ready to embark on an artistic journey into the thrilling world of ATV illustration!
Materials Required
To draw an ATV, you will need the following materials:
- Paper: Preferably thick paper or sketch paper to withstand the pressure of drawing and erasing.
- Pencil: Different grades of pencils for sketching and shading. A set ranging from 2H to 6B should be sufficient.
- Eraser: A good quality eraser for correcting mistakes and cleaning up your drawing.
- Ruler: To ensure straight lines and accurate proportions in your drawing.
- Sharpener: To keep your pencils sharp for fine details and precise lines.
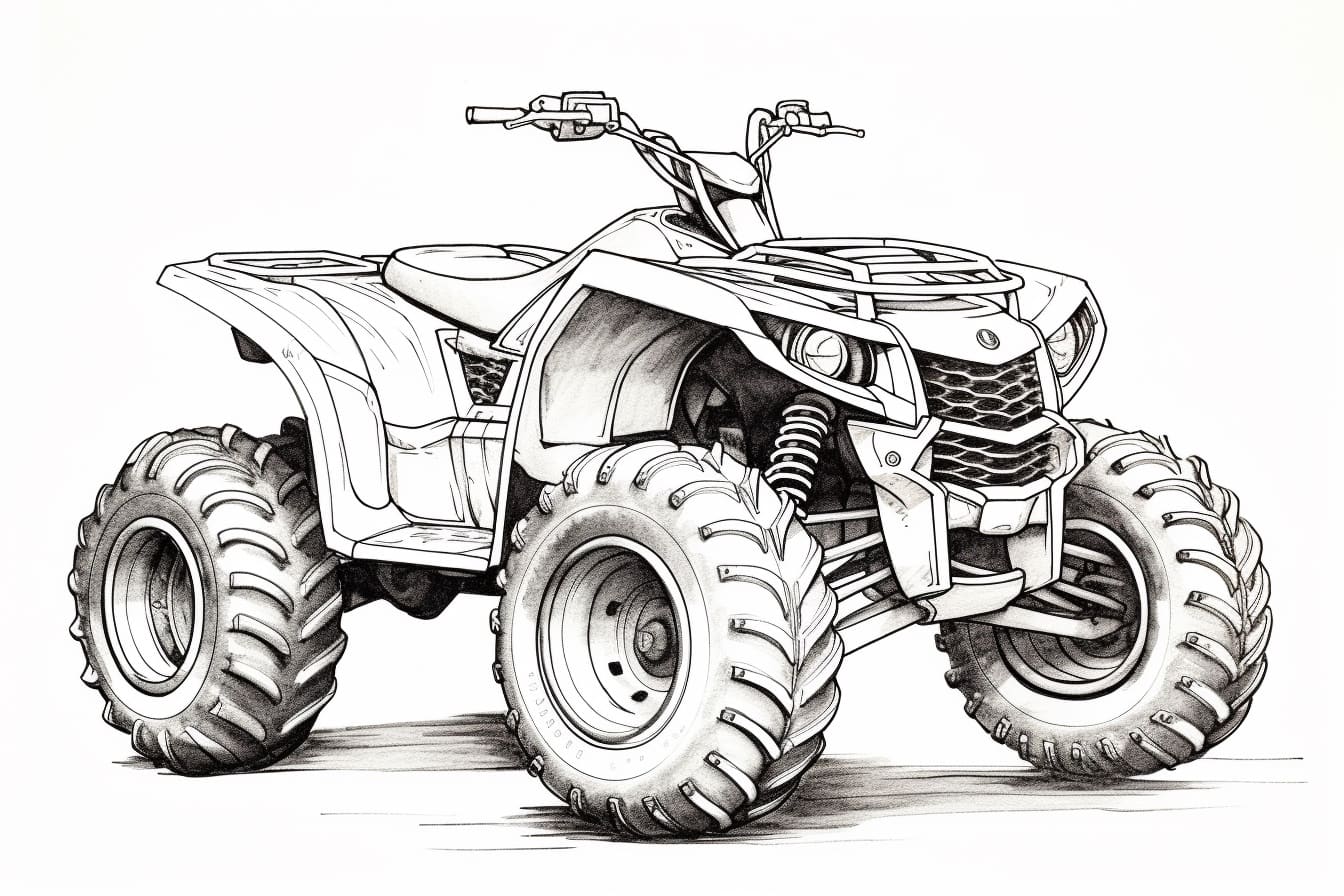
- Reference image: A picture of an ATV to use as a guide for your drawing.
- Optional: Colored pencils or markers if you want to add color
How to Draw an ATV: a Step-by-step Guide
Step 1: Outline the Basic Shape of the ATV
Start by sketching a large rectangular shape for the body of the ATV. This will be the main frame of the vehicle. Add two smaller rectangles for the seat and the front portion of the ATV where the handlebars will be located.
Step 2: Add the Wheels and Tires
Draw two circles under the body of the ATV to represent the wheels. Make sure the wheels are aligned properly and are the same size. Add smaller circles inside the wheels to represent the tires.
Step 3: Sketch the Handlebars and Controls
Extend two lines from the front of the ATV to create the handlebars. Add small circles at the end of the handlebars to represent the hand grips. Draw additional lines for the throttle and brake controls.
Step 4: Define the Details
Add details such as headlights, fenders, and exhaust pipes to the ATV. You can also include additional features like a luggage rack or a winch, depending on the style of ATV you are drawing.
Step 5: Refine and Add Texture
Refine the outline of the ATV, making sure all the proportions are correct. Add texture to the tires by drawing treads and shading to give the ATV a three-dimensional look.
Step 6: Finalize the Drawing
Go over the entire drawing, adding any necessary details and making sure everything is in proportion. Erase any unnecessary lines and add shading to create depth and realism in your ATV drawing.
Step 7: Optional – Color the Drawing
If you wish, you can add color to your ATV drawing using colored pencils, markers, or digital coloring tools. Consider using realistic colors or get creative with unique color schemes.
Conclusion
In conclusion, mastering the art of drawing an ATV requires patience, practice, and attention to detail. By breaking down the complex shapes and components of the vehicle into simpler forms, and focusing on perspective and proportions, you can gradually improve your drawing skills. Remember to study reference images, experiment with different techniques, and don’t be afraid to make mistakes along the way. With dedication and perseverance, you can create realistic and dynamic drawings of ATVs that showcase your artistic talents.
Fun Facts About ATVS
- ATVs were originally designed for agricultural and military use before becoming popular recreational vehicles.
- The first ATV was created in Japan in 1970 by Honda, called the ATC90.
- ATVs are also known as quad bikes, quadricycles, or four-wheelers.
- ATVs are designed to be used off-road and are not legal for street use in most places.
- There are different types of ATVs, including sport ATVs, utility ATVs, and youth ATVs.
- ATVs have different engine sizes, ranging from 50cc for youth models to over 1000cc for high-performance models.
- Safety gear such as helmets, goggles, gloves, and protective clothing should always be worn when riding an ATV.
- ATVs require proper maintenance and care to ensure safe and reliable operation.
- Many ATV manufacturers offer accessory options such as winches, plows, and racks to customize the vehicle for specific needs.
- ATVs are popular for recreational activities such as trail riding, racing, hunting, and farming.
Suggestions for Scenes and Settings for ATV Drawings
- ATV racing through a rugged desert terrain, kicking up dust and rocks behind it.
- ATV navigating through a dense and mysterious forest with rays of sunlight filtering through the trees.
- ATV jumping over a series of sand dunes at sunset with a colorful sky in the background.
- ATV crossing a rocky riverbed with water splashing up around the wheels.
- ATV climbing a steep and rocky mountain trail with a panoramic view of valleys and peaks in the distance.
- ATV exploring a snowy winter wonderland with snow-covered trees and a clear blue sky.
- ATV cruising along a sandy beach at low tide, with seagulls flying overhead and waves crashing in the distance.
- ATV parked in front of an old rustic cabin in the woods, surrounded by tall pine trees and a crackling campfire nearby.
- ATV riding through a bustling city street with tall buildings and colorful lights illuminating the scene.
- ATV racing through a futuristic sci-fi cityscape with neon lights and holographic advertisements in the background.