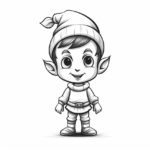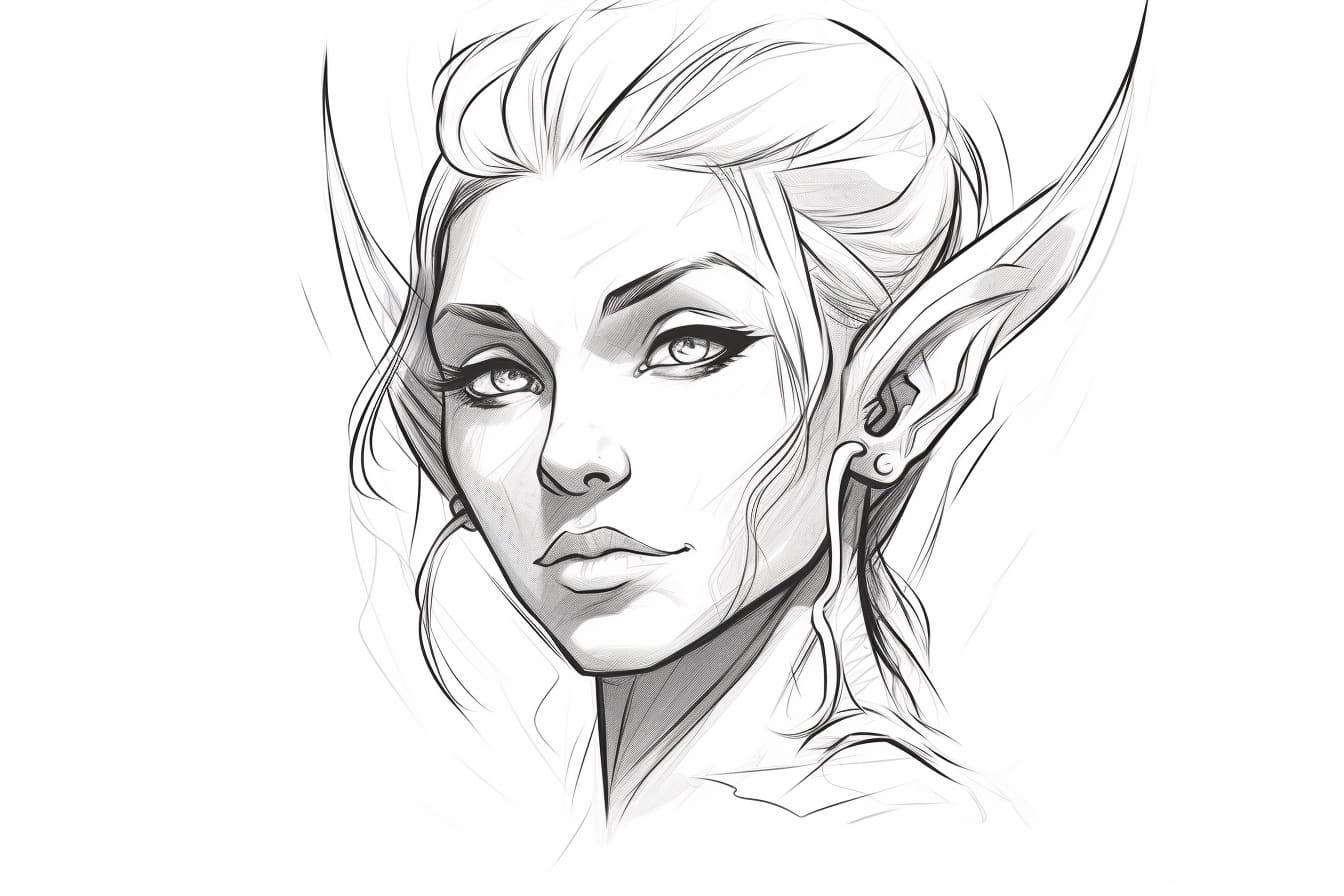
Drawing an Elf Face can be a magical and captivating experience, as you delve into the mystical world of fantasy and folklore. Elves are often depicted as graceful and ethereal beings with striking features, making them a fascinating subject to bring to life on paper. In this artistic journey, you will have the opportunity to explore intricate details such as pointed ears, elegant eyes, and enchanting expressions that define the essence of these mythical creatures. Whether you are a beginner seeking to enhance your drawing skills or an experienced artist looking for a creative challenge, drawing an Elf Face is sure to ignite your imagination and inspire you to create a piece of art that captures the enchanting allure of these mystical beings. Let’s embark on this artistic adventure together and unlock the secrets of bringing an Elf Face to life on the blank canvas before you.
Materials Required
To draw an Elf face, you will need the following materials:
- Drawing paper or sketchbook
- Pencils (various grades for shading and details)
- Eraser (preferably a kneaded eraser for easy cleanup)
- Fine-tip markers or pens (for outlining and adding details)
- Colored pencils or markers (optional, for adding color to your drawing)
- Reference images of Elf faces for inspiration and guidance
These materials will help you create a detailed and visually appealing Elf face drawing.
How to Draw an Elf Face: a Step-by-step Guide
Step 1: Gather Your Materials
Start by gathering all the necessary materials for drawing the elf face. These include a pencil, eraser, paper, and any coloring materials you may want to use.
Step 2: Sketch the Basic Shapes
Begin by lightly sketching the basic shapes that will make up the elf face. Draw a circle for the head and sketch guidelines to help you place the features accurately.
Step 3: Outline the Facial Features
Next, outline the facial features of the elf. Start with the eyes, nose, and mouth. Pay attention to the shape and size of each feature to give your elf character a unique look.
Step 4: Add Details
Once you have the basic facial features in place, start adding details such as eyebrows, eyelashes, and any other defining features that will bring your elf to life.
Step 5: Draw the Ears
Elves are known for their long, pointy ears. Draw elongated ear shapes on either side of the head, making sure they are symmetrical and proportionate to the rest of the face.
Step 6: Refine the Hair
Sketch the elf’s hair, keeping in mind the style you want to portray. Whether it’s long and flowing or short and spiky, add texture and volume to make the hair look realistic.
Step 7: Erase Guidelines
Once you are satisfied with the overall look of your elf face, carefully erase any remaining guidelines and unnecessary sketch lines to clean up the drawing.
Step 8: Add Color (Optional)
If you prefer, you can add color to your drawing using colored pencils, markers, or paints. Be creative with your color choices to make your elf face stand out.
Step 9: Final Touches
Finally, take a step back and assess your drawing. Make any final adjustments or details to enhance the overall appearance of your elf face and ensure it looks exactly how you envisioned it.
Conclusion
In conclusion, drawing an elf face is a rewarding and creative endeavor that allows artists to explore fantasy and imagination. By following the step-by-step instructions and practicing regularly, artists can develop their skills and create captivating elf characters. Remember to embrace your own style and have fun with the process, as drawing is a wonderful way to express your creativity and bring magical beings to life on paper.
Fun Facts About Elf Faces
- Elves are often depicted with high, elegant cheekbones that give them a regal and ethereal appearance.
- Many elves are portrayed with pointed ears, which are a distinctive feature that sets them apart from humans in fantasy literature and art.
- Elf faces are often described as timeless and ageless, with smooth, flawless skin that radiates a sense of otherworldly beauty.
- The eyes of elves are typically large, almond-shaped, and expressive, reflecting their deep connection to nature and magic.
- Some depictions of elves include intricate facial tattoos or markings that symbolize their heritage, status, or magical abilities.
- Elves are often depicted with long, flowing hair that adds to their mystical and elegant appearance.
- In some stories and myths, elves have a mesmerizing gaze that can enchant or captivate those who look into their eyes.
- The facial expressions of elves are said to be subtle and nuanced, conveying a wide range of emotions with just a slight tilt of the head or a faint smile.
- Elves are often described as having a natural grace and poise that is reflected in their delicate features and serene expressions.
- The beauty of elf faces is often celebrated in art, literature, and popular culture, inspiring awe and admiration among those who encounter them.
Suggestions for Scenes and Settings for Elf Face Drawings
Certainly! Here are some suggestions for scenes and settings you can use as inspiration for your drawings of an Elf Face:
- Enchanted Forest: Draw the Elf Face surrounded by lush greenery, colorful flowers, and magical creatures like fairies and unicorns.
- Moonlit Lake: Depict the Elf Face gazing at a tranquil lake under the soft glow of the moon, with twinkling stars reflected in the water.
- Winter Wonderland: Show the Elf Face in a snowy landscape, with icicles hanging from the trees and snowflakes falling gently around them.
- Secret Garden: Illustrate the Elf Face in a secluded garden filled with blooming roses, ivy-covered walls, and a whimsical fountain.
- Ancient Ruins: Place the Elf Face amid ancient ruins overgrown with moss and vines, hinting at a long-forgotten civilization.
- Celestial Realm: Imagine the Elf Face in a celestial setting, surrounded by swirling galaxies, shooting stars, and nebulae.
- Underwater Kingdom: Draw the Elf Face exploring a vibrant underwater world filled with colorful coral reefs, sea creatures, and sunken treasures.
- Mountain Peak: Picture the Elf Face standing on a majestic mountain peak, overlooking sweeping vistas of valleys, forests, and snow-capped peaks.
- Desert Oasis: Illustrate the Elf Face in a desert oasis, with palm trees, a shimmering pool of water, and a sense of peace and tranquility.
- Castle Courtyard: Show the Elf Face in a grand castle courtyard, adorned with towering stone walls, intricate carvings, and blooming gardens.
Feel free to let your imagination run wild and add your own unique twist to these scenes and settings as you bring your Elf Face drawings to life!