How to Draw a Toothbrush
Learn how to draw a toothbrush in this step-by-step tutorial. Perfect for beginners or anyone looking to improve their artistic skills.
Materials You'll Need
- Pencil
- Paper
- Eraser
Toothbrushes are everyday objects that we all use, yet their simple, familiar form can be surprisingly interesting to draw. With their unique combination of straight lines, curves, and textured bristles, toothbrushes are an excellent subject for practicing observation and refining your drawing skills. In this tutorial, you'll discover how to draw a toothbrush step by step, focusing on capturing the essential shapes and adding realistic details that make your illustration stand out. Understanding the structure and design of a toothbrush can also help you with drawing other common household objects in the future.
Learning how to draw a toothbrush is a great exercise for beginners and intermediate artists alike. If you're just starting out, this subject offers an approachable challenge that helps you work on proportion, perspective, and simple shading techniques. Even experienced artists can benefit from revisiting basic objects and exploring new ways to render textures, such as the bristles and grip patterns. You might want to draw a toothbrush for a creative project, an educational illustration, or simply to improve your overall drawing confidence by tackling a recognizable item from daily life.
No matter your skill level, this tutorial will guide you through each stage of the process, from sketching the basic outline to adding the finishing touches with color and detail. Don't worry if your first attempt isn't perfect—drawing is all about practice and enjoying the creative journey. So grab your pencils, gather your materials, and let's explore how to draw a toothbrush together. You'll be surprised at how much you can learn from drawing the simplest of objects!
Materials Required
To successfully complete this drawing, you will need the following materials:
- Pencil
- Eraser
- Paper
- Ruler (optional but useful for creating straight lines)
- Colored pencils or markers (optional for adding color)
Now that you have all your materials ready, let's begin drawing a toothbrush!
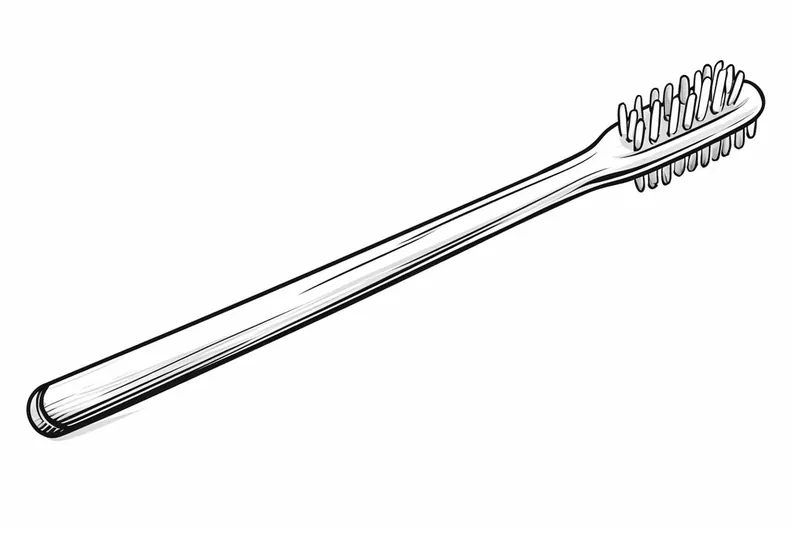
Step 1: Draw the Handle
To start, lightly sketch a long, straight vertical line in the center of your paper. This line will serve as the handle of the toothbrush. Take your time to ensure the line is straight and in the desired length. Remember, you can always make adjustments later with an eraser.
Step 2: Add Thickness to the Handle
Next, draw two parallel lines on either side of the initial line, slightly curving them outward. These lines will add thickness and dimension to the handle. Make sure they are evenly spaced from the central line.
Step 3: Shape the Brush Head
Tip: As you work through the steps of drawing a toothbrush, don't hesitate to use references—either real toothbrushes or images— to better understand the shapes, textures, and proportions. Observing your subject closely will enhance your ability to capture realistic details, especially when it comes to the bristles and handle design. Additionally, consider experimenting with different lighting conditions in your drawing to practice creating dynamic shadows and highlights, which can significantly elevate the final result.
Now, move to the top of the handle and draw a rectangular shape for the brush head. The top edge of the rectangle should align with the top of the handle, and the sides should be slightly curved. This shape will resemble a rounded rectangle, wider at the bristle end and narrower at the handle end.
Step 4: Add Bristles to the Brush Head
Inside the brush head, draw a series of short, vertical lines to represent the bristles. Start by drawing a few lines at the center of the brush head and gradually increase their number as you move towards the edges. Remember to leave some gaps between the bristles to create a realistic effect.
Step 5: Define the Handle Shape
To give the handle more structure, draw two lines connecting the top and bottom of the handle. These lines will run parallel to the handle but will be slightly curved to follow its shape. This will give the toothbrush a rounded appearance.
Step 6: Refine the Brush Head
Take a closer look at the brush head and make any necessary adjustments. Smooth out the edges and curves, ensuring the brush head looks well-formed and balanced. Pay attention to the width of the brush head as it transitions towards the handle.
Step 7: Enhance the Handle
In this step, add some details to the handle to make it more realistic. You can draw some lines or patterns on the handle to create a textured grip. Experiment with different patterns and find one that suits your style.
Step 8: Erase Unwanted Lines
Carefully go over your drawing and erase any unnecessary or overlapping lines. Take this opportunity to refine the overall shape and proportions of the toothbrush. Use a kneaded eraser if you have one, as it allows for more precise erasing.
Step 9: Add Shadows and Highlights
To add depth and dimension to your drawing, it's time to add shadows and highlights. Study the lighting conditions you want to depict and imagine where the light source is coming from. Shade the areas that would be in shadow and leave the areas that would catch the light lighter. This will create a more realistic and three-dimensional effect.
Step 10: Optional - Add Color
If you prefer a colored toothbrush drawing, now is the time to add some color! Use colored pencils or markers to carefully fill in the areas with the desired colors. Pay attention to the shadows and highlights you previously added and adjust the colors accordingly.
Congratulations! You have successfully drawn a toothbrush from start to finish. By following these steps, you should now have a detailed and realistic drawing of a toothbrush. Feel free to experiment with different styles, colors, and textures to make your drawing unique.
Conclusion
In this tutorial, we learned how to draw a toothbrush step by step. As an aspiring artist, it's essential to practice drawing everyday objects to improve your skills. Drawing a toothbrush allows you to focus on various shapes, textures, and shading techniques. Remember to take your time, be patient with yourself, and have fun throughout the process.
We hope you found this tutorial helpful in your artistic journey. Now, grab your pencils and start sketching your very own toothbrush masterpiece!
Fun Facts About Toothbrush
- The first mass-produced toothbrush was invented in England in 1780 by William Addis.
- Modern nylon bristles replaced animal hair in toothbrushes in 1938.
- The average person will use over 300 toothbrushes in their lifetime.
- Electric toothbrushes were first introduced to the public in 1954 in Switzerland.
- It is recommended to replace your toothbrush every three to four months, or sooner if the bristles are frayed.
- Toothbrushes should be stored upright and allowed to air-dry to prevent bacteria growth.
- The world's most expensive toothbrush is made of titanium and costs thousands of dollars.
- Over 3.5 billion toothbrushes are sold worldwide each year.
- The Guinness World Record for the largest toothbrush sculpture is held by a 12-meter-long toothbrush created in India.
Suggestions for Scenes and Settings for Toothbrush Drawings
- A toothbrush resting on the edge of a bathroom sink with a tube of toothpaste nearby.
- A close-up of toothbrush bristles under a bright light, showcasing their texture and detail.
- An imaginative scene where a toothbrush is transformed into a rocket ship blasting off from a soap bar launchpad.
- A cup holding multiple colorful toothbrushes on a tiled bathroom counter.
- A toothbrush lying on a travel bag, surrounded by other toiletries ready for vacation.
- A whimsical underwater world where a toothbrush is used by a fish or other sea creature.
- An old, worn-out toothbrush next to a new, pristine one, highlighting contrast and age.
- A toothbrush balanced on top of an open book, as if someone paused mid-cleaning to read.
- A toothbrush with foamy toothpaste on its bristles, mid-squeeze from the tube.
- A toothbrush in motion, being held by a hand, with water droplets flying off the bristles.