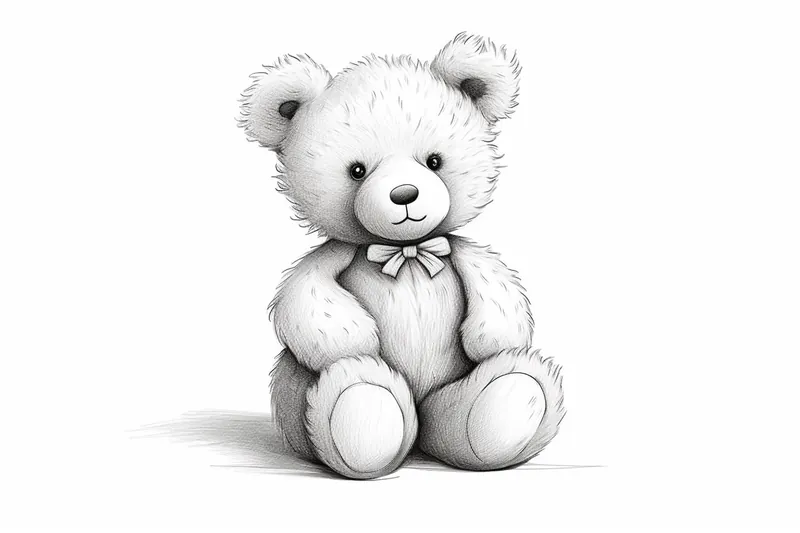
How to Draw a Teddy Bear
Learn how to draw a cute and cuddly teddy bear with this step-by-step tutorial. Follow the simple instructions to create your own adorable bear drawing!
Materials You'll Need
- Pencil
- Paper
- Eraser
Teddy bears have long held a special place in our hearts, symbolizing comfort, childhood, and cherished memories. Their soft, rounded shapes and gentle expressions make them a beloved subject not just for children, but for artists of all ages. Learning how to draw a teddy bear can be a delightful way to practice capturing warmth and personality in your artwork. Whether you want to illustrate a storybook, create a handmade card, or simply enjoy a relaxing drawing session, teddy bears are a timeless and endearing theme that never goes out of style.
This tutorial on how to draw a teddy bear is designed to be approachable for beginners, yet still engaging for more experienced artists. You'll learn how to break down the teddy bear into basic shapes, refine its features, and add those charming details that bring your teddy to life. Along the way, we'll explore useful techniques such as sketching lightly, building up forms, and adding shading or color to enhance the final result. No matter your skill level, drawing a teddy bear is a great exercise in observation, proportion, and creative expression.
So, grab your favorite drawing materials and follow along as we walk through each step together. Remember, every artist has their own style—so feel free to add your own twist and personality to your teddy bear. Most importantly, have fun and enjoy the creative process as you discover how to draw a teddy bear that is uniquely yours!
Materials Required
Before we begin, make sure you have the following materials:
- Pencil
- Eraser
- Paper
- Coloring tools (optional)
Now that you have everything you need, let's start drawing!
Step 1: Basic Outline
To begin, lightly sketch a large oval shape for the body of the teddy bear. This will serve as the foundation for the bear's shape. Next, draw a smaller oval shape for the head, directly above the body. Connect the two ovals with curved lines to form the bear's neck.
Step 2: Ears and Face
Now, let's focus on the details of the face. Draw two small circles on top of the head to represent the bear's ears. Inside the head oval, draw two small ovals for the eyes. Add a small circle in each eye to represent the bear's pupils. Just below the eyes, draw a small triangular shape for the bear's nose. Finally, add a curved line for the mouth, creating a gentle smile.
Step 3: Arms and Legs
Moving on to the bear's limbs, draw two curved lines extending from the sides of the body for the arms. At the end of each arm, draw a smaller oval shape for the paws. For the legs, draw two straight lines extending downwards from the bottom of the body. Add smaller ovals at the end of each leg to represent the bear's feet.
Step 4: Fur and Details
Tip: As you draw each part of the teddy bear, take the time to step back and assess your work from a distance; this can help you identify any areas that may need adjustments in proportion or detail. Additionally, don't hesitate to experiment with different expressions or accessories, like hats or scarves, to give your teddy bear a unique personality that reflects your artistic style.
Now that we have the basic structure, let's add some fur and refine the details. Start by adding small curved lines all over the body and head to represent the bear's fur. Be sure to follow the contour of the body to create a fluffy appearance. Next, add small curved lines on the arms and legs to mimic the teddy bear's fur texture. You can also add some additional details, such as a collar or a bowtie, to give your bear some extra personality.
Step 5: Finalize and Refine
Once you're satisfied with the overall shape and details of your teddy bear, darken the lines to make them more prominent. Use an eraser to remove any unnecessary guidelines or stray lines. Take your time and pay attention to the little details, such as the shape of the eyes, the positioning of the ears, and the overall proportions. Make any adjustments necessary to ensure a well-balanced and appealing teddy bear drawing.
Step 6: Coloring (Optional)
If you'd like to add some color to your teddy bear drawing, you can use colored pencils, markers, or any other coloring tools of your choice. Start by selecting the colors you'd like to use. Traditionally, teddy bears are colored in shades of brown, but feel free to get creative and experiment with different colors. Use light, gentle strokes to fill in the various parts of the bear, adding depth and dimension to your drawing.
Challenge: Try drawing your teddy bear in an imaginative setting, like having a picnic in a sunny park or embarking on a mini adventure in a child's bedroom filled with oversized toys. Include a few props or background elements to tell a little story—maybe your teddy has a favorite snack, a stack of books, or a playful companion like a toy rabbit. Focus on how the scene's mood and extra details can showcase your teddy's personality and make the drawing more engaging. This challenge will help you practice composition, storytelling, and adding context, all while letting your creativity shine!
Conclusion
Congratulations! You've successfully learned how to draw a teddy bear step-by-step. By following these simple instructions, you've created your very own adorable teddy bear drawing. Remember to be patient and have fun throughout the process. Drawing is a wonderful way to express your creativity and imagination. So why not continue exploring your artistic skills and try drawing other animals or objects? The possibilities are endless! We hope you enjoyed this tutorial and happy drawing!
Fun Facts About Teddy Bear
- The teddy bear was named after Theodore "Teddy" Roosevelt, following a famous 1902 hunting trip incident.
- The first teddy bears were simultaneously created in the United States and Germany in the early 1900s.
- Steiff, a German company, is credited with producing the world's first plush teddy bear.
- The world's largest collection of teddy bears is housed at the Teddy Bear Museum in Jeju, South Korea.
- National Teddy Bear Day is celebrated annually on September 9th.
- The most expensive teddy bear ever sold was a Steiff Louis Vuitton bear, auctioned for $2.1 million.
- Teddy bears have been used for therapeutic purposes, providing comfort to children and adults in hospitals.
- Winnie-the-Pooh, one of the most famous fictional teddy bears, was inspired by a real bear and a stuffed toy.
- There is a global community of teddy bear collectors, known as arctophiles.
Suggestions for Scenes and Settings for Teddy Bear Drawings
- A teddy bear having a picnic in a sunny, flower-filled meadow.
- A teddy bear reading a bedtime story to a group of smaller stuffed animals.
- A teddy bear sailing a paper boat down a gentle stream.
- A teddy bear dressed as a superhero, flying through the clouds.
- A teddy bear sitting by a window, watching the rain with a cozy blanket.
- A teddy bear baking cookies in a warm, inviting kitchen.
- A teddy bear going on a camping adventure under a starry night sky.
- A teddy bear building a snowman in a winter wonderland.
- A teddy bear at a birthday party, surrounded by balloons and presents.
- A teddy bear painting a colorful masterpiece on an easel.