How to Draw a Street in Perspective - Complete Step-by-Step Guide
Master the art of drawing streets with proper perspective, depth, and urban details in this comprehensive tutorial for all skill levels
Materials You'll Need
- Drawing paper (preferably 11x14 or larger)
- Pencils (2H, HB, 2B, 4B)
- Ruler or straight edge
- Soft eraser
- Blending stump
- Reference photos of street scenes
How to Draw a Street in Perspective - Complete Step-by-Step Guide
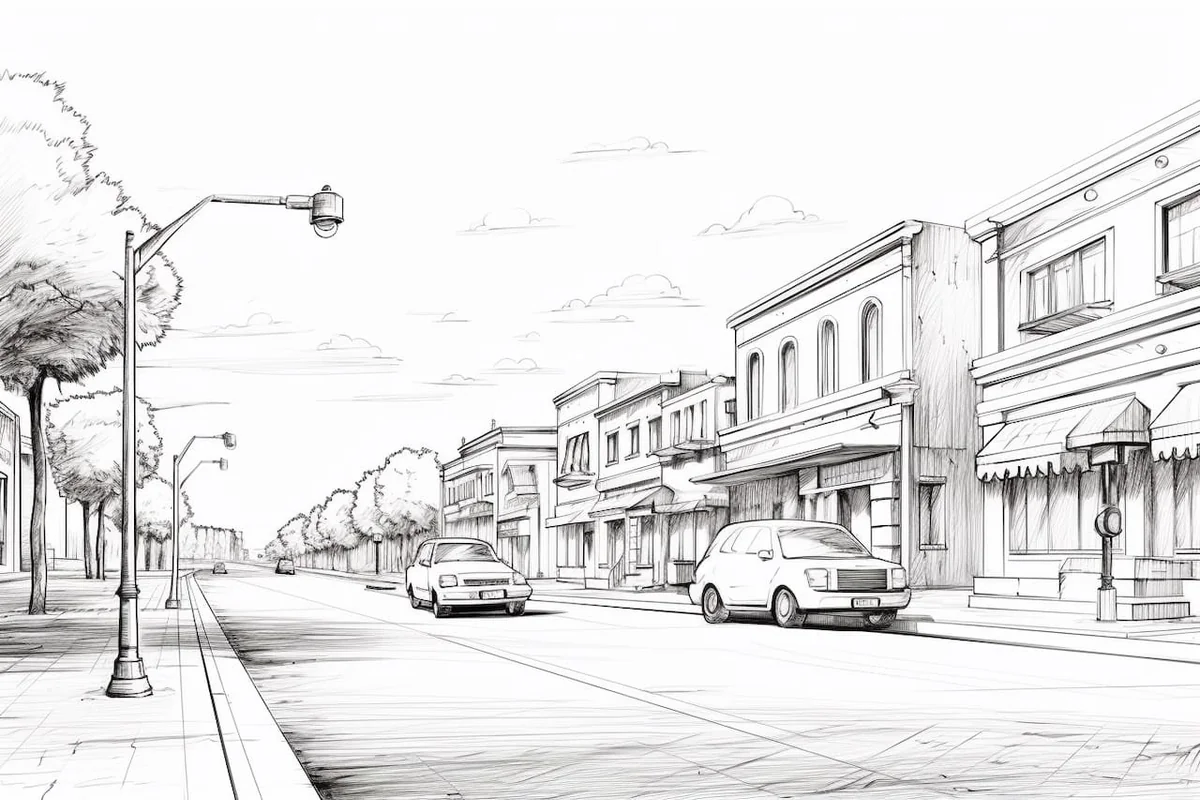
Drawing a convincing street scene is one of the most rewarding skills in urban sketching and landscape art. Whether you want to capture a bustling city avenue, a quiet suburban road, or a charming European cobblestone street, mastering perspective and architectural elements will bring your drawings to life. This comprehensive tutorial will guide you through creating a realistic street scene that demonstrates proper linear perspective, atmospheric depth, and engaging urban details.
Streets offer endless artistic possibilities - from dramatic vanishing points that draw the viewer's eye deep into the composition, to the interplay of light and shadow between buildings. You'll learn to capture the energy of urban life while developing fundamental perspective skills that apply to all architectural drawing.
Materials You'll Need
Essential Materials
- Drawing paper - 11x14 inches or larger for comfortable perspective work
- Pencils - 2H for construction lines, HB for general sketching, 2B for medium tones, 4B for deep shadows
- Ruler or straight edge - Critical for perspective guidelines and building edges
- Soft eraser - For corrections and creating highlights
- Blending stump or tortillion - For smooth atmospheric effects
Optional Materials for Enhanced Results
- 6B pencil - For very dark accents and deep shadows
- White gel pen or white pencil - For bright highlights and reflections
- Fixative spray - To prevent smudging of detailed work
- Reference photos - Street scenes from different angles and lighting conditions
- Viewfinder or framing tool - To help compose your scene
Pro Tip
If you're a beginner, start with a simple suburban street rather than a complex city intersection. You can always add complexity as your skills develop!
Understanding Street Anatomy
Before diving into drawing, let's understand the key elements that make a street scene convincing:
Perspective Fundamentals
One-Point Perspective is the foundation of most street drawings. All parallel lines that recede into the distance converge at a single vanishing point on the horizon line. This creates the illusion of depth that makes your street appear three-dimensional.
Key Urban Elements
- Road surface - Shows texture, markings, and wear patterns
- Sidewalks - Frame the street and provide pedestrian areas
- Buildings - Create the "walls" of your street corridor
- Street furniture - Light posts, signs, fire hydrants, benches
- Vehicles - Add life and scale reference
- Trees and vegetation - Soften hard architectural lines
- Sky and atmospheric elements - Provide context and mood
Depth Indicators
- Overlapping forms - Closer objects block distant ones
- Size variation - Objects get smaller as they recede
- Detail graduation - Distant objects show less detail
- Atmospheric perspective - Distant objects appear lighter and less contrasted
Step 1: Establish the Horizon Line and Vanishing Point
Start your street drawing with the most critical foundation elements:
Setting Up Your Perspective Grid
- Draw a light horizontal line across your paper about one-third from the top - this is your horizon line
- Mark a vanishing point anywhere along this line (slightly off-center often looks more natural)
- From the vanishing point, lightly draw several guidelines radiating outward - these will help position everything in proper perspective
Determining Your Viewpoint
Consider whether you want:
- Eye-level view - Horizon line at your eye height (most natural)
- Worm's eye view - Horizon line low on paper (dramatic, looking up)
- Bird's eye view - Horizon line high on paper (looking down the street)
Pro Tip
Place your vanishing point slightly off-center rather than dead center. This creates a more dynamic, less symmetrical composition that feels more natural to the eye.
Step 2: Define the Street Boundaries
Now establish the basic street layout:
Drawing the Road Edges
- From your vanishing point, draw two converging lines that will become the edges of your street
- Make the street wider in the foreground and narrower as it approaches the vanishing point
- These lines should be parallel to each other in real space, so they converge at your vanishing point
Adding Sidewalks
- Draw parallel lines on each side of the street to create sidewalks
- Sidewalk edges also converge at the vanishing point
- Keep sidewalks proportionally narrower than the street itself
Road Surface Guidelines
- Add center line markings that also converge at the vanishing point
- Sketch light crosswalk positions if desired
- Consider lane divider lines for multi-lane streets
Step 3: Block in Basic Building Shapes
Time to create the architectural framework of your street:
Establishing Building Heights
- Draw vertical lines for building corners - these remain perfectly vertical, never converging
- Vary the heights to create visual interest
- Use your perspective guidelines to determine roof lines and base lines
Creating Building Blocks
- Start with simple rectangular shapes for each building
- Focus on overall proportions rather than details
- Remember that buildings get smaller as they recede toward the vanishing point
Architectural Variety
- Mix different building heights and styles
- Consider including:
- Residential houses with pitched roofs
- Commercial buildings with flat roofs
- Different architectural periods and styles
Pro Tip
Keep building faces simple at this stage. You're establishing the basic structure - details come later. Think of this as creating a stage set for your street scene.
Step 4: Add Major Architectural Details
Now bring your buildings to life with distinctive features:
Windows and Doors
- Map out window patterns following your perspective guidelines
- Windows get smaller and closer together as buildings recede
- Add doorways at street level, paying attention to their perspective
- Remember that all horizontal lines (window sills, door frames) converge at your vanishing point
Rooflines and Structural Elements
- Define roof edges and gutters
- Add chimneys, ensuring they follow proper perspective
- Include architectural details like cornices, awnings, or fire escapes
- Vary the complexity - foreground buildings can have more detail
Building Textures
- Indicate brick patterns, siding, or stone work with simple line suggestions
- Add shadows under roof overhangs and architectural features
- Consider different building materials for variety
Step 5: Develop the Street Surface and Markings
The road surface is crucial for selling the perspective illusion:
Road Texture and Wear
- Add texture lines that follow the street's perspective
- Include cracks, patches, and wear patterns
- Show manholes or utility covers as ellipses that get narrower with distance
Street Markings
- Draw center lines using dashed patterns that get smaller and closer together
- Add crosswalk stripes that converge properly
- Include parking spaces markers if appropriate
- Consider turn arrows or other road markings
Sidewalk Details
- Show sidewalk sections with subtle lines
- Add texture to suggest concrete or brick paving
- Include curb edges that separate sidewalk from street
Pro Tip
Road markings are excellent perspective guides. If your center line looks wrong, it often means your overall perspective needs adjustment. Use the markings as a check on your perspective accuracy.
Step 6: Place Street Furniture and Urban Elements
These elements add authenticity and scale to your scene:
Light Posts and Street Lamps
- Position lamp posts at regular intervals, getting smaller with distance
- Ensure posts remain perfectly vertical
- Add light fixtures and electrical connections
- Consider different lamp styles for different street types
Signs and Traffic Elements
- Add street signs at appropriate intersections
- Include traffic lights if drawing a busy street
- Consider stop signs, yield signs, or speed limit signs
- Remember all rectangular signs become trapezoids in perspective
Other Street Furniture
- Fire hydrants at regular intervals
- Trash cans or recycling bins
- Bus stops or benches if appropriate
- Bike racks in urban settings
Vehicles and Transportation
- Place parked cars along the street, getting smaller with distance
- Add a moving car or two for life and energy
- Consider bicycles, motorcycles, or delivery trucks
- Ensure all vehicles follow proper perspective
Step 7: Add Natural Elements and Vegetation
Soften the hard urban environment with organic elements:
Street Trees
- Plant trees along sidewalks at regular intervals
- Show tree trunks getting smaller with distance
- Add canopy shapes that create interesting shadows
- Consider seasonal variations - bare winter branches vs. full summer foliage
Green Spaces and Gardens
- Include small front yards or planter boxes
- Add bushes or shrubs around buildings
- Consider grass strips between sidewalk and street
- Show flower beds or landscaping where appropriate
Organic Shadows and Light
- Tree shadows create complex, interesting patterns on the street
- Dappled light through leaves adds visual interest
- Seasonal elements like fallen leaves or snow can enhance mood
Step 8: Develop Lighting and Shadow Patterns
Lighting transforms a flat drawing into a convincing three-dimensional scene:
Establishing Light Source
- Decide on sun position - this affects all shadows
- Common choices:side lighting (dramatic), back lighting (atmospheric), front lighting (clear details)
- Maintain consistent lighting throughout the scene
Building Shadows
- Cast shadows from buildings across the street
- Show architectural shadows under overhangs and recessed areas
- Create shadow patterns from windows, doors, and decorative elements
- Remember shadows follow perspective rules too
Atmospheric Effects
- Add haze or atmospheric perspective to distant elements
- Show light rays if dramatically lit
- Consider reflections on wet pavement for added interest
- Include light pollution effects for evening scenes
Pro Tip
Shadows are your friend in perspective drawing. They help define form, create depth, and add dramatic interest. Don't be afraid to push your shadows darker than you think necessary - contrast is key to impact.
Step 9: Add People and Life to the Scene
Human figures bring scale and energy to your street:
Pedestrian Placement
- Add people walking on sidewalks
- Include figures at different distances to show scale progression
- Consider people crossing the street or waiting at intersections
- Show different activities - shopping, walking dogs, conversing
Scale and Proportion
- Distant figures should be much smaller
- Maintain consistent head-to-body proportions
- Use people as scale references for buildings and street furniture
- Overlap figures to create depth
Clothing and Details
- Simple clothing suggestions are usually sufficient
- Add seasonal appropriate attire
- Include accessories like bags, umbrellas, or pets
- Show movement through posture and clothing
Step 10: Refine Details and Add Final Touches
Time for the finishing touches that make your drawing shine:
Architectural Refinement
- Sharpen important building edges
- Add window details like frames, shutters, or curtains
- Include signage on storefronts
- Show wear and weathering on older buildings
Street Surface Finishing
- Darken shadow areas on the pavement
- Add puddle reflections if depicting wet conditions
- Include debris or litter for realism (but don't overdo it)
- Show tire marks or oil stains subtly
Atmospheric Final Touches
- Soften distant elements with lighter strokes
- Strengthen foreground contrasts
- Add final shadow adjustments
- Include sky elements if visible - clouds, power lines, aircraft
Final Touches: Bringing Everything Together
The final phase focuses on unity and impact:
Line Weight Variation
- Use heavier lines for foreground elements
- Lighten distant features for atmospheric perspective
- Vary line quality - crisp architectural edges vs. soft organic forms
- Emphasize important focal points
Value Adjustments
- Darken the darkest shadows for maximum contrast
- Lighten the brightest highlights
- Check your value range - you should have pure whites, deep blacks, and a full range of grays
- Adjust overall balance if needed
Unity and Cleanup
- Erase any remaining construction lines
- Blend areas that need smooth transitions
- Sharpen final details with confident strokes
- Step back and assess the overall composition
Pro Tip
Turn your drawing upside down for a fresh perspective on compositional balance. This old artist's trick helps you see the abstract relationships between shapes and values.
Pro Tips for Success
Perspective Mastery
- Practice drawing boxes in perspective before attempting complex scenes
- Use a viewfinder to study real street scenes and understand perspective
- Keep your vanishing point consistent - don't let it drift during the drawing
- Remember that only parallel lines converge - vertical lines always stay vertical
Technical Excellence
- Start light and build up gradually - you can always go darker
- Use your eraser as a drawing tool, not just for corrections
- Vary your pencil grip for different line qualities
- Rotate your paper to draw more comfortable angles
Observational Skills
- Study real streets from different viewpoints
- Notice how details change with distance
- Observe shadow patterns throughout the day
- Take reference photos from street level, not aerial views
Compositional Strength
- Create interesting focal points along your street
- Use the vanishing point to direct viewer attention
- Balance architectural elements with organic forms
- Consider the emotional impact of your street - busy vs. peaceful, old vs. new
Common Mistakes to Avoid
Perspective Errors
- Inconsistent vanishing point - Letting your perspective guidelines drift
- Vertical lines converging - All vertical elements should stay perfectly vertical
- Wrong horizon line placement - This affects the entire mood and viewpoint
- Ignoring atmospheric perspective - Distant objects should be lighter and less detailed
Proportion Problems
- People too large for the perspective - Use consistent scale references
- Buildings inconsistent heights - Check that similar structures follow perspective rules
- Street furniture floating - Ensure objects sit properly on the ground plane
- Vehicle proportions wrong - Cars and trucks have specific proportional relationships
Technical Issues
- Lines too dark too early - Build gradually, don't commit to dark lines immediately
- Lack of value contrast - Timid shading makes drawings appear flat
- Overworking details - Not every building needs every brick drawn
- Ignoring light source - Inconsistent shadows destroy believability
Pro Tip
The most common mistake is rushing the perspective setup. Spend extra time getting your basic structure right - everything else builds on this foundation.
Fun Facts About Street Art and Urban Drawing
Historical Perspective
- Linear perspective was formalized during the Renaissance, revolutionizing architectural drawing
- Canaletto, the 18th-century Venetian painter, was famous for his incredibly accurate street perspectives
- Urban sketching has become a worldwide movement, with artists documenting city life globally
Famous Street Scenes in Art
- Van Gogh's "The Potato Eaters" shows mastery of interior perspective
- Hopper's street scenes capture the loneliness and beauty of American urban life
- Manga backgrounds often feature incredibly detailed street perspectives that rival photographs
Modern Applications
- Movie storyboards rely heavily on street perspective techniques
- Video game environments use these same principles for creating believable virtual worlds
- Architectural visualization uses street-level perspectives to show proposed developments
Psychology of Street Drawing
- Vanishing points naturally draw the viewer's eye and create psychological depth
- Street width affects emotional response - narrow alleys feel intimate, wide avenues feel grand
- Perspective height influences viewer relationship - low viewpoints make buildings feel imposing
Advanced Techniques for Different Street Types
Urban City Streets
- Multiple vanishing points for complex intersections
- Tall buildings requiring dramatic perspective
- Heavy traffic and complex vehicle arrangements
- Layered architecture showing different historical periods
- Neon signs and urban lighting effects
Suburban Residential Streets
- Consistent house styles with subtle variations
- Front yards and landscaping elements
- Parked cars in driveways and along curbs
- Sidewalk details like mailboxes and bike paths
- Seasonal elements like holiday decorations
Historic or European Streets
- Cobblestone textures and irregular surfaces
- Varied building heights and architectural styles
- Narrow passages and interesting angles
- Historic street furniture and vintage elements
- Stone and brick construction details
Village or Small Town Streets
- Simpler architecture with rural elements
- Wide streets with minimal traffic
- Natural elements integrated into urban planning
- Local character through unique buildings and signage
- Seasonal agricultural elements
Different Styles and Versions
Realistic Detailed Style
Focus on photographic accuracy with:
- Precise perspective measurements
- Detailed architectural elements
- Realistic textures and materials
- Accurate lighting and shadow
- High contrast and sharp details
Impressionistic Approach
Emphasize mood and atmosphere:
- Loose, expressive linework
- Suggested rather than detailed forms
- Emphasis on light and color relationships
- Simplified but characteristic details
- Emotional response over technical accuracy
Minimalist Line Drawing
Strip down to essential elements:
- Clean, confident line work
- Selective detail placement
- Strong use of negative space
- Focus on composition and form
- Limited value range
Manga/Anime Background Style
Perfect for storytelling contexts:
- Precise architectural detail
- High contrast lighting
- Dramatic perspective choices
- Clean lineart with screen tones
- Stylized but convincing environments
Urban Sketching Style
Quick, observational recording:
- Confident, loose line quality
- Focus on capturing the moment
- Limited time investment
- Emphasis on character over perfection
- Mixed media possibilities
Suggestions for Scenes and Settings
Time of Day Variations
- Early morning - Long shadows, quiet streets, warm light
- Midday - Strong contrasts, busy activity, harsh shadows
- Golden hour - Warm light, dramatic shadows, romantic mood
- Evening - Artificial lighting, bustling activity, cool shadows
- Night - Street lamps, neon signs, mysterious atmosphere
Weather and Seasonal Moods
- Rain - Reflections, umbrellas, dramatic lighting
- Snow - Simplified forms, winter activities, cozy atmosphere
- Sunny day - Sharp shadows, bright contrasts, cheerful energy
- Overcast - Soft lighting, subdued mood, even illumination
- Autumn - Fallen leaves, warm colors, seasonal character
Activity and Energy Levels
- Rush hour - Crowded sidewalks, traffic, urban energy
- Weekend morning - Relaxed pace, casual activities, peaceful mood
- Market day - Vendors, crowds, bustling commerce
- Late evening - Quiet streets, solitary figures, contemplative mood
- Festival time - Decorations, crowds, celebratory atmosphere
Architectural Themes
- Historic district - Period architecture, preserved character, tourist elements
- Modern development - Contemporary design, clean lines, new construction
- Mixed neighborhood - Varied styles, organic growth, community character
- Commercial district - Storefronts, signage, business activity
- Residential area - Homes, gardens, family activities
Frequently Asked Questions
Q: How do I handle complex intersections with multiple vanishing points?
A: Start with the dominant street direction using one-point perspective, then add secondary streets with their own vanishing points. Keep the main perspective strongest and subordinate the others. Practice with simple T-intersections before attempting complex multi-way intersections.
Q: My street looks flat even with perspective. What's wrong?
A: Likely issues include: insufficient value contrast, missing atmospheric perspective, or weak shadow patterns. Try darkening your shadows significantly, making distant objects lighter and less detailed, and ensuring your light source creates strong directional lighting.
Q: How do I draw cars in perspective without them looking distorted?
A: Start with basic box shapes that follow your perspective grid, then modify them into car shapes. Study car proportions carefully - they're typically about 2.5 times as long as they are tall. Practice drawing cars from different angles before placing them in street scenes.
Q: What's the best way to add texture to a street surface?
A: Use directional strokes that follow the street's perspective. Vary the texture - newer pavement is smoother, older surfaces have more cracks and irregularities. Add subtle shadows in cracks and around manholes. Don't overdo it - suggest texture rather than rendering every detail.
Q: How do I make buildings look different without drawing every brick?
A: Focus on overall proportions, roofline variations, and key architectural features like window patterns, doorway styles, and building materials. Use different line weights and shading techniques to suggest various textures. Small details like awnings, signs, or architectural trim make big differences.
Q: Should I always use one-point perspective for streets?
A: One-point perspective works best for straight streets viewed head-on. Use two-point perspective for corner views or when showing the sides of buildings prominently. Three-point perspective adds drama but can be overwhelming for beginners. Master one-point first, then experiment with others.
Q: How detailed should background buildings be?
A: Follow the principle of atmospheric perspective - foreground buildings can have significant detail, mid-ground buildings should have moderate detail, and background buildings should be simplified to basic shapes and values. This creates natural depth and prevents visual confusion.
Q: What's the best paper size for street scenes?
A: Larger paper (11x14 inches or bigger) works better for street scenes because it allows room for perspective development and architectural details. Smaller papers can work for simple scenes but may feel cramped when trying to show depth and multiple buildings.
Conclusion
Congratulations on completing this comprehensive street drawing tutorial! You've learned the fundamental principles of perspective drawing, architectural representation, and urban scene composition. These skills form the foundation for all environmental drawing, from simple village roads to complex city intersections.
Remember that mastering street perspective takes practice and patience. Don't be discouraged if your first attempts don't match your vision - even professional artists spend years developing their perspective skills. The key is consistent practice and careful observation of real environments.
Keep challenging yourself by drawing different types of streets from various viewpoints. Try sketching the same street at different times of day to understand how lighting affects mood and atmosphere. Experiment with different styles - from detailed architectural renderings to loose impressionistic sketches.
Build on these fundamentals by exploring related subjects like individual buildings, interior spaces, and complex urban environments. The perspective principles you've learned here apply to all architectural and environmental drawing.
Most importantly, get out and sketch real streets! Nothing replaces direct observation for understanding how perspective, light, and atmospheric effects work in reality. Carry a sketchbook and capture the streets in your own neighborhood - you'll be amazed how much your drawing improves with regular practice.
Your journey in urban sketching and environmental drawing has just begun. Every street you draw will teach you something new about perspective, composition, and the art of capturing place and atmosphere. Embrace the learning process, celebrate your progress, and enjoy bringing the urban world to life on paper!
Happy drawing, and remember - every great artist started with a single line on paper. Your street drawing adventure awaits!