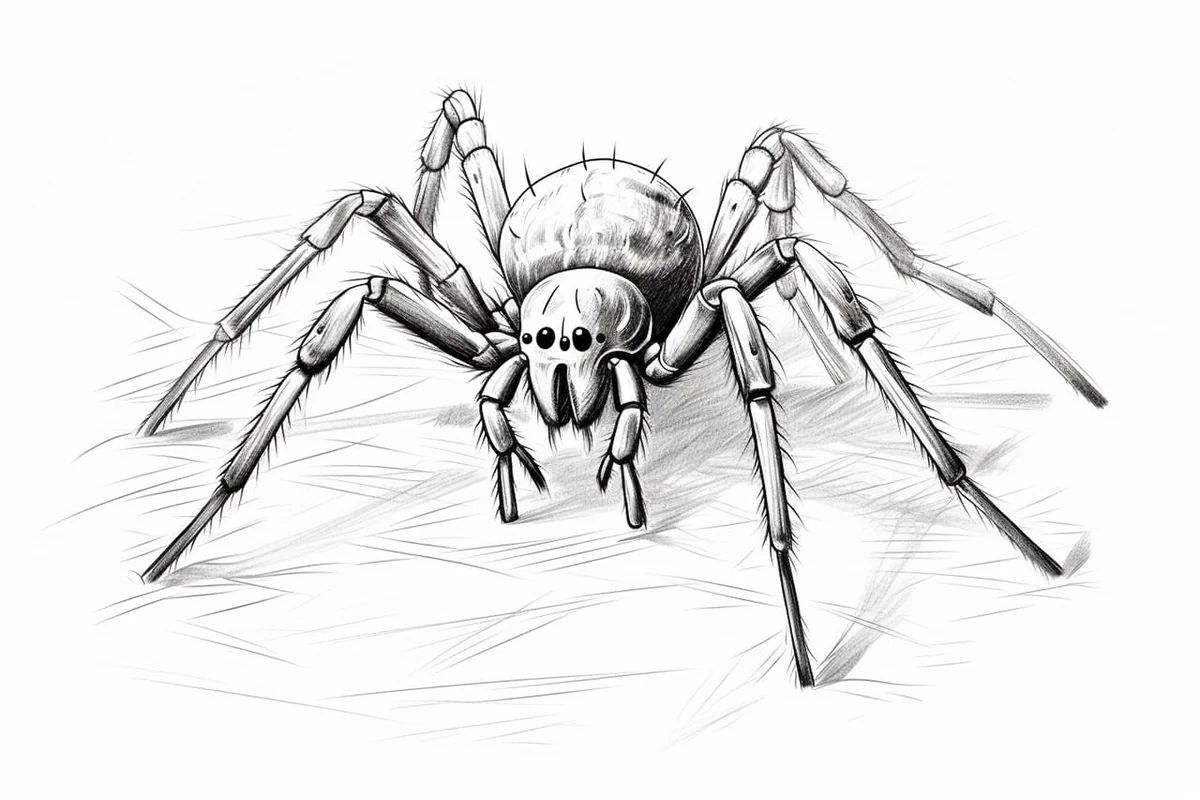
How to Draw a Spider in 10 Easy Steps
Learn how to draw with this step-by-step tutorial.
Materials You'll Need
- Drawing paper
- Pencil (HB or 2B)
- Eraser
- Colored pencils
- Markers
- Blending stump
Spiders are fascinating creatures found all around the world, known for their intricate webs and unique anatomy. Drawing a spider can be an exciting way to study its interesting features, such as its segmented legs, detailed body parts, and characteristic eyes. Whether you're interested in nature illustration, looking to add a spooky element to your artwork for Halloween, or simply want to improve your skills in drawing animals and insects, learning how to draw a spider is a rewarding challenge that helps you observe and appreciate the tiny details of the natural world.
This tutorial will guide you step by step through the process of creating a realistic spider, breaking down each stage so that artists of any skill level can follow along. We'll cover basic shapes, line work, shading, and how to capture the delicate structure of the spider's legs and body. Knowing how to draw a spider not only enhances your ability to render complex forms but also strengthens your overall observation and drawing skills. Whether you're a beginner picking up a pencil for the first time or a more experienced artist refining your technique, this guide is designed to be both accessible and informative.
Don't worry if you find spiders a bit intimidating—by the end of this tutorial, you'll see just how enjoyable and satisfying it can be to bring one to life on paper. Gather your materials, follow along step by step, and remember that practice and patience are key. Let's get started and discover just how fun drawing a spider can be!
Materials Required
Before we begin, make sure you have the following materials at hand:
-
Black pen or marker
-
Colored pencils or markers (optional)
Now that you have your materials ready, let's begin the process of drawing a spider.
Step 1: Sketch the Spider's Body
Start by drawing a small circle in the center of your paper. This will be the spider's body. Make sure the circle is not too big or too small, but just about the size you want your spider to be.
Step 2: Add the Spider's Legs
Extend four lines from the bottom of the circle to represent the spider's legs. These lines should be slightly curved and taper towards the ends to give them a more realistic look. Repeat this step on the opposite side to draw the remaining four legs.
Step 3: Create the Spider's Head
Tip: As you follow the steps to draw your spider, take breaks to observe real spiders or high-quality reference images, paying close attention to their unique anatomy and proportions. This practice will enhance your understanding of how to accurately depict the spider's body structure, leg placement, and intricate details, ultimately leading to a more realistic and lifelike drawing.
Now, draw a smaller circle just above the spider's body. This will be the spider's head. Position it in a way that it slightly overlaps with the body to create a more connected look.
Step 4: Detail the Spider's Body
To add texture to the spider's body, draw small, short lines or curves from the outer edge of the circle towards the center. These lines should be evenly spaced apart and cover the entire body.
Step 5: Define the Spider's Legs
Next, add details to the spider's legs. Draw small curved lines across each leg to represent the joints. Then, add small triangular shapes at the end of each leg to symbolize the spider's feet.
Step 6: Draw the Spider's Eyes
Inside the spider's head, draw two large oval shapes to represent the eyes. Leave a small white space in the top corner of each eye to create a glimmer effect. Then, add a small dot or circle in the center of each eye to represent the spider's pupils.
Step 7: Add the Spider's Mouth
Below the spider's eyes, draw a slightly curved line to form the mouth. This line should start from the top of one side of the head and end at the opposite side. Add two smaller curved lines at the ends of the main line to complete the mouth.
Step 8: Refine the Spider's Details
Now that the basic shapes of the spider are complete, take your time to refine the details. Add more curves and lines to the spider's body to create a sense of depth and texture. Pay attention to the contours of the body and legs to make your drawing more realistic.
Step 9: Ink the Spider
Using a black pen or marker, carefully go over the final lines of your drawing. Start with the spider's body and then move on to the legs, head, and other details. Once you have finished inking, let the ink dry completely before erasing any pencil lines.
Step 10: Color the Spider (Optional)
If you want to add color to your drawing, now is the time to do it. Use colored pencils or markers to bring your spider to life. Spiders can be found in various colors, so feel free to use your imagination or reference images for inspiration.
Congratulations, you have successfully drawn a spider! With practice, you can improve your technique and create even more realistic and detailed spider drawings in the future.
Mistake Alert: A frequent mistake when drawing spiders is making all eight legs emerge from a single spot or too closely together on the body. This often happens because spiders are small and their anatomy can be tricky to observe, leading artists to bunch the legs at the front or in the center.
To avoid this, take a close look at reference photos and notice how the legs are attached in pairs to the spider's cephalothorax (the front body section), spaced out in a way that supports their movement and balance. Lightly sketch guidelines for leg placement before committing to darker lines, and remember that each leg is segmented and bends at distinct angles—this will help your spider look more realistic and natural.
Conclusion
Drawing a spider can be an enjoyable and rewarding experience. By following these step-by-step instructions, you have learned how to create a realistic spider drawing. Remember to have fun and experiment with different techniques and styles to develop your own unique spider illustrations.
We hope you found this guide helpful. Happy drawing!
Gallery of Spider Drawings


Fun Facts About Spider
-
There are more than 48,000 known species of spiders worldwide.
-
Spiders are not insects; they belong to the class Arachnida.
-
All spiders produce silk, but not all of them spin webs.
-
Some spider silk is stronger than steel of the same diameter.
-
Spiders have blue blood because their blood uses hemocyanin.
-
Most spiders have eight eyes, but some species have fewer.
-
Jumping spiders can leap up to 50 times their own body length.
-
Spiders help control insect populations and are important for ecosystems.
-
The Goliath birdeater is the world's largest spider by mass and size.
Suggestions for Scenes and Settings for Spider Drawings
-
A spider weaving an intricate web between branches in a dewy morning forest.
-
A close-up of a spider's face, emphasizing its multiple eyes and detailed mouthparts.
-
A spooky Halloween scene featuring a large spider crawling over a jack-o'-lantern.
-
A tiny spider hanging from a single silk strand in the corner of a cozy room.
-
An imaginative scene with a superhero spider swinging between city skyscrapers.
-
A spider perched on a colorful flower, blending into its environment for camouflage.
-
A dramatic view of a spider catching an insect in its web at dusk.
-
A whimsical cartoon spider with exaggerated features and a playful expression.
-
An ancient cave painting-style drawing of a spider, using earthy colors and textures.
-
A fantasy forest where spiders have jewel-like bodies and spin sparkling webs.