How to Draw a Smore
Learn how to draw a mouthwatering smore with this step-by-step tutorial. Perfect for beginners or experienced artists looking to improve their drawing skills.
Materials You'll Need
- Pencil
- Paper
- Eraser
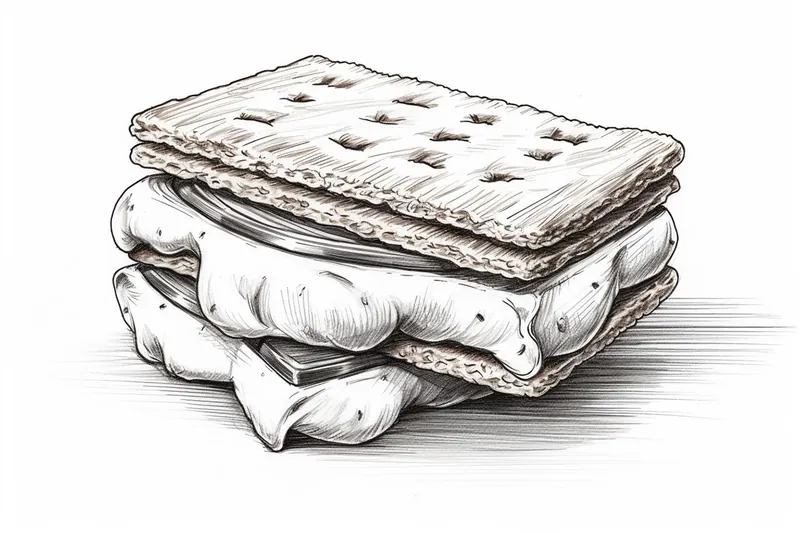
There's something undeniably nostalgic and inviting about a perfectly toasted s'more—the gooey marshmallow, melty chocolate, and crunchy graham crackers stacked together make it a classic treat enjoyed by campers and dessert lovers alike. Drawing a s'more is a delightful way to capture the essence of this sweet snack, allowing you to explore texture, depth, and contrast within a simple yet recognizable subject. In this tutorial, you'll learn how to draw a smore step by step, making it easy to recreate this mouthwatering dessert whether you're decorating a food journal, designing a greeting card, or simply practicing your drawing skills.
Learning how to draw a smore is a fantastic exercise for artists of all levels. Beginners will find it approachable thanks to the s'more's basic geometric shapes, while more experienced artists can focus on adding realistic details, such as the gooey drips of melted chocolate and the charred edges of marshmallow. The process will help you practice shading, layering, and creating dimension, all while working with familiar and fun subject matter. Drawing food items like s'mores can also help you develop observation skills and an eye for detail, which are essential in any artist's toolkit.
Whether you're just starting out or looking to enhance your realism techniques, this guide will provide clear instructions and helpful tips to ensure your s'more looks deliciously lifelike. Don't worry if your first attempt isn't perfect—art is all about experimenting and enjoying the creative process. Grab your favorite drawing tools, and let's embark on this tasty artistic adventure together!
Materials Required
Before we begin, make sure you have the following materials handy:
- [Drawing paper or sketchbook](https://yonderoo.com/best-sketchbooks-for-artists/)
- Pencils (HB, 2B, and 4B recommended)
- Eraser
- Blending stump or cotton swab
- Ruler (optional)
- Reference image of a smore (optional)
Now that we have our materials ready, let's dive into the step-by-step process of drawing a smore!
Step 1: Outline the Marshmallow
Start by lightly sketching a circle shape in the center of your paper. This will serve as the base for the marshmallow. Keep in mind that smores come in various sizes, so adjust the size of your circle accordingly. Don't press too hard on the pencil, as we'll be refining the outline in the following steps.
Step 2: Add Texture to the Marshmallow
To give the marshmallow a realistic texture, lightly sketch lines in a random pattern within the circle. These lines will represent the ridges and folds of the marshmallow. Make sure the lines are not perfectly straight or evenly spaced to create a natural look.
Step 3: Draw the Graham Cracker Base
Beneath the marshmallow, draw a rectangular shape for the graham cracker base. Use a ruler if you prefer precise lines, or freehand it for a more organic feel. Remember that the base should be slightly larger than the marshmallow.
Step 4: Enhance the Texture of the Graham Cracker
Add texture to the graham cracker by sketching horizontal and vertical lines that intersect each other. This will simulate the texture of a real graham cracker. Keep the lines uneven and irregular for a more realistic appearance.
Step 5: Draw the Chocolate
On top of the graham cracker base, draw another rectangular shape for the chocolate. The chocolate should be smaller than the base, leaving some space around the edges to show the graham cracker.
Step 6: Shade the Marshmallow
Now it's time to add some depth to our drawing. Begin by shading the marshmallow using a soft pencil (2B or 4B). Start with light, even strokes and gradually build up the shading, focusing on the areas where the light hits the marshmallow. Leave some areas lighter to create highlights and give it a rounded look.
Step 7: Shade the Graham Cracker
Next, shade the graham cracker using the same pencil you used for the marshmallow. Apply light, even strokes along the intersecting lines to give it a textured appearance. Use darker shading in some areas to create depth and dimension.
Step 8: Shade the Chocolate
For the chocolate, use a slightly darker pencil (4B or 6B) and shade it in a smooth and even manner. Start with light strokes and gradually build up the shading, paying attention to the highlights and shadows. Blend the shading with a blending stump or a cotton swab for a smoother look if desired.
Step 9: Refine the Details
Now that the basic shapes and shading are done, it's time to refine the details. Use a sharpened pencil (HB or 2B) to add any necessary lines or accents. Pay attention to the ridges and edges of the marshmallow, the details on the graham cracker, and any additional details on the chocolate. Take your time and make any adjustments needed to bring your smore to life.
Step 10: Finalize and Erase
Take a step back and evaluate your drawing. Are there any areas that need adjustments or further shading? Make any necessary changes to bring your smore drawing to its final form. Once you're satisfied, carefully erase any visible guidelines and excess shading, leaving behind a clean and crisp smore drawing.
And there you have it – a delicious smore drawing that looks good enough to eat! We hope you enjoyed following along with this tutorial and that it helped you improve your drawing skills. Remember, practice makes perfect, so keep exploring different techniques and subjects to further develop your artistic abilities.
Tip: To effectively capture the delicious textures of a s'more, focus on layering your materials. Start with a light pencil sketch to outline the basic shapes of the graham crackers, marshmallow, and chocolate. Once you're satisfied with the composition, use colored pencils or pastels to build up layers of color, starting with the lightest shades first and gradually adding darker tones for depth. For the marshmallow, use a blending tool or your finger to create a smooth gradient that mimics its soft, gooey texture. Don't forget to add highlights using a white gel pen or pencil to simulate the shine of melted chocolate and toasted marshmallow, which will bring your drawing to life!
Conclusion
In this step-by-step guide, we learned how to draw a smore from start to finish. By breaking down the process into simple steps, anyone can create a mouthwatering smore drawing. So grab your pencils and start sketching your way to a scrumptious piece of art!
Fun Facts About Smore
- The first recorded recipe for s'mores appeared in a 1927 Girl Scouts handbook called Tramping and Trailing with the Girl Scouts.
- The name s'more is a contraction of "some more," reflecting how irresistible the treat is.
- National S'mores Day is celebrated every year on August 10th in the United States.
- Traditional s'mores are made with just three ingredients: graham crackers, marshmallows, and chocolate.
- Graham crackers were invented in the early 19th century by Sylvester Graham, a Presbyterian minister.
- Marshmallows were originally made from the root of the mallow plant.
- The world's largest s'more weighed 267 pounds and was made in 2014.
- S'mores have inspired a variety of products, including cereals, ice creams, and even Pop-Tarts.
- Some people enjoy making s'mores in the microwave or oven when a campfire isn't available.
Suggestions for Scenes and Settings for Smore Drawings
- A classic campfire scene with a s'more roasting on a stick over glowing embers.
- A close-up of gooey chocolate and marshmallow oozing out from between the graham crackers.
- A whimsical s'more picnic, with a pile of s'mores on a picnic blanket in a sunny meadow.
- A wintry indoor setting with s'mores being made in a cozy fireplace, surrounded by mugs of hot chocolate.
- A "build your own s'more" bar, with bowls of different chocolates, marshmallows, and crackers.
- S'mores as a stack of characters—marshmallow, chocolate, and graham cracker each with fun faces and personalities.
- S'mores alongside other camp treats, like roasted corn and baked potatoes, on a rustic wooden table.
- A s'more being squished between two hands, with chocolate and marshmallow dripping out the sides.
- An imaginative s'more landscape, where the graham cracker forms the ground and marshmallow clouds float above.
- A s'more served on a fancy dessert plate, garnished with berries and a drizzle of chocolate sauce.