How to Draw a Slingshot
Learn how to draw a slingshot in this step-by-step tutorial. Follow the instructions to create your own detailed and visually appealing slingshot drawing.
Materials You'll Need
- Pencil
- Paper
- Eraser
Welcome to this detailed step-by-step guide on how to draw a slingshot! The slingshot is a classic and iconic tool, often associated with childhood adventures, creativity, and simple mechanics. Drawing a slingshot offers a wonderful opportunity to explore basic shapes, textures, and proportions, making it an excellent subject for artists at various skill levels. Whether you're a beginner wanting to develop your sketching skills or an experienced artist looking to add an interesting object to your portfolio, learning how to draw a slingshot can be both fun and educational.
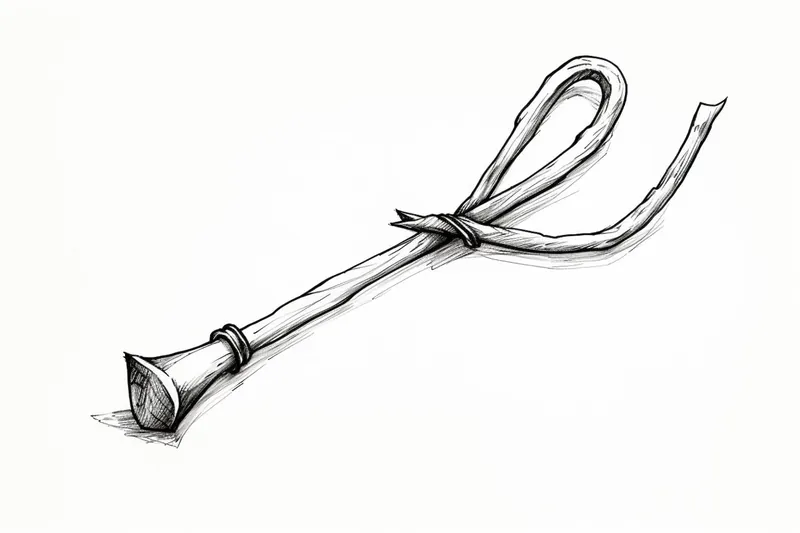
In this tutorial, you will learn to capture the distinctive Y-shaped frame and the elastic band with careful attention to detail and shading techniques. Understanding how to represent the wood texture of the handle and the tension in the band will help you create a realistic and dynamic drawing. This project will enhance your ability to observe proportions and improve your hand control, making it a great exercise in both structural drawing and textural rendering. Plus, drawing everyday objects like a slingshot encourages creative thinking and artistic confidence.
By following our clear, step-by-step instructions on how to draw a slingshot, you'll be able to create a striking and lifelike image that showcases your growing artistic skills. Remember, every great artist starts with simple shapes and builds up from there, so don't be discouraged if it takes some practice. Grab your pencil and eraser, and let's embark on this creative journey together—you'll be surprised at just how rewarding it is to bring this classic object to life on paper!
Materials Required
Before we begin, let's gather the materials you'll need for this drawing:
Now that you have everything you need, let's dive into the steps to create your slingshot drawing.
Step 1: Start with the Frame
Begin by drawing a horizontal line slightly above the center of your paper. This line will serve as the base for the frame of your slingshot. Use your ruler to ensure that the line is straight and even.
Step 2: Draw the Handle
From the center of the horizontal line, draw two vertical lines in a downward direction. The length of these lines will determine the size of the handle. Make sure they are parallel to each other and evenly spaced.
Step 3: Connect the Lines
Connect the ends of the vertical lines to the horizontal line using two diagonal lines, forming a triangular shape. This will create the base of the handle.
Step 4: Add Detail to the Handle
To make the handle look more realistic, draw curved lines on both sides of the triangular base. These lines will represent the grip of the slingshot.
Step 5: Draw the Y-Shaped Frame
On both sides of the handle, draw two straight lines extending away from the frame. These lines should be at an angle, sloping downward and outward. Connect the ends of these lines using a slightly curved line, forming a "Y" shape.
Step 6: Add the Slingshot Bands
From the top of each arm of the "Y" shape, draw two curved lines extending inward towards the handle. These lines should meet at a point near the center of the handle. These lines represent the bands of the slingshot.
Step 7: Refine the Frame
Take a look at your drawing so far and make any necessary adjustments. Ensure that the proportions and angles are accurate. Erase any unwanted lines or guidelines.
Step 8: Add Details
To make your drawing more interesting, consider adding some extra details. You can draw a small circle at the center of the handle or add texture to the grip by lightly shading in some areas.
Step 9: Color Your Drawing (optional)
If you have colored pencils or markers, you can enhance your drawing by adding color. Be creative and choose colors that you find appealing. You can color the frame, handle, and bands in any combination you like.
Conclusion
Congratulations! You have successfully drawn a slingshot. By following these step-by-step instructions, you have created a detailed and visually appealing representation of this classic weapon. Drawing can be a rewarding and therapeutic activity, allowing you to express your creativity and bring your ideas to life on paper. I hope you enjoyed this tutorial and that it has inspired you to continue developing your artistic skills. Have fun exploring different drawing subjects and remember, practice makes perfect!
Fun Facts About Slingshot
- The slingshot was first patented in 1876 by Charles Goodyear Jr., the son of the famous vulcanization inventor.
- Traditional slingshots use a Y-shaped frame with elastic bands, often made from natural rubber or latex.
- Slingshots have been used historically for hunting small game due to their quiet operation and portability.
- Modern slingshots can reach projectile speeds of over 200 miles per hour with the right bands and technique.
- Slingshots are often used in competitive target shooting sports, with specialized designs for accuracy and power.
- The elastic bands on a slingshot store potential energy that converts to kinetic energy when released, propelling the projectile forward.
- In some cultures, slingshots have been crafted from natural materials like wood and animal sinew for bands.
- Slingshots have appeared in popular culture as symbols of childhood mischief and ingenuity.
Suggestions for Scenes and Settings for Slingshot Drawings
- A rustic backyard with a tree stump and scattered leaves where a slingshot rests against a tree trunk.
- A childhood adventure scene featuring a young artist holding a slingshot, ready to explore the woods.
- A close-up of a slingshot with detailed wood grain texture and stretched elastic bands, emphasizing tension and realism.
- A classic campfire setting with a slingshot leaning on a log beside marshmallow sticks and a glowing fire.
- A vintage workshop table cluttered with drawing tools, sketches, and a handcrafted wooden slingshot in progress.
- A dynamic action shot of a slingshot being pulled back, with the projectile mid-air and blurred motion effects.
- A nature-inspired composition with a slingshot placed on mossy rocks surrounded by wildflowers and small critters.
- A whimsical fantasy scene where the slingshot is oversized and decorated with magical runes or glowing elements.
- An urban rooftop at sunset with a silhouetted figure holding a slingshot against the city skyline.
- A minimalist still life featuring the slingshot alongside simple geometric shapes and soft shadows for practice in form and light.