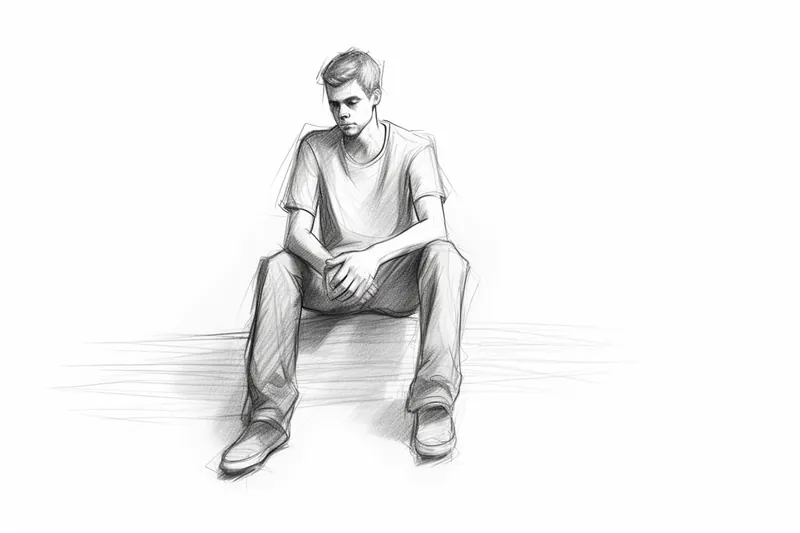
How to Draw a Sitting Person
Learn how to draw a sitting person in this step-by-step tutorial. Master the art of drawing people in different positions and enhance your drawing skills.
Materials You'll Need
- Pencil
- Paper
- Eraser
Learning how to draw a sitting person is a valuable skill for any artist interested in capturing the human form in diverse and natural poses. The seated position introduces unique challenges, such as foreshortening, perspective, and the way clothing and anatomy fold and overlap when a person is at rest. This tutorial offers a detailed, step-by-step approach that guides you through the entire drawing process—from sketching basic shapes and proportions to refining intricate details like posture, balance, and shading to create depth and realism.
Drawing a sitting person is not only useful for portrait artists and illustrators but also for those who want to enhance their figure drawing skills or add dynamic characters to their work.
Whether you are a beginner eager to build confidence or an experienced artist looking to refine your technique, understanding how to draw a sitting person helps improve your observational skills and your ability to depict realistic body language. This tutorial breaks down complex anatomy and perspective into manageable steps, focusing on essential techniques such as gesture drawing, contour lines, and shading to bring your artwork to life.
By the end of this guide, you'll feel equipped and inspired to sketch sitting figures with greater ease and accuracy. Remember, practice and patience are key—so grab your pencil and paper, and let's embark on this creative journey together. Mastering how to draw a sitting person will not only expand your artistic repertoire but also deepen your appreciation for the beauty and complexity of the human form.
Materials Required
Before we begin, gather the following materials:
Now that you have all the necessary materials, let's get started on our drawing!
Step 1: Basic Proportions
To start, draw a circle for the head. Then, draw a vertical line down from the bottom of the circle, extending it to the desired height of your sitting person. This line will serve as the centerline of the body and help you maintain proper proportions throughout the drawing.
Step 2: Torso and Pelvis
Using the centerline as a guide, draw a slightly curved line downward from the bottom of the circle. This line represents the top of the torso. From the lower end of this line, draw two curved lines to form the pelvis. The pelvis should be wider than the torso to create a natural sitting pose.
Step 3: Arms and Hands
Next, sketch the arms by drawing two lines extending outward from the sides of the torso. These lines should be slightly curved to mimic the natural position of the arms when someone is sitting. At the end of each line, add simple shapes to represent the hands.
Step 4: Legs and Feet
Draw two lines downward from the bottom of the pelvis to create the legs. These lines should be slightly angled outward to depict a relaxed sitting position. At the end of each leg, sketch the basic shape of the feet.
Step 5: Adding the Neck and Shoulders
Using the top of the torso as a reference, draw a shorter vertical line upward to create the neck. Then, add two diagonal lines on either side of the neck to represent the shoulders. The shoulders should be slightly rounded to give a natural look to the sitting person.
Step 6: Refining the Body
Now that the basic framework of the sitting person is complete, it's time to refine the body. Go over the initial sketch, adding more definition and details to each body part. Pay attention to the curves and angles of the body to ensure a realistic depiction.
Step 7: Facial Features
Tip: As you progress through your drawing of a sitting person, consider using reference images to study different poses and clothing drapes, which can greatly enhance your understanding of foreshortening and perspective. Observing how fabric interacts with the body in a seated position will help you create more realistic folds and shadows, making your artwork come alive with authenticity and depth.
Draw the facial features of the sitting person. Start with simple shapes for the eyes, nose, and mouth. Pay attention to the positioning of the facial features in relation to each other. Add eyebrows, ears, and hair to complete the face.
Step 8: Clothing and Accessories
Add clothing and accessories to your sitting person. Consider the type of clothing that would be suitable for a sitting pose, such as loose-fitting or relaxed attire. You can also add accessories like jewelry or a hat to enhance the overall look of the drawing.
Step 9: Shading and Textures
To bring your drawing to life, add shading and textures. Identify the light source in your drawing and add shadows accordingly. Pay attention to the different textures of the clothing and any other objects in the scene. Use light pencil strokes or colored pencils to create smooth transitions and depth.
Step 10: Final Touches
Take a step back and evaluate your drawing. Make any necessary adjustments to ensure proper proportions and symmetry. Add any final details or highlights to enhance the overall quality of the sitting person. Once you are satisfied with the result, you can erase any visible guidelines.
Conclusion
Congratulations! You have successfully learned how to draw a sitting person. By following the step-by-step instructions in this guide, you can create realistic and captivating drawings of people in a sitting position. Remember to practice regularly and experiment with different poses and styles to further develop your drawing skills. With time and dedication, you will become a master at drawing people in various positions.
Fun Facts About Sitting People
- The seated pose is one of the most challenging for artists due to complex foreshortening and perspective involved.
- Understanding the anatomy of a sitting person improves an artist's ability to depict natural human posture and balance.
- Clothing folds and overlaps differently when a person is seated, requiring special attention to fabric behavior in art.
- Gesture drawing is a key technique to capture the dynamic essence of a sitting figure quickly and effectively, as explained by Concept Art Empire.
- Artists often use a vertical centerline to maintain correct proportions when sketching a sitting person, a method detailed by Art Instruction Blog.
- Drawing seated figures helps improve observational skills, especially in recognizing subtle shifts in body language.
- Shading seated figures requires understanding the light source and how it interacts with the body's curves and clothing, as taught by Drawspace.
- Mastering the seated pose expands an artist's repertoire, allowing for more diverse and realistic character compositions, according to Creative Bloq.
Suggestions for Scenes and Settings for Sitting Person Drawings
- A person sitting on a park bench, reading a book with relaxed posture and soft clothing folds.
- A child sitting cross-legged on the floor, playing with toys, capturing foreshortening of the legs.
- An elderly person sitting in a cozy armchair by a fireplace, wrapped in a blanket, showing intricate shading and textures.
- A musician sitting on a stool, playing a guitar, focusing on arm and hand positioning.
- A businessperson seated at a desk, leaning slightly forward while working on a laptop, emphasizing perspective and body language.
- A person sitting on the edge of a dock, feet dangling above water, showing reflections and natural light effects.
- A woman sitting on a café chair outdoors, sipping coffee, with detailed clothing folds and accessories like a hat or scarf.
- A teenager sitting on stairs with one knee up, resting an arm on it, highlighting dynamic angles and relaxed posture.
- A yoga practitioner sitting cross-legged in meditation, focusing on balanced posture and calm expression.
- A traveler sitting on a suitcase in an airport, surrounded by bags, capturing casual body language and varied textures.