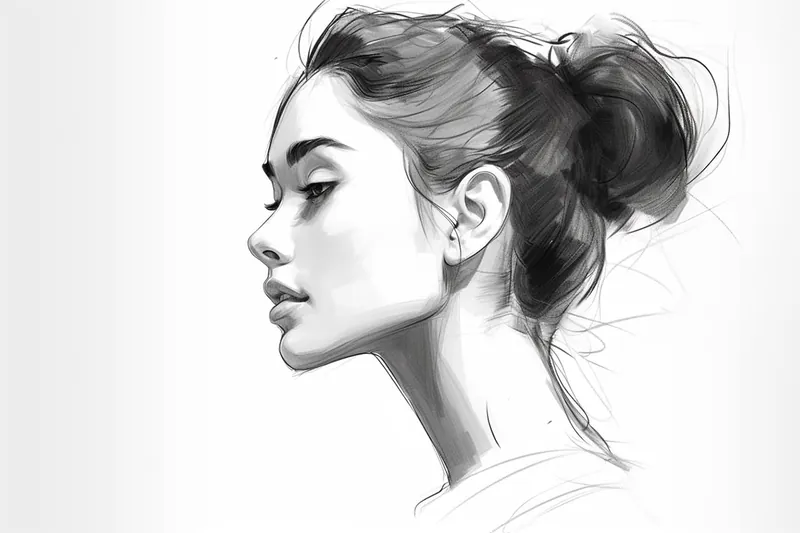
How to Draw a Side Profile
Learn how to draw a side profile with our step-by-step tutorial. Master the art of capturing unique features and proportions in portrait drawings.
Materials You'll Need
- Pencil
- Paper
- Eraser
Welcome to this comprehensive tutorial on how to draw a side profile! The side profile, also known as the profile view, is a classic angle in portrait art that highlights the unique contours and features of the human face, such as the nose, lips, and jawline. Artists often study side profiles to better understand facial proportions and to create more realistic and dynamic portraits. Drawing a side profile can also help you appreciate the subtle differences that make each individual face unique, making it a valuable skill for anyone interested in character design, illustration, or fine art portraiture.
Learning how to draw a side profile is not only an essential step in developing your figure drawing abilities but also a fun way to challenge your observation skills. Whether you're a beginner who wants to grasp the basic proportions or an experienced artist seeking to refine your technique, this tutorial will guide you through the process with clear, easy-to-follow instructions. You'll discover important techniques such as mapping out guidelines, understanding the placement of facial features, and adding shading to give your drawing depth and dimension. These skills will help you create expressive and accurate side profiles, making your portrait work more versatile and impressive.
Don't worry if you're new to drawing or if capturing a likeness from the side feels intimidating—every artist starts somewhere, and practice is the key to improvement. By following along with this guide and dedicating some time to practice, you'll find that drawing side profiles becomes more intuitive and enjoyable. Gather your favorite drawing materials, keep an open mind, and let's dive into the rewarding process of creating a stunning side profile together!
Materials Required
To begin drawing a side profile, gather the following materials:
- Paper: Select a high-quality drawing paper that can handle the medium you prefer to work with.
- Pencil: Choose a set of graphite pencils with different lead hardness (e.g., 2H, HB, 2B, 4B, and 6B). These will allow you to achieve different levels of shading and depth.
- Eraser: Have a soft eraser handy to correct any mistakes or smudges.
- Blending tools: Consider blending stumps or tortillons to achieve smooth transitions and shading.
Now that we have our materials ready, let's dive into the steps of drawing a side profile.
Step 1: Basic Guidelines
Start by lightly sketching the basic guidelines that will serve as the foundation for your side profile drawing. Draw a vertical line down the center of your paper. This line will represent the middle of the face. Then, draw a horizontal line halfway down the vertical line to indicate the position of the eyes.
Step 2: Shape of the Head
Next, observe and sketch the shape of the head. The side view will reveal more prominent features like the forehead, nose, and chin. Begin by drawing an oval shape to represent the cranium. Then, outline the jawline, gradually tapering it to the chin. Pay attention to the curvature and angles of the jawline, ensuring it aligns with the guidelines you drew in the previous step.
Step 3: Facial Proportions
To establish the correct proportions of the face, divide the head into sections. Divide the distance between the horizontal guideline and the bottom of the chin into thirds. The top third will be the location of the hairline, while the middle third will house the eyes. The final third will make space for the nose and mouth.
Step 4: Eyes
Tip: To elevate your side profile drawing, consider using reference images to better understand the unique features and proportions of different faces. Studying real-life profiles or photographs can help you accurately capture the angles and characteristics that make each individual distinct. Additionally, don't hesitate to take breaks during your drawing process to step back and assess your work from a distance—this can help you spot any imbalances or inaccuracies in the placement of facial features.
The eyes are a crucial element in any portrait drawing. To draw the eyes, start by positioning them on the horizontal guideline. Remember to leave enough space between the eyes for the width of another eye. Sketch the basic shapes of the eyes by creating almond or oval-shaped outlines. Pay attention to the curvature of the eyelids and the position of the iris and pupil within the eye.
Step 5: Nose
Move on to drawing the nose. Position the nose between the eyes and just below the horizontal guideline. Begin by sketching the shape of the nose, paying attention to its proportions and angles. Observe your reference image or subject to capture the unique characteristics of their nose. Add details such as the nostrils and bridge of the nose to bring it to life.
Step 6: Lips
Proceed to draw the lips below the nose. Outline the basic shape of the upper and lower lips, ensuring they align with the guidelines you established earlier. Observe the unique curves and proportions of your subject's lips and add details such as the cupid's bow and the creases around the mouth. Remember that the lips should have depth and volume, so use shading to achieve this effect.
Step 7: Ears
The ears are often overlooked in portrait drawings but play a significant role in capturing the likeness of a person. Position the ears between the eyes and the bottom of the nose, around the middle third of your head. Observe the shape and details of your subject's ears. Start by lightly sketching the overall shape and then add details such as the earlobe, helix, and antihelix.
Step 8: Hair
Now it's time to add some hair. Start by outlining the basic shape and style of the hair, considering the flow and direction. Observe the texture and volume of your subject's hair, and use varied shading and strokes to create the desired effect. Take your time with this step, as hair can greatly contribute to the overall likeness of your drawing.
Step 9: Shading and Details
Once you have completed the basic features of the side profile, you can begin adding shading and details to enhance the three-dimensional quality of your drawing. Use a range of pencils to achieve different tones, from light to dark, and pay attention to the areas of shadow and light on the face. Gradually build up the shading, using smooth and controlled strokes, and blend with a blending stump or tortillon where necessary. Add fine details, such as wrinkles, freckles, or texture, to bring your drawing to life.
Mistake Alert: A common mistake when drawing a side profile is placing the facial features—especially the ear, eye, and jaw—too far forward or backward, which can make the face look unbalanced or distorted. This happens because it's easy to misjudge the alignment of features when working from the side, since we're used to drawing them from a frontal view. To avoid this, lightly sketch a vertical guideline from the top of the head to the chin, then map out the positions of the forehead, nose, lips, and chin along this line, with the ear sitting roughly between the brow and the base of the nose. Consistently checking your feature placements against reference photos or your guidelines will help you achieve a more natural and proportional side profile.
Conclusion
Congratulations on completing your side profile drawing! By following these step-by-step instructions, you have learned how to capture the unique features and proportions of a subject's face from a different perspective. Remember, practice makes perfect, so keep exploring and experimenting with different techniques. With time and dedication, you'll continue to improve your artistic skills.
So, grab your materials, follow these steps, and enjoy the process of drawing a side profile!
Gallery of Side Profile Drawings


Fun Facts About Side Profile
- The term "side profile" in art is also known as the profile view, which has been used in portraiture for centuries.
- Ancient coins often featured rulers in side profile, a tradition that dates back to ancient Greece and Rome.
- Leonardo da Vinci's famous anatomical studies include detailed side profile sketches of the human head.
- Artists use the side profile to study facial proportions, as explained in the Loomis method for drawing heads.
- In psychology, the side profile is sometimes analyzed in facial recognition research to understand how humans perceive identity.
- Many cultures have used side profile silhouettes for portraiture, especially during the 18th and 19th centuries.
- The side profile is crucial in forensic art for reconstructing faces from skeletal remains.
- Modern character designers often start with a side profile to establish a character's turnaround sheet in animation and games.
- Photographers use the side profile to highlight unique features and create dramatic portrait lighting effects.
- Some studies suggest that people can recognize familiar faces from their side profile almost as well as from the front.
Suggestions for Scenes and Settings for Side Profile Drawings
- A side profile of a person gazing out a rain-soaked window, with soft light illuminating their features.
- Draw a character in profile wearing headphones, lost in music, with closed eyes and a subtle smile.
- A dramatic side profile against the backdrop of a city skyline at sunset.
- Capture an elderly person's side profile, focusing on the unique lines, wrinkles, and wisdom in their expression.
- A child in profile blowing dandelion seeds into the wind in a grassy field.
- Side profile of an athlete mid-action, such as a runner sprinting or a dancer leaping.
- A fantasy character in profile, featuring pointed ears, unusual markings, or ornate headpieces.
- Draw a side profile of someone reading a book under a tree, with dappled sunlight falling on their face.
- Profile portrait of a person with elaborate, flowing hair styled with braids or accessories.
- Side profile of two people facing each other, almost touching noses, capturing emotion and connection.