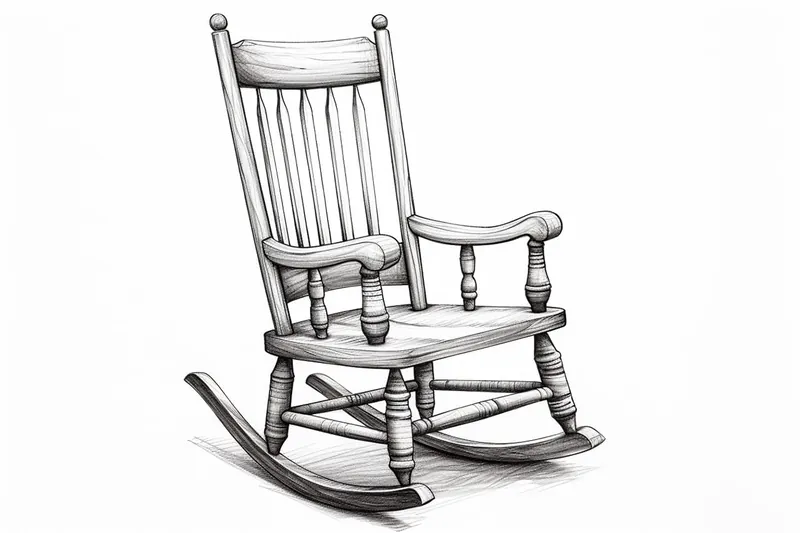
How to Draw a Rocker
Learn how to draw a realistic and detailed rocker with this step-by-step tutorial. Discover the art of sketching, shading, and adding texture to create stunning pencil drawings.
Materials You'll Need
- Pencil
- Paper
- Eraser
If you've ever been captivated by the dynamic energy and rebellious spirit of rock music, capturing that vibe on paper can be an incredibly exciting artistic challenge. Rockers, with their iconic clothing, expressive poses, and electric instruments, are more than just musicians—they're symbols of creativity, passion, and individuality. Learning how to draw a rocker not only lets you celebrate this bold subculture, but also helps you practice essential skills like anatomy, gesture drawing, and the depiction of intricate details such as guitars, leather jackets, and dramatic hairstyles.
There are many reasons why someone might want to learn how to draw a rocker. Maybe you're a fan of rock music and want to pay tribute to your favorite band, or perhaps you're building a portfolio of diverse characters that show movement and emotion. Drawing a rocker requires a mix of observational skills and creativity, making it a fantastic subject for both beginners and more experienced artists. In this tutorial, we'll break down the process into manageable steps, focusing on basic sketching, proportion, and adding those unique finishing touches that give your rocker personality and attitude.
Don't worry if you're new to drawing people or musical themes—this guide is designed to be approachable, with tips and techniques to help you at every stage. Whether you want to create a realistic portrait or a more stylized character, learning how to draw a rocker will expand your skills and boost your confidence as an artist. So gather your materials, let your creativity flow, and get ready to bring your own rock star to life on the page!
Materials Required
Before we begin, make sure you have the following materials:
- Paper: It's best to use a medium-weight drawing paper that can handle graphite and other shading techniques.
- Pencils: You will need a range of pencils, from H to 6B, to achieve different shades and textures.
- Eraser: A kneaded eraser is ideal for gently removing mistakes or lightening areas.
- Blending tools: You can use tissue paper or blending stumps to blend and smooth out your shading.
- Reference image: Find a clear and well-lit picture of a rocker to use as a reference. This will help you capture the details accurately.
Now that you have your materials ready, let's dive into the process of drawing a rocker.
Step 1: Sketching the Outline
Start by lightly sketching the basic outline of the rocker using an H or HB pencil. Pay attention to the proportions and angles of the rocker. Keep your lines light and loose, as you will be refining them later. Don't worry about adding too much detail at this stage; focus on capturing the overall shape and structure.
Step 2: Adding the Details
Once you are satisfied with the initial outline, use a lighter pencil (2H or 3H) to add more details to the rocker. Start by sketching the seat and backrest, carefully observing the curves and edges. Then, add the legs and any armrests or decorative elements. Take your time with this step, as getting the details right will make your drawing more realistic.
Step 3: Shading the Rocker
Now it's time to add some depth and shading to your drawing. Begin by identifying the light source in your reference image. This will help you determine where the highlights and shadows should be. Use a softer pencil (like 2B or 4B) to start shading the rocker. Start with light strokes and gradually build up the darkness. Remember to blend the shading using a tissue or blending stump for a smooth and realistic look.
Step 4: Adding Texture and Depth
To make your rocker drawing more realistic, focus on adding texture and depth. Pay attention to the wood grain and any patterns or details on the rocker. Use a variety of pencils, from HB to 6B, to create different shades and textures. Experiment with cross-hatching and stippling techniques to mimic the texture of the wood. Take your time with this step, as the details will bring your drawing to life.
Step 5: Refining and Finalizing
Now that you have added the necessary shading, texture, and depth, take a moment to step back and evaluate your drawing. Look for any areas that need refining or adjustments. Use an eraser to lighten or correct any mistakes, and add any final details that will enhance the overall look of the rocker. When you are satisfied with your drawing, carefully go over the lines with a darker pencil to make them more defined.
Tip: To capture the energy and attitude of a rocker, start your drawing with quick, loose gesture sketches to establish a dynamic pose—think about how the character might lean into their guitar or throw their head back mid-performance. Use a soft pencil (like a 2B or 4B) for these initial gestures, allowing you to experiment with movement without worrying about details yet. When adding clothing and accessories, pay special attention to how leather jackets bunch at the elbows or how guitar straps interact with the body—these subtle touches add realism and personality. Emphasize hair volume and texture with bold, sweeping lines, and don't be afraid to exaggerate elements like spikes or studs to amplify the rocker's rebellious flair.
Conclusion
Congratulations! You have successfully learned how to draw a rocker. By following these step-by-step instructions and using your creativity, you have created a realistic and detailed representation of a rocker. Practice and experiment with different techniques to further refine your drawing skills. Have fun exploring your artistic abilities and enjoy the process of creating beautiful artwork.
Fun Facts About Rocker
- The classic wooden rocker, or rocking chair, was first popularized in North America during the early 18th century, with some crediting Benjamin Franklin for its invention—though this is debated.
- Rockers are designed to provide a soothing motion that can help calm babies and adults alike, and have been used for centuries to promote relaxation and sleep.
- Some of the earliest rockers were actually converted from regular chairs by simply attaching curved bands, called rockers, to the legs.
- Rocking chairs have been associated with famous figures, including President John F. Kennedy, who used one to alleviate his chronic back pain.
- In some cultures, rockers are believed to bring good luck and are often given as gifts to new parents.
- The Shakers, a religious group known for their minimalist furniture, created some of the most iconic and collectible rocking chair designs in the 19th century.
- Modern rockers come in a variety of materials, including wood, metal, and plastic, and can be found in both traditional and contemporary styles.
- Rocking chairs have even made their way into space—NASA developed a special "space rocker"
Suggestions for Scenes and Settings for Rocker Drawings
- A rocker mid-performance on stage, surrounded by dramatic lighting, fog machines, and a cheering crowd.
- A close-up portrait of a rocker tuning their electric guitar, with details like band patches and spiked bracelets.
- A group of rockers jamming together in a cluttered garage, with posters, amps, and musical gear scattered around.
- A rebellious rocker leaning against a graffiti-covered wall, holding drumsticks or headphones, exuding attitude.
- A stylized rocker jumping in the air during a solo, hair and clothing flowing with the movement.
- A backstage scene, with a rocker applying makeup or adjusting a leather jacket before a show.
- An acoustic set in an intimate club, with a rocker sitting on a stool under warm, moody lighting.
- A rocker riding a vintage motorcycle down a deserted road, guitar case strapped to their back.
- A fantasy-inspired rocker with electric energy swirling around them, amplifying the power of their music.
- A peaceful moment after a concert, with a tired but content rocker sitting on the edge of the stage, surrounded by instruments and setlists.