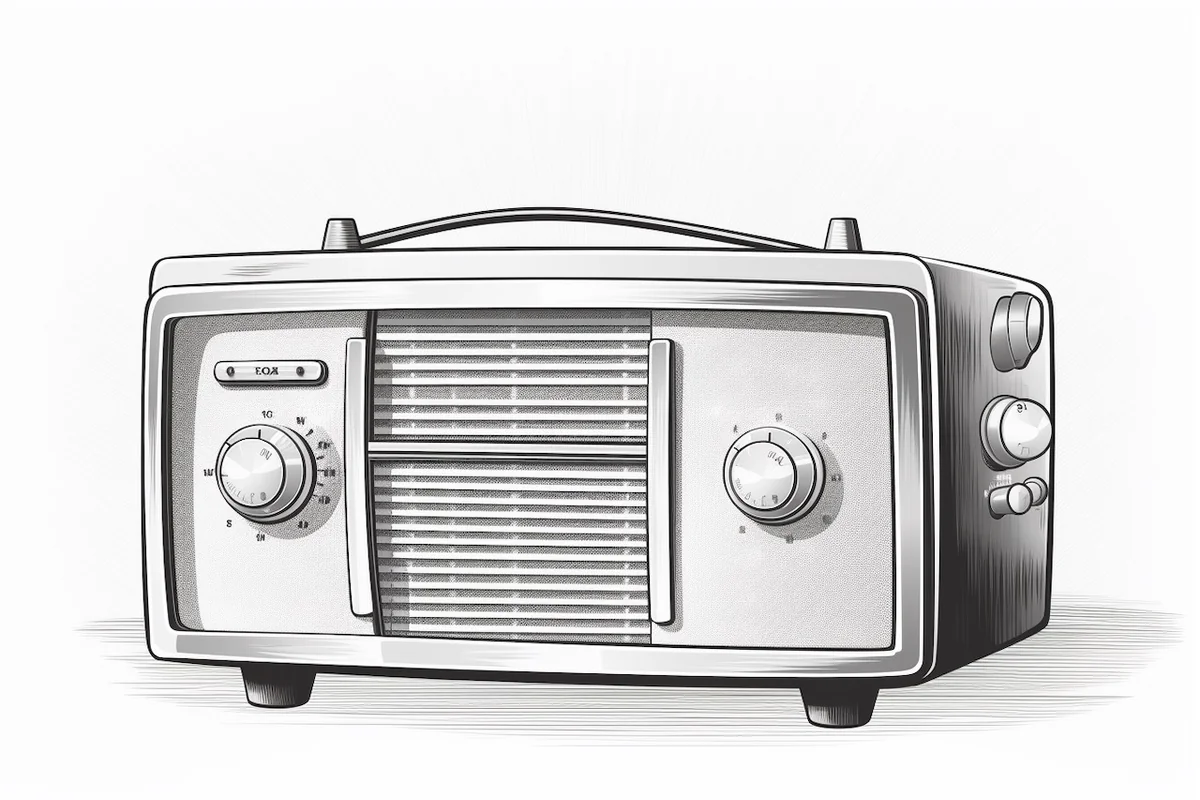
How to Draw a Radio A Step by Step Guide to Capturing Vintage Charm
Learn how to draw a radio with this comprehensive step-by-step tutorial. Master the art of depicting vintage electronics with detailed instructions, pro tips, and techniques for beginners and intermediate artists.
Materials You'll Need
- Drawing paper (8x10 inches or larger)
- Pencils (HB, 2B, 4B)
- Kneaded eraser
- Blending stump
- Ruler
- Reference image
- Fine-tip pen (optional)
Drawing a radio can be a wonderfully rewarding artistic endeavor, especially for those who appreciate the charm and nostalgia that vintage radios evoke. These iconic devices represent a golden era of communication and entertainment, from the crackling voices of distant AM stations to the warm glow of tube-powered FM receivers. Radios have played a significant role in our cultural heritage, serving as family gathering points during important broadcasts, companions during late-night study sessions, and symbols of technological progress.
Whether you're aiming to recreate the classic wood-paneled designs of 1940s cathedral radios, the sleek chrome aesthetics of 1950s space-age models, or the colorful plastic portability of transistor radios, learning how to draw a radio is an excellent way to practice your observation skills and attention to detail. This tutorial will guide you through the process with clear, step-by-step instructions that work for beginners and intermediate artists alike.
For artists, radios present fascinating technical challenges: geometric precision for the main housing, intricate details in speaker grilles and control panels, and the interplay of different materials and textures. You'll develop skills in proportion, perspective, and realistic rendering while creating a piece that connects you to decades of design evolution and technological innovation.
So, grab your pencil and quality paper – let's embark on this artistic journey together! With patience and practice, you'll soon be able to bring this iconic device to life in your sketchbook, creating a detailed and realistic drawing that captures both the form and spirit of the radio age.
Materials You'll Need
Essential Materials:
- Drawing paper: High-quality paper, 8x10 inches or larger, with smooth texture
- Pencils: Range of hardness (HB for construction lines, 2B for general drawing, 4B for deep shadows)
- Kneaded eraser: Essential for lifting graphite and creating highlights
- Blending stump: For smooth gradations and realistic textures
- Ruler: For precise measurements and straight construction lines
Optional Materials:
- Fine-tip pen (0.3mm or 0.5mm): For crisp final details and technical elements
- White gel pen: For bright highlights on metallic surfaces
- Tortillon stumps (various sizes): For detailed blending work
- Soft cloth: For large area blending and texture effects
- Reference materials: High-resolution photos from multiple angles
- Light box or window: For tracing refined sketches
Pro Tip
Choose your paper carefully – slightly textured paper holds graphite better for shading, while smooth paper is ideal for fine details and clean lines.
Understanding Radio Anatomy
Before diving into drawing, let's explore the essential components and design variations that make radios unique:
Classic Radio Components:
- Main housing: Usually rectangular or cathedral-shaped, made of wood, plastic, or metal
- Speaker grille: Protective covering with geometric patterns or fabric mesh
- Control panel: Contains knobs, switches, and display elements
- Tuning dial: Often the most detailed element, with numbered scales and pointer
- Volume and tone controls: Typically round knobs with textured surfaces
- Antenna: Telescoping metal rod or fixed wire element
- Handle: On portable models, often curved or rectangular
Design Era Characteristics:
1920s-1930s Cathedral Style:
- Tall, arched wooden cabinets resembling church architecture
- Intricate speaker cloth patterns
- Large, prominent tuning dials
- Rich wood grain textures
1940s-1950s Streamline Moderne:
- Horizontal emphasis with chrome accents
- Geometric speaker grilles
- Bold color schemes (often Bakelite plastic)
- Space-age aesthetic elements
1960s-1970s Transistor Era:
- Compact, portable designs
- Bright plastic colors
- Simple, functional controls
- Modern typography and branding
Pro Tip
Study the proportional relationships – most vintage radios follow a 3:2 or 4:3 width-to-height ratio, which creates pleasing, balanced compositions.
Step-by-Step Instructions
Step 1: Establish the Basic Framework
Begin by lightly sketching the overall proportions using your HB pencil. Start with a simple rectangle that captures the radio's main body dimensions.
Measuring and Proportions:
- Use your pencil as a measuring tool, holding it at arm's length
- Compare width to height ratios
- Mark key reference points: corners, center lines, major divisions
- Keep lines very light – these are construction guides
Pro Tip
Hold your pencil loosely and use your whole arm for smoother, more confident construction lines. Don't worry about perfection at this stage!
Step 2: Define the Main Housing Shape
Refine your basic rectangle into the specific radio shape you're drawing. Most radios aren't perfect rectangles – they have:
Shape Refinements:
- Rounded corners (varying degrees depending on era)
- Slight curves in the sides or top
- Beveled edges that catch and reflect light
- Proportional adjustments based on your reference
Add guidelines for major component placement: where will the speaker go? The control panel? The tuning dial?
Step 3: Map the Speaker Area
The speaker is often the radio's most prominent visual element. Carefully observe its:
Speaker Characteristics:
- Size and position relative to the overall housing
- Shape: Round, rectangular, or decorative patterns
- Depth and recession from the main surface
- Grille pattern: Geometric holes, fabric mesh, or decorative metalwork
Draw the speaker's basic shape first, then add its mounting ring or bezel. Leave the detailed grille pattern for later steps.
Step 4: Add the Control Panel Layout
Map out the control areas with light construction lines:
Control Elements:
- Tuning dial: Usually the largest circular element
- Volume knob: Typically smaller, often positioned for easy access
- Additional controls: Tone, band selector, power switch
- Display window: Shows station frequencies or channel numbers
Pro Tip
Real radios prioritize functional accessibility – volume controls are usually prominent and easy to reach, while fine-tuning elements might be smaller or recessed.
Step 5: Detail the Tuning Dial
The tuning dial is often the most complex and rewarding element to draw:
Dial Components:
- Outer ring: Usually has measurement markings (AM/FM frequencies)
- Inner face: May show numbers, station call letters, or decorative patterns
- Pointer or needle: Indicates current tuning position
- Depth and dimensionality: Dials are rarely flat – they have raised rims and recessed centers
Start with the basic circular shape, then add concentric rings for different detail layers. Pay attention to the typography and spacing – vintage dials have distinctive number styles and proportions.
Step 6: Construct the Antenna (if applicable)
Telescoping antennas add dynamic visual interest:
Antenna Structure:
- Base mounting: How it attaches to the radio body
- Telescoping sections: Usually 3-5 segments of decreasing diameter
- Length and angle: Extended antennas can be quite long
- Surface details: Joint rings, texture variations
Pro Tip
Antennas follow precise geometric rules – each section is typically about 70% the diameter of the previous section, creating a natural telescoping proportion.
Step 7: Add Secondary Details and Hardware
Focus on the smaller elements that add authenticity:
Hardware Details:
- Knob textures: Ribbed surfaces, smooth plastic, metal rings
- Switch positions: ON/OFF indicators, band selectors
- Mounting screws: Small but important for realism
- Brand badges: Logos, model numbers, decorative elements
- Feet or stands: How the radio sits on its surface
Step 8: Define Surface Materials and Textures
Different materials require different approaches:
Material Rendering:
- Wood grain: Use directional strokes following the grain pattern
- Plastic surfaces: Smooth gradations with sharp highlight reflections
- Metal elements: High contrast between highlights and shadows
- Fabric speaker cloth: Irregular texture with crosshatch patterns
- Glass or clear elements: Strong reflections and transparency effects
Pro Tip
Study how light interacts with each material – wood absorbs light and shows soft gradations, while chrome creates sharp, mirror-like reflections.
Step 9: Establish the Lighting Scheme
Choose a consistent light source and apply it throughout your drawing:
Lighting Fundamentals:
- Primary light direction: Usually from upper left in traditional drawing
- Form shadows: Areas turned away from the light
- Cast shadows: Where the radio blocks light from reaching other surfaces
- Reflected light: Subtle illumination from nearby surfaces
- Core shadows: The darkest areas on the radio itself
Begin with broad, simple shadow shapes, then gradually add complexity and detail.
Step 10: Render the Speaker Grille
The speaker grille often becomes the drawing's focal point:
Grille Techniques:
- Map the pattern first: Establish the underlying geometric structure
- Vary the darkness: Holes closer to the viewer appear darker
- Consider depth: Each hole is a small cylinder extending into the speaker
- Add irregularities: Perfect geometry can look mechanical – add slight variations
For fabric grilles, use cross-hatching techniques to suggest the weave pattern without drawing every individual thread.
Step 11: Refine Control Details and Typography
Bring the technical elements to life:
Technical Refinements:
- Knob graduations: Small marks indicating adjustment positions
- Number clarity: Vintage radios often have distinctive typography
- Wear patterns: Real radios show use – slightly worn paint, finger marks
- Dimensional depth: Controls aren't flat – they have thickness and shadow
Pro Tip
Reference authentic vintage typography – each era has characteristic number styles, from Art Deco elegance to Space Age boldness.
Step 12: Final Touches and Environmental Context
Complete your drawing with finishing details:
Final Elements:
- Background context: Simple surface the radio sits on
- Cast shadows: How the radio interacts with its environment
- Final contrast adjustments: Ensure your darkest darks and lightest lights create impact
- Detail refinements: Small corrections and enhancements
- Surface quality: Final texture work and material differentiation
Final Touches
Enhancing Realism:
- Darken your deepest shadows using 4B pencil for maximum contrast
- Clean up construction lines with your kneaded eraser
- Add crisp highlights with white gel pen on metallic surfaces
- Soften harsh edges where appropriate with blending stump
- Check proportions one final time against your reference
Professional Finishing:
- Sign your artwork discretely in a lower corner
- Protect the surface with fixative spray if desired
- Document your work with a high-quality photo for your portfolio
Pro Tip
Step back frequently during the final stages – details that look perfect up close might need adjustment when viewed from normal viewing distance.
Pro Tips for Success
Observation Techniques:
- Use the "squint test": Squinting helps you see major value relationships without getting lost in details
- Draw what you see, not what you know: Radios have surprising asymmetries and quirks
- Measure constantly: Use your pencil to check proportional relationships throughout the drawing process
- Study multiple references: Different angles reveal how forms connect and overlap
Technical Drawing Skills:
- Master your construction lines: Light guidelines are essential for accurate proportions
- Develop your blending technique: Practice smooth gradations on scrap paper first
- Control your pencil pressure: Vary pressure for different line weights and textures
- Build value gradually: It's easier to darken areas than to lighten them
Workflow Optimization:
- Work from general to specific: Establish major shapes before adding details
- Rotate your paper: Turn it to draw comfortable lines from different angles
- Keep reference materials well-lit: Poor lighting on references leads to poor drawings
- Take breaks: Fresh eyes catch mistakes and see new possibilities
Pro Tip
Professional artists often spend 60% of their time on planning and construction, and only 40% on details and finishing – don't rush the foundation stages!
Common Mistakes to Avoid
1. Proportion Problems
Issue: Radio appears too narrow, too wide, or components are incorrectly sized Solution: Use measuring techniques consistently and check proportions at every stage. Hold your pencil at arm's length to compare dimensions.
2. Flat, Two-Dimensional Appearance
Issue: Drawing looks like a diagram rather than a three-dimensional object
Solution: Establish consistent lighting and use form shadows to describe volume. Pay attention to how surfaces turn away from the light.
3. Inconsistent Perspective
Issue: Different parts of the radio appear viewed from different angles Solution: Establish your viewpoint early and maintain it throughout. Use construction lines to ensure all elements follow the same perspective rules.
4. Overworked Details Too Early
Issue: Focusing on intricate details before establishing the basic form Solution: Work in stages from general to specific. Get the overall shape and proportions right before adding fine details.
5. Neglecting Material Differences
Issue: All surfaces look the same regardless of whether they're wood, metal, or plastic Solution: Study how light behaves on different materials and adjust your rendering techniques accordingly.
6. Ignoring the Light Source
Issue: Inconsistent or confusing shadows and highlights Solution: Choose one primary light source and stick with it. Map out your major shadow shapes early in the process.
7. Poor Reference Usage
Issue: Not looking at the reference enough or relying on memory Solution: Keep your reference visible and well-lit. Look at it more often than you think you need to – at least once every few strokes.
8. Rushing the Construction Phase
Issue: Moving to details and shading before the basic structure is sound Solution: Invest time in light construction lines and proportion checking. The foundation determines the success of everything that follows.
Fun Facts About Radios
Historical Milestones:
- The first radio transmission was made by Guglielmo Marconi in 1895, marking the birth of wireless communication and revolutionizing human connectivity
- Radio waves travel at the speed of light – approximately 299,792 kilometers per second, meaning signals can circle the Earth in just 0.13 seconds
- The term "radio" comes from the Latin word "radius," meaning ray or beam, perfectly describing the radial transmission of electromagnetic waves
- During World War II, radio became a crucial tool for military communication and propaganda, with resistance movements using secret broadcasts to coordinate operations
Cultural Impact:
- The first commercial radio station, KDKA in Pittsburgh, began broadcasting in 1920, revolutionizing mass media and creating the concept of scheduled programming
- The "War of the Worlds" broadcast in 1938 demonstrated radio's incredible power when Orson Welles' realistic alien invasion drama caused widespread panic
- FM radio, invented by Edwin Armstrong, offers superior sound quality to AM because it reduces static interference through frequency modulation rather than amplitude changes
- Radio drama was America's primary entertainment medium in the 1930s and 1940s, creating the concept of "theater of the mind" and launching countless careers
Technical Wonders:
- Satellite radio provides nationwide coverage by transmitting signals from space-based satellites, allowing uninterrupted listening across continental distances
- Radio is still essential for emergency communication because it can reach people even when cell towers and internet infrastructure fail during disasters
- The ionosphere bounces radio waves back to Earth, which is why AM radio stations can be heard hundreds of miles away at night when atmospheric conditions change
- Crystal radios require no external power source – they operate entirely on the energy captured from radio waves, making them perfect for emergency situations
Pro Tip: These historical details can inspire your artistic choices – a 1920s cathedral radio might be drawn in a formal, reverent style, while a 1960s transistor radio could have a more playful, colorful approach.
Advanced Techniques
Drawing Different Radio Styles
Vintage Tube Radios (1930s-1950s):
- Emphasize rich wood textures with directional grain patterns
- Create warm, golden tones through careful value control
- Add intricate details like fabric speaker grilles and brass hardware
- Focus on craftsmanship elements: hand-carved details, quality joinery
- Use traditional drawing techniques: cross-hatching for shadows, stippling for textures
Space Age Portables (1960s-1970s):
- Render smooth plastic surfaces with clean gradations and sharp highlights
- Incorporate bold geometric forms and streamlined design elements
- Use high contrast to emphasize the modern aesthetic
- Add chrome details with precise reflections and mirror-like surfaces
- Include period-appropriate typography and branding elements
Modern Digital Radios:
- Focus on minimalist design principles with clean, uncluttered compositions
- Render LCD displays with attention to pixel structure and backlighting
- Show contemporary materials: brushed aluminum, matte plastics, glass panels
- Include subtle design details: LED indicators, touch-sensitive controls
- Emphasize precision engineering through exact proportions and clean lines
Dynamic Compositions and Viewpoints
Dramatic Low-Angle Views:
- Create powerful, imposing presence by viewing the radio from below
- Emphasize the antenna extending dramatically upward
- Use strong perspective to show the radio's substantial base
- Add environmental elements: tabletop, background objects for scale
Detailed Close-Up Studies:
- Focus on specific components: tuning dial, speaker grille, control cluster
- Show incredible detail and craftsmanship
- Use dramatic lighting to reveal texture and form
- Create technical illustration quality with precise rendering
Environmental Context Shots:
- Show the radio in its natural habitat: 1940s living room, teenager's bedroom, workshop bench
- Include period-appropriate details: other furniture, decorations, clothing
- Use atmospheric perspective to create depth and mood
- Tell a story through compositional choices and environmental clues
Different Styles and Approaches
Realistic Technical Illustration:
- Precise measurements and proportions
- Detailed material rendering
- Clean, professional presentation
- Focus on accuracy and function
- Similar to engineering drawings or patent illustrations
Nostalgic Artistic Interpretation:
- Warm, emotional lighting
- Emphasis on texture and atmosphere
- Soft, romantic rendering style
- Focus on memory and sentiment
- Similar to Norman Rockwell's approach to everyday objects
Modern Minimalist Style:
- Clean lines and simple forms
- Limited value range
- Focus on essential shapes
- Contemporary aesthetic sensibility
- Similar to modern product photography
Sketch and Study Approach:
- Loose, expressive line work
- Multiple views on one page
- Process-oriented rather than finished
- Focus on understanding form and function
- Similar to designer's development sketches
Pro Tip: Choose your style based on your artistic goals – technical illustration for learning, nostalgic rendering for emotional impact, minimalist approach for modern aesthetics.
Suggestions for Scenes and Settings
Classic Home Interior Scenes:
- Cozy vintage living room with an old wooden radio on a side table, surrounded by books, family photos, and a steaming cup of tea, warm lamplight creating inviting shadows
- 1940s family kitchen featuring a tabletop radio on the counter, morning sunlight streaming through gingham curtains, fresh flowers in a mason jar nearby
- Traditional study or library with a cathedral radio on built-in shelving, leather-bound books, a pipe in an ashtray, and papers scattered on a desk
Period-Specific Environments:
- Bustling 1940s diner with a classic jukebox-style radio on the counter, chrome stools, checkered floor tiles, and the atmosphere of wartime America
- Retro teenager's bedroom from the 1960s, decorated with band posters, where a colorful transistor radio sits among homework, records, and teenage memorabilia
- Nostalgic family gathering in a 1950s living room, with multiple family members gathered around a large console radio during an important broadcast
Outdoor and Portable Scenarios:
- Sunny park picnic with a portable radio on a red checkered blanket, surrounded by sandwiches, a thermos, and families enjoying a weekend afternoon
- Beach scene featuring a transistor radio half-buried in sand, with sunglasses, a beach novel, and waves gently lapping in the background
- Camping adventure with a battery-powered radio glowing softly next to a campfire under a star-filled sky, tents and camping gear visible in the background
Professional and Workshop Settings:
- Radio repair shop scene where a skilled technician carefully adjusts vintage radios, surrounded by parts, tools, technical manuals, and workbench clutter
- Broadcasting station from the golden age of radio, with professional equipment, microphones, scripts, and an "ON AIR" sign glowing red
- Antique shop discovery with a rare radio among dusty treasures, creating a sense of found history and hidden value
Modern Nostalgic Contexts:
- Contemporary minimalist apartment showcasing a beautifully restored vintage radio on a floating shelf, emphasizing the contrast between old and new design sensibilities
- Coffee shop ambiance with a vintage radio playing softly among plants, books, and the warm atmosphere of community gathering
- Artist's studio where a classic radio provides inspiration, surrounded by paintings, brushes, and creative chaos
Pro Tip: Choose settings that enhance your radio's character – a 1930s cathedral radio belongs in a formal, traditional setting, while a 1960s portable radio works better in casual, youthful environments.
Frequently Asked Questions
Q: What's the best way to start drawing a radio if I'm a complete beginner?
A: Begin with simple geometric construction using light pencil lines. Start with basic rectangles and circles to establish the overall proportions, then gradually refine the shapes. Don't worry about details until you have the basic form correct. Practice drawing simple boxes and cylinders first if you're new to drawing three-dimensional objects. Remember, every professional artist started with basic shapes!
Q: How do I make my radio drawing look three-dimensional instead of flat?
A: Consistent lighting is key to creating dimension. Choose one light source direction and stick with it throughout your drawing. Use form shadows (areas turned away from light) and cast shadows (where the radio blocks light from reaching other surfaces). Pay attention to how surfaces curve away from the light source, and use gradual value transitions to show the turning of forms.
Q: What's the most challenging part of drawing a radio, and how do I handle it?
A: The tuning dial and speaker grille are typically the most complex elements. For tuning dials, start with perfect circles using a compass, then add details layer by layer – outer rim, number markings, inner face, and pointer. For speaker grilles, map out the underlying geometric pattern first, then fill in individual holes or mesh patterns while paying attention to perspective and depth.
Q: How do I choose the right reference photo for my radio drawing?
A: Look for high-resolution images with clear, directional lighting that shows form and detail well. Avoid photos with harsh flash lighting or confusing backgrounds. Multiple reference photos from different angles are ideal. Consider the era and style you want to capture – a 1940s cathedral radio requires different references than a 1960s transistor radio.
Q: Should I draw from real radios or photographs?
A: Drawing from real objects is ideal when possible, as you can see how light naturally interacts with the surfaces and observe details that photographs might miss. However, high-quality reference photos are perfectly acceptable and often more practical. If using photos, try to find images with good lighting and resolution.
Q: How long should it take to complete a radio drawing?
A: For beginners, plan for 2-4 hours for a detailed radio drawing. This includes time for planning, construction, detail work, and shading. More complex vintage radios with intricate details might take longer. Remember, rushing leads to poor results – it's better to work slowly and carefully than to hurry and make mistakes.
Q: What pencil grades work best for radio drawings?
A: Use a range of pencils for different purposes: HB or H for light construction lines, 2B for general drawing and medium tones, 4B or 6B for deep shadows and dark details. Having multiple grades allows you to create a full range of values from light gray to rich black.
Q: How do I draw different materials like wood, plastic, and metal convincingly?
A: Study how light behaves on each material: Wood grain has directional patterns and absorbs light softly, plastic has smooth gradations with sharp highlight reflections, metal creates strong contrasts with mirror-like reflections. Practice rendering different materials on scrap paper before applying techniques to your main drawing.
Q: My radio proportions always look wrong. How can I improve this?
A: Use measuring techniques consistently. Hold your pencil at arm's length to compare width to height ratios. Mark key reference points before drawing. Check proportions at every stage of your drawing, not just at the beginning. Consider using a grid system for complex subjects, and don't hesitate to make corrections – even professional artists redraw sections that aren't working.
Q: How do I add realistic wear and aging to make my radio look authentic?
A: Observe real vintage radios to see how they age naturally. Common wear patterns include: slightly rounded edges where hands have touched, faded areas exposed to sunlight, small scratches on control knobs, and dust accumulation in recessed areas. Add these details subtly – too much "aging" can look artificial.
Conclusion
Congratulations on completing this comprehensive radio drawing journey! You've not only learned to capture the physical form of these iconic devices but also connected with the rich cultural heritage they represent. From the golden age of radio broadcasting to the personal soundtrack of transistor radios, these devices have soundtracked humanity's most important moments.
The skills you've developed – precise observation, proportional accuracy, material rendering, and lighting control – will serve you well in all your future artistic endeavors. Radio drawing combines technical precision with nostalgic storytelling, making it an ideal subject for developing both your mechanical drawing skills and your ability to imbue objects with emotional resonance.
Remember that mastery comes through practice. Each radio you draw will teach you something new about form, light, and the subtle details that bring drawings to life. Don't be discouraged if your first attempts don't match your vision – even the most accomplished artists constantly refine their techniques.
Keep exploring different radio eras and styles – from the cathedral radios of the 1930s to the space-age designs of the 1960s, each period offers unique artistic challenges and rewards. Consider creating a series of radio studies that showcase the evolution of design and technology.
Most importantly, enjoy the process! Drawing should bring you satisfaction and joy. Whether you're creating detailed technical illustrations or loose, expressive sketches, you're participating in the timeless tradition of artists who find beauty and meaning in everyday objects.
Happy drawing, and keep tuning in to your artistic frequency! Your pencil is now calibrated to capture the magic of radio – use it to broadcast your own creative vision to the world.