How to Draw a Playground
Explore this step-by-step tutorial on how to draw a playground. From swings to slides, learn how to create a vibrant and fun scene through easy-to-follow instructions.
Materials You'll Need
- Pencil
- Paper
- Eraser
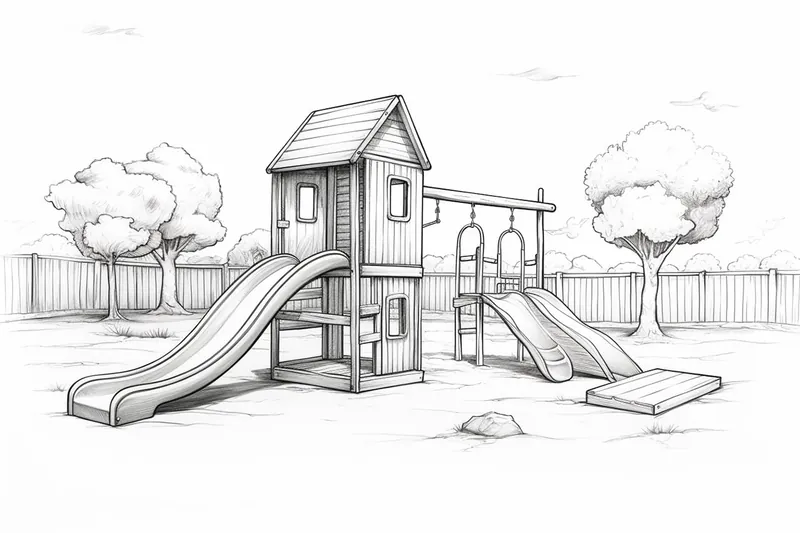
Playgrounds are vibrant spaces filled with energy, imagination, and joy. From towering slides and monkey bars to swings and sandboxes, these lively environments are not only a delight for children but also serve as fantastic subjects for artists of all ages. The variety of shapes, textures, and colorful equipment found in playgrounds offer endless opportunities to experiment with perspective, composition, and detail. Learning how to draw a playground allows you to capture the spirit of play and creativity, making your artwork both dynamic and engaging. Whether you're illustrating a scene for a children's story, designing a landscape, or simply exploring new themes in your sketchbook, drawing a playground can add a cheerful and nostalgic touch to your portfolio.
This tutorial is perfect for beginners and intermediate artists alike. We'll break down the process into simple, easy-to-follow steps, focusing on basic geometric shapes and gradually building up the complexity of the scene. You'll learn how to draw essential playground elements such as slides, swings, and climbing frames, as well as how to arrange them in a balanced composition. Along the way, we'll discuss useful techniques for adding depth and personality to your drawing, from sketching initial outlines to adding details and color. By following this guide on how to draw a playground, you'll not only improve your observational skills but also gain confidence in drawing lively outdoor scenes. So gather your drawing materials, let your creativity run free, and enjoy the playful process of bringing a playground to life on your page!
Materials Required
To draw a playground, you will need the following materials:
- Drawing paper or sketchbook
- Pencil (HB or B)
- Eraser
- Fine-tip markers or colored pencils (optional)
- Ruler (optional)
Having these materials ready will ensure you have everything you need to create a beautiful playground drawing.
Step 1: Start with a Basic Layout
Begin by sketching a simple outline for the playground. You can use a light pencil so that you can easily erase any mistakes or adjust the layout as needed. Think about the different elements you want to include, such as swings, slides, a sandbox, or a merry-go-round. Plan their placement and size, keeping in mind the overall composition of your drawing.
Step 2: Add Swings and Slides
Once you have the basic layout in place, start adding the swings and slides. Draw two vertical lines for each swing, with a horizontal line connecting them at the top. Add the swing seats by drawing small rectangles or circles attached to the vertical lines. For the slides, sketch a straight line with curves at the top and bottom to represent the ladder and slide section.
Step 3: Incorporate a Sandbox and Playhouse
To create a sandbox, draw a square or rectangular shape on the ground. Add a few lines inside to represent the texture of the sand. For the playhouse, draw a square or rectangular shape with a triangular roof on top. Add details such as windows and a door to bring it to life.
Step 4: Draw a Merry-Go-Round
Next, let's add a merry-go-round to your playground drawing. Begin by drawing a large circle on the ground. Inside the circle, sketch several horizontal lines evenly spaced apart to represent the seats. Above the circle, draw a pole with a circular top that holds the merry-go-round in place. Add handles or railings on the circle's outer edge for children to hold onto.
Step 5: Detail the Playground Equipment
Now it's time to add more details to your playground drawing. Begin by refining the shapes of the swings, slides, sandbox, playhouse, and merry-go-round. Add curves and rounded edges to make them look more realistic. Use your imagination to embellish the equipment with additional features, such as decorative patterns or color.
Step 6: Include Additional Elements
To make your playground scene more interesting, consider adding some additional elements. You could draw trees, bushes, flowers, or even a picnic area nearby. These elements will enhance the overall composition and make your drawing more visually appealing.
Step 7: Finalize the Outline
After adding all the necessary elements and details, it's time to finalize the outline of your playground drawing. Go over the entire sketch, refining the lines and shapes. Use a darker pencil or a fine-tip marker to trace the final outline, making sure to erase any unnecessary guidelines. This will give your drawing a polished and finished look.
Step 8: Add Color (Optional)
Tip: To enhance your playground drawing, consider using a reference photo or visiting a playground to observe the various elements and their proportions in real life. This will help you capture more accurate details and improve your ability to portray perspective, making your artwork more dynamic and lifelike. Additionally, pay attention to how light interacts with different surfaces and materials, as this can add depth and interest to your final piece.
If you prefer to have a colorful playground drawing, now is the time to bring it to life with markers or colored pencils. Select vibrant colors that complement each other and fill in different areas of your drawing. Add shading and highlights to create depth and dimension.
Challenge: Try expanding your playground drawing into a bustling scene filled with children at play, capturing the movement and excitement that makes these spaces so special. Focus on adding at least three different playground elements—like swings, a slide, and a climbing frame—and include children interacting with each piece in unique ways. Challenge yourself to show dynamic poses, such as a child mid-swing or climbing up a ladder, and experiment with overlapping figures and equipment to create a sense of depth and liveliness. This exercise will push you to observe gesture, spatial relationships, and storytelling, helping your artwork truly embody the joyful spirit of a playground. Have fun with colors and expressions, and don't be afraid to let your imagination guide you as you bring your playground scene to life!
Conclusion
Drawing a playground allows you to unleash your creativity and create a whimsical scene filled with fun and laughter. By following these step-by-step instructions, you can bring your vision to life on paper. Remember to start with a basic layout, add the swings and slides, incorporate other playground equipment, and finish with additional elements. Don't forget to finalize the outline, and if desired, add color to make your illustration pop. So grab your pencils and let your imagination soar as you create a playground masterpiece!
Fun Facts About Playground
- The first public playground in the United States opened in Boston in 1886, promoting safe outdoor play for children.
- Modern playgrounds often include inclusive equipment designed for children of all abilities.
- Playgrounds help children develop social, cognitive, and physical skills through unstructured play.
- Rubberized safety surfaces are now common in playgrounds to reduce injury risk from falls.
- Swings are one of the oldest playground features, dating back to ancient Greece.
- Some playgrounds are designed as adventure playgrounds, where children can build and modify structures themselves.
- Playgrounds can be found in nearly every country, reflecting local culture and design preferences.
- Research shows that access to playgrounds encourages more physical activity in children.
- Some cities have play streets, temporarily closing roads to create pop-up playgrounds.
Suggestions for Scenes and Settings for Playground Drawings
- Draw a bustling playground from a bird's-eye view, showing the arrangement of slides, swings, and climbing frames with children playing everywhere.
- Illustrate a peaceful early morning playground scene, with empty equipment and long shadows cast by the rising sun.
- Create a close-up drawing of a group of children sharing and building together in a sandbox, complete with toy buckets and shovels.
- Depict a rainy day at the playground, with puddles forming and empty swings swaying in the breeze.
- Draw a playground at sunset, with warm golden light washing over colorful slides and children playing tag.
- Imagine a fantastical playground with whimsical equipment—think slides shaped like dragons or rocket ship climbing towers.
- Show a group of friends challenging each other to a race across the monkey bars and balance beams.
- Illustrate a picnic area beside the playground, with families relaxing while kids play nearby.
- Draw a winter playground scene, with snow covering the ground and children bundled up building snowmen and using the slides.
- Capture the excitement of a playground birthday party, with balloons, decorations, and kids enjoying cake on a nearby bench.