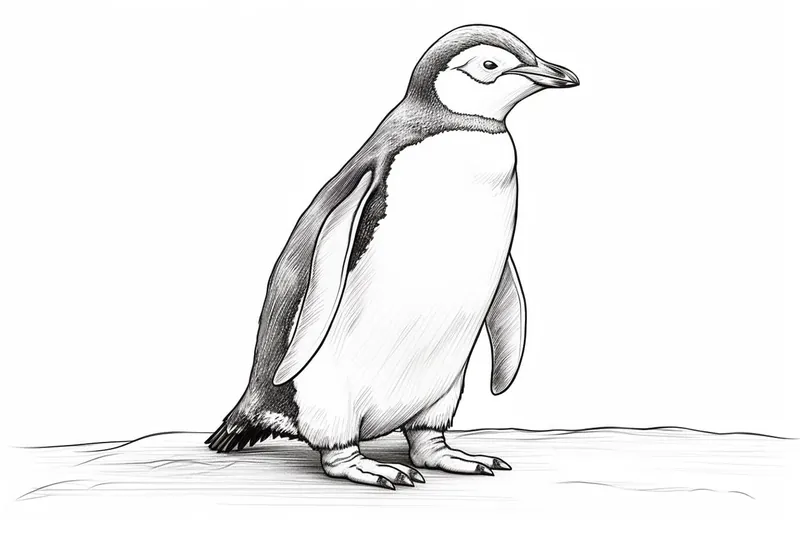
How to Draw a Penguin
Learn how to draw a penguin step by step with this detailed tutorial. Create a charming and realistic penguin drawing using simple shapes and lines.
Materials You'll Need
- Pencil
- Paper
- Eraser
Penguins are among the most beloved animals in the world, instantly recognizable by their tuxedo-like black and white feathers, charming waddle, and playful personalities. Native mainly to the Southern Hemisphere, these flightless birds have adapted to some of the planet's harshest climates, from the icy coasts of Antarctica to the rocky shores of South America and Africa. Their unique appearance and fascinating behaviors have made penguins a favorite subject in art, animation, and storytelling, appealing to both children and adults alike.
Learning how to draw a penguin is a delightful way to capture the essence of these endearing creatures. Whether you're looking to create an adorable character for a greeting card, practice your animal drawing skills, or simply enjoy a relaxing and creative project, drawing a penguin offers plenty of opportunities for both fun and learning. This tutorial is designed for artists of all skill levels, from complete beginners to those looking to refine their technique. You'll discover how breaking down the penguin's form into simple shapes and lines can make the drawing process approachable and enjoyable, while also gaining confidence in shading and adding personality to your artwork.
As you follow the steps on how to draw a penguin, remember that each artist's interpretation is unique—don't worry about making your drawing perfect! This is a wonderful chance to experiment with proportions, expressions, and poses, letting your creativity shine. So grab your pencils and paper, and let's embark on this artistic adventure together. With a little practice and patience, you'll soon have your very own charming penguin illustration to be proud of!
Materials Required
Before we begin, make sure you have the following materials ready:
- Drawing paper
- Pencil
- Eraser
- Fine-tip black marker or pen
- Colored pencils or markers (optional)
Now that you have gathered all the necessary materials, let's dive into the step-by-step process of drawing a penguin!
Step 1: Sketch the Basic Shapes
Start by drawing a large oval shape for the body of the penguin. Place it slightly towards the left side of your paper. This oval will serve as the foundation for the entire drawing.
Next, draw a smaller oval shape on top of the larger one, slightly to the right. This will be the head of the penguin. Connect the head and body with two curved lines to create the neck.
Step 2: Add the Beak and Eyes
Now, let's focus on the penguin's face. Draw a triangle shape protruding from the bottom of the head. This will be the beak. Make the base of the triangle wider, and taper it towards the tip.
Within the head shape, draw two large circles for the eyes. Leave a small gap between them, and make sure they are evenly spaced. These circles will give your penguin a cute and expressive look.
Step 3: Define the Body and Wings
To give your penguin more volume, draw two curved lines on each side of the body. These lines should start from the bottom of the head and taper towards the back of the body. These will be the outline of the wings.
Now, let's work on the belly. Draw a curved line from the bottom of the head, following the contour of the body. This line should be slightly curved upwards towards the back. Repeat the same step on the opposite side to complete the belly shape.
Step 4: Create the Flippers
Penguins have flippers instead of wings. To draw the flippers, start by drawing a small oval shape at the bottom of each curved line we drew in the previous step. These ovals should point downwards. Connect the ovals to the body with a slightly curved line to form the flippers.
Step 5: Add the Feet
The characteristic feature of penguins is their unique feet. To draw them, start by drawing two long, curved lines from the bottom of the body, extending downwards. These lines should be close to each other and slightly overlap towards the bottom.
At the end of each line, draw three short, triangular shapes to represent the toes. These toes should be wider at the base and taper towards the tips.
Step 6: Refine the Details
Now that we have established the basic shape of the penguin, it's time to add some details. Start by adding eyebrows above the eyes. These can be simple curved lines that point slightly downwards.
Next, add a small oval shape within each eye to represent the iris. Leave a small gap at the top of the iris to create a highlight, giving the eyes a lively appearance.
To add the feathers on the penguin's body, draw small, inward-curving lines along the outline of the body and wings. These lines should follow the shape of the body and taper towards the center.
Step 7: Finalize the Outline
With the main features in place, we can now finalize the overall outline of the penguin. Go over your sketch, refining the lines and making them more defined. Use a fine-tip black marker or pen to trace the final lines of your drawing. Once you are satisfied with the outline, let the ink dry, and erase any remaining pencil marks.
Step 8: Add Color (optional)
If you want to add some color to your penguin drawing, you can use colored pencils or markers. Penguins are mostly black and white, but you can also experiment with shades of gray, blue, or even yellow for the beak and feet.
Color the body and head with a combination of black, dark gray, and light gray. Leave the belly white to create contrast. Add some shading and highlights to give your penguin a three-dimensional look.
Tip: When drawing a penguin, start by sketching its body with a simple oval for the torso and a smaller circle for the head, lightly connecting them with a curved line for the neck—this helps capture the penguin's signature upright posture. Use a soft pencil (like a 2B) for these initial shapes so you can easily adjust proportions as you go. Pay attention to the placement of the flippers, which start just below the head and curve gently outward, and remember that the feet are set far back on the body, giving penguins their charming waddle. For the face, keep the eyes close together near the top of the head and experiment with different beak angles to add personality. Once you're happy with your sketch, go over your lines with a darker pencil or pen, and use gentle, layered shading to emphasize the soft, rounded look of their feathers.
Conclusion
Congratulations! You have successfully learned how to draw a penguin step by step. Starting with simple shapes and adding details gradually, you have created a charming penguin drawing. Remember to practice regularly to improve your skills and experiment with different poses and expressions.
Drawing penguins can be a delightful and relaxing experience, allowing you to explore your creativity. Whether you want to use your drawing as a standalone artwork or incorporate it into a larger piece, drawing penguins is a great way to express your artistic vision.
Fun Facts About Penguins
- Penguins are flightless birds, but they are excellent swimmers, reaching speeds up to 22 km/h in the water.
- There are 18 different species of penguins, all native to the Southern Hemisphere.
- The Emperor penguin is the tallest and heaviest of all penguin species.
- Unlike most birds, penguins have solid bones that help them dive deep underwater.
- Penguins keep warm in freezing temperatures with a layer of blubber and tightly packed feathers.
- Some penguin species, like the Galápagos penguin, live near the equator.
- Penguins communicate with each other using unique vocal calls and body language.
- Both penguin parents take turns incubating eggs and feeding chicks.
- Penguins can drink seawater thanks to a special gland that filters out salt.
Suggestions for Scenes and Settings for Penguin Drawings
- A penguin sliding joyfully down an icy slope, wings outstretched and snow flying behind.
- A group of penguins huddled together for warmth against a swirling Antarctic blizzard.
- A playful penguin diving underwater, surrounded by bubbles and shimmering fish.
- A cute baby penguin following its parent across a landscape of sparkling blue icebergs.
- A penguin holding a colorful balloon, standing on a snowy hill and looking at the sky.
- Penguins gathered around a decorated igloo, wearing scarves and party hats.
- A penguin artist painting a wintery scene on a canvas propped up on the ice.
- A pair of penguins exchanging a fish as a gift at sunset, with a pink and orange sky in the background.
- A penguin exploring a rocky shoreline, peeking curiously at seashells and tide pools.
- A superhero penguin striking a heroic pose atop a glacier, with a flowing cape in the wind.