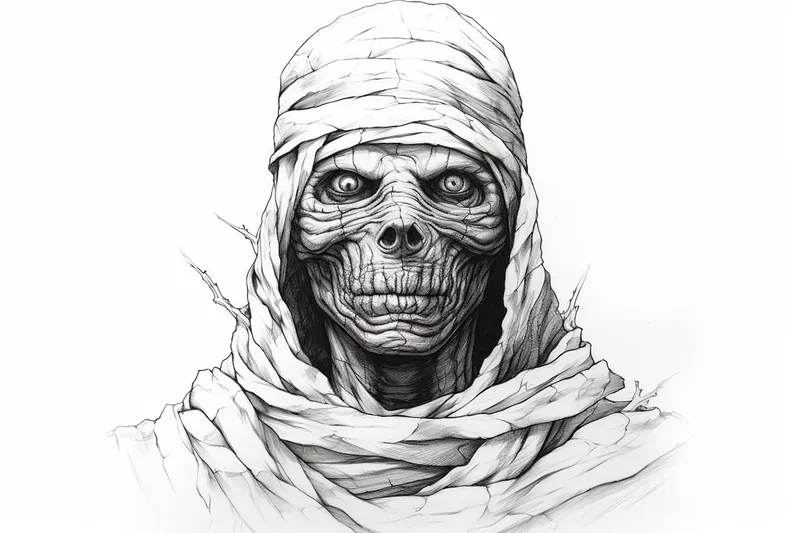
How to Draw a Mummy
Learn how to draw a mummy with this step-by-step tutorial. Create a realistic and detailed mummy drawing by following these simple instructions.
Materials You'll Need
- Pencil
- Paper
- Eraser
Welcome to this comprehensive tutorial on how to draw a mummy! Mummies have long fascinated people with their mysterious origins, dating back thousands of years to ancient Egypt, where they were carefully preserved to ensure safe passage to the afterlife. Today, mummies have become iconic figures in popular culture, frequently appearing in movies, comics, and Halloween decorations. Drawing a mummy is a great way to explore both history and your creative skills, as you bring to life the intricate bandages and haunting expressions that make these figures so captivating.
Learning how to draw a mummy can be especially appealing for anyone interested in ancient civilizations, horror themes, or simply looking to expand their repertoire of mythical and legendary creatures. This subject is perfect for artists of all skill levels—whether you're a beginner eager to practice basic shapes and lines, or an experienced artist wanting to experiment with texture and shading techniques. In this tutorial, you'll discover how to break down the mummy's form into manageable steps, focusing on building its structure, wrapping it in realistic bandages, and adding finishing touches for a dramatic effect.
Don't worry if this is your first time attempting a subject like this—the process will be broken down into clear, easy-to-follow stages. With a little patience and practice, you'll find that drawing a mummy is both fun and rewarding. So gather your materials, unleash your imagination, and let's get started on creating your very own mummy masterpiece!
Materials Required
Before we begin, make sure you have the following materials ready:
- Drawing paper or sketchbook
- Pencil
- Eraser
- Fine-tip markers or pens (optional)
- Colored pencils or markers (optional)
Now that you have your materials ready, let's dive into the steps!
Step 1: Basic Shape
Start by drawing a vertical line slightly off-center on your paper. This line will act as a guide for the mummy's body alignment. Next, draw a horizontal line intersecting the vertical line at the midpoint. This horizontal line will help you position the mummy's facial features accurately.
Step 2: Head and Facial Features
At the top of the vertical line, draw a circle to represent the mummy's head. Then, using the horizontal line as a guide, draw two oval shapes on either side of the vertical line. These ovals will serve as the mummy's eyes.
Below the eyes, draw a horizontal line to indicate the placement of the mummy's bandages. Add horizontal curved lines across the face to represent the wrapping of the bandages. Make sure to leave gaps for the eyes and the mouth.
Step 3: Eyes and Wrinkles
Within the oval shapes, draw smaller circles for the mummy's pupils. Leave a small white dot in each pupil to create a sense of reflection. Add a few horizontal lines above and below the eyes to represent wrinkles on the mummy's forehead and under the eyes.
Step 4: Nose, Mouth, and Teeth
Draw a small triangular shape beneath the eyes to form the mummy's nose. Below the nose, draw a horizontal line as a guide for the mouth. Add a series of small, jagged lines within this shape to create the illusion of bandaged teeth.
Step 5: Ears and Hair
On either side of the head, draw semi-circular shapes to represent the mummy's ears. Add some angled lines within the ears to indicate the bandages. Then, draw a few hair strands peeping out from under the bandages. Make them uneven and messy to give your mummy a more rugged look.
Step 6: Torso and Bandages
Start drawing the mummy's body by extending two lines down from the bottom of the head. These lines will form the sides of the mummy's torso. Connect them at the bottom with a horizontal line to complete the torso shape.
Draw vertical lines across the torso to create the appearance of wrapped bandages. Vary the width and spacing of the lines to add depth and texture to your drawing.
Step 7: Arms and Hands
Extend two lines from the sides of the torso to create the mummy's arms. At the end of each arm, draw a rectangular shape for the hands. Add extra lines within the hands to indicate fingers and creases in the bandages.
Step 8: Legs and Feet
Similar to the arms, extend two lines downward from the bottom of the torso to form the mummy's legs. At the end of each leg, draw a rectangular shape for the feet. Again, add extra lines to represent the bandages and toes.
Step 9: Details and Texture
Now that you have the basic outline of the mummy, it's time to add some texture and details. Use your pencil or fine-tip markers to draw irregular lines and shapes across the bandages to give them a weathered and ancient appearance. Don't be afraid to experiment with different patterns and textures to make your mummy drawing more interesting.
Step 10: Final Touches and Shading
To bring your mummy drawing to life, add some shading to create dimension. Identify the light source in your drawing and darken the areas that would be in shadow accordingly. Use your pencils or colored markers to add depth and shading to the bandages, as well as to the mummy's face and body.
Did You Know?: Ancient Egyptian mummies were often wrapped in hundreds of yards of linen, with each finger and toe individually bound before the rest of the body was swathed, creating the layered, textured look we associate with mummies today. This elaborate process could take up to 70 days and included not only wrapping but also placing amulets and charms between the bandages for spiritual protection. When drawing your mummy, imagine the hidden stories beneath each layer, and use varied line thickness and overlapping wraps to suggest the careful, ritualistic craftsmanship of ancient embalmers. Adding these subtle details can make your artwork feel both more authentic and mysterious!
Tip: When drawing a mummy, focus on the texture of the bandages to convey a sense of age and decay. Use a combination of soft and hard pencils; start with a softer pencil (like a 2B) for sketching the basic forms and outlines, which will allow you to create gentle curves and shapes. Once you're satisfied with the basic structure, switch to a harder pencil (like an HB) for adding fine details and shadows, particularly where the bandages overlap. Use short, quick strokes to mimic the frayed edges of the wrappings, and consider using a blending stump to soften the lines for a more realistic effect. Lastly, don't be afraid to experiment with shading techniques to highlight the mummy's haunting expression and give depth to the folds of the bandages—this will bring your artwork to life!
Conclusion
Congratulations! You have successfully learned how to draw a mummy from start to finish. By following these step-by-step instructions and adding your own creative touches, you can create a unique and captivating mummy drawing. Remember to practice regularly and have fun with your artwork.
I hope you found this guide helpful in your drawing journey. Remember, the key to improving your drawing skills is practice and patience. So keep sketching, and soon you'll be able to master more complex subjects. Happy drawing!
Fun Facts About Mummy
- The word mummy comes from the Persian word "mummiya," meaning "bitumen," which was once believed to be used in the preservation process.
- Ancient Egyptians began mummifying their dead as early as 3500 BCE to ensure safe passage to the afterlife.
- Not all mummies are Egyptian—mummification has been practiced in cultures worldwide, including in Chile's Chinchorro culture and ancient China.
- The process of mummification could take up to 70 days and involved removing internal organs and drying the body with natron salt.
- Some animal species, such as cats and crocodiles, were also mummified in ancient Egypt as offerings to the gods.
- The most famous mummy is probably King Tutankhamun, whose tomb was discovered nearly intact in 1922.
- Mummies have inspired countless movies and books, becoming iconic figures in horror and adventure genres.
- Natural mummification can occur in extremely dry, cold, or acidic environments, as seen with the Ötzi the Iceman found in the Alps.
- Victorian-era Europeans sometimes held "mummy unwrapping parties," where real mummies were unwrapped for entertainment.
Suggestions for Scenes and Settings for Mummy Drawings
- A mummy emerging from a shadowy ancient Egyptian tomb filled with hieroglyphics and treasure chests.
- A spooky Halloween night where a mummy shuffles through a foggy graveyard under a full moon.
- A comical scene of a mummy struggling to re-wrap its bandages after they get tangled up with a curious black cat.
- A mummy standing guard in a grand pharaoh's burial chamber, surrounded by golden artifacts and statues.
- A modern-day setting where a mummy rides the subway, startling passengers with its ancient appearance.
- A mummy chasing mischievous children at a costume party, blending in among other monsters and creatures.
- An action-packed scene of a mummy fending off treasure hunters with magical, glowing bandages.
- A friendly mummy helping a young explorer solve ancient puzzles in a secret pyramid passageway.
- A mummy lost in a museum exhibit, confused by glass cases and curious visitors pointing and taking photos.
- A dramatic desert landscape with a mummy wandering among sand dunes, guided by starlight and ancient spirits.