How to Draw a Kuvasz
Learn how to draw a Kuvasz, a majestic and elegant dog breed, with this step-by-step tutorial. Create a realistic portrait of a Kuvasz using graphite pencils.
Materials You'll Need
- Pencil
- Paper
- Eraser
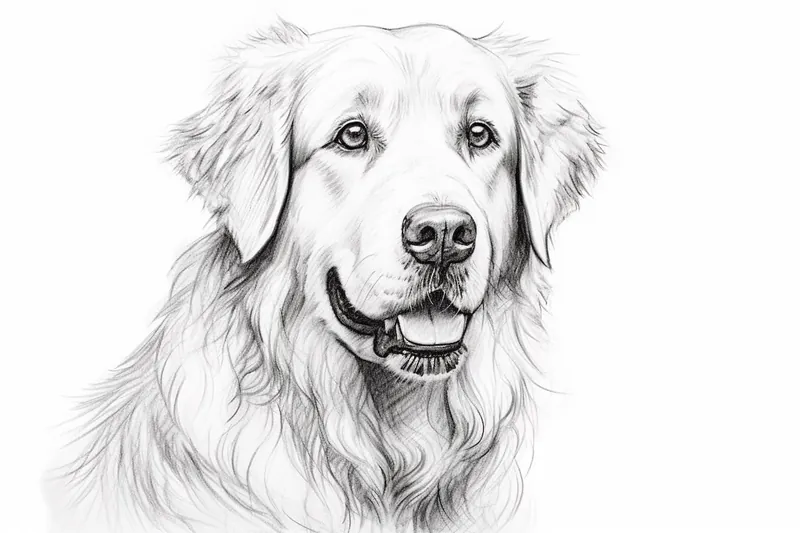
The Kuvasz is a striking and noble breed, known for its powerful build, thick white coat, and gentle yet protective demeanor. Originally bred in Hungary as a livestock guardian dog, the Kuvasz has a rich history and is admired for its intelligence, loyalty, and grace. Capturing the unique features of the Kuvasz, such as its expressive eyes, fluffy fur, and regal posture, can be both an enjoyable and rewarding artistic challenge. Learning how to draw a Kuvasz allows you to appreciate the breed's distinct characteristics while developing your observation and drawing skills.
People may be inspired to draw a Kuvasz for many reasons—whether you are a dog lover wanting to pay tribute to this beautiful breed, a pet owner capturing your companion's likeness, or an artist seeking to practice drawing realistic animals. This tutorial is designed to be accessible for all skill levels, from beginners to more advanced artists. We will break down the drawing process into simple, manageable steps, focusing on essential techniques like sketching basic shapes, layering details, and rendering texture to portray the Kuvasz's fluffy coat. By following this guide on how to draw a Kuvasz, you'll gain confidence in rendering lifelike animals and improve your overall artistic technique.
Remember, every artist starts somewhere, and each drawing is a step forward in your creative journey. Don't worry if your first attempt isn't perfect—the most important thing is to enjoy the process and learn as you go. Gather your materials, take your time with each step, and soon you'll have a charming and realistic Kuvasz drawing to be proud of. Let's dive in and bring this majestic dog to life on paper!
Materials Required
Before we begin, make sure you have the following materials ready:
- Drawing paper or sketchbook
- Pencils (preferably graphite) of different hardness (e.g., HB, 2B, 4B)
- Eraser (preferably a kneaded eraser)
- Pencil sharpener
- Blending stump or tortillon
- Reference photo of a Kuvasz (you can find one online or use a book)
Now that you have all your materials ready, let's dive into the step-by-step process of drawing a Kuvasz.
Step 1: Sketch the Basic Shapes
Start by lightly sketching the basic shapes that make up the Kuvasz's body. Begin with an oval shape for the head, followed by a rectangular shape for the body. Add circles for the joints and simple lines for the legs. Remember to keep these guidelines light, as they will be erased later.
Step 2: Define the Head and Facial Features
Using the oval shape as a guide, start adding more detail to the head. Sketch the ears, eyes, and nose, paying close attention to their placement and proportions. Kuvasz dogs have almond-shaped eyes and a straight, prominent nose. Take your time to capture these features accurately.
Step 3: Outline the Body and Legs
Using the rectangle shape as a guide, start outlining the body of the Kuvasz. Pay attention to the contours and curves of the dog's muscular body. Add more definition to the legs by sketching the shape of the muscles and joints. Remember to compare the proportions to your reference photo regularly.
Step 4: Add Fur Details
Tip: As you work through the drawing process, remember to regularly step back and assess your progress from a distance; this will help you better gauge proportions and overall balance in your artwork. Additionally, taking short breaks can refresh your perspective and enhance your ability to spot areas that need adjustment, ensuring a more refined final piece.
Kuvasz dogs have a beautiful, long, and fluffy coat. To capture this, start sketching the fur details using light, feathery strokes. Focus on the direction of the fur growth and add texture to create a realistic effect. Use a softer pencil, such as a 4B, to achieve darker and more defined fur areas.
Step 5: Refine the Facial Features
Now it's time to refine the facial features of the Kuvasz. Use darker pencil strokes to add depth and shading to the eyes, nose, and mouth. Pay attention to the highlights and shadows, as they play a crucial role in creating a three-dimensional effect. Take your time to capture the expression and unique characteristics of the breed.
Step 6: Work on the Body and Legs
Continue adding depth and shading to the body and legs of the Kuvasz. Observe the reference photo closely to capture the correct muscle definition and contours. Use various pencil hardnesses to achieve different tones and textures. Remember to blend the pencil strokes with a blending stump or tortillon to create a smooth and seamless look.
Step 7: Finalize the Details
Take a step back and evaluate your drawing. Look for any areas that need refinement or adjustment. Add more contrast and depth to the fur by darkening the shadows and adding highlights. Pay attention to smaller details like the paws, tail, and facial expressions. Take your time with this step to ensure the best possible outcome.
Step 8: Erase Guidelines and Clean Up
Once you are satisfied with the overall drawing, carefully erase any remaining guidelines and unnecessary pencil marks. Use a kneaded eraser to lift off excess graphite and create clean highlights. Take your time with this step and pay attention to detail, as it can significantly improve the final result.
Mistake Alert: A common mistake when drawing a Kuvasz is making the fur look too stiff or uniform, which can happen if you use short, repetitive strokes or outline the fur in a rigid, even pattern. This often occurs because beginners try to capture the fluffy texture by drawing every hair, rather than focusing on the overall flow and volume of the coat. To avoid this, step back and observe how the Kuvasz's fur naturally falls in soft, layered tufts, especially around the neck, chest, and tail. Use longer, varied pencil strokes that follow the direction of the fur, and remember to leave some areas lighter to suggest fluffiness and depth—this will help your Kuvasz look more dynamic and true to life!
Conclusion
Congratulations! You have successfully learned how to draw a Kuvasz. By following these step-by-step instructions, practicing patience, and paying attention to details, you can create a stunning and realistic drawing of this beautiful breed. Remember to use a reference photo and take breaks if needed. Enjoy the process and have fun with your artwork!
Fun Facts About Kuvasz
- The Kuvasz is an ancient Hungarian breed, with roots tracing back to the Middle Ages as a royal guard dog.
- Known for their striking white coats, Kuvasz dogs were bred to blend in with sheep flocks and protect them from predators.
- Kuvasz are highly intelligent and independent, making them excellent problem-solvers but sometimes challenging to train.
- This breed is renowned for its loyalty and protective instincts toward family members.
- Kuvasz dogs have a double coat that helps them withstand harsh weather conditions.
- They are large dogs, with males often weighing between 100 and 115 pounds.
- The Kuvasz is considered a national treasure in Hungary and is featured in Hungarian folklore.
- Despite their size and strength, Kuvasz can be gentle and affectionate with children.
- They require early socialization and consistent training to become well-mannered companions.
- Kuvasz dogs have a life expectancy of 10 to 12 years.
Suggestions for Scenes and Settings for Kuvasz Drawings
- A Kuvasz standing proudly on a grassy Hungarian hillside, overlooking a flock of sheep.
- A close-up portrait highlighting the Kuvasz's expressive eyes and fluffy white fur.
- A playful Kuvasz rolling in the snow, capturing the texture of its thick coat.
- A Kuvasz sitting majestically beside a rustic wooden fence at sunset.
- A Kuvasz and a child sharing a gentle moment, emphasizing the breed's loyal and protective nature.
- A Kuvasz running through a field of wildflowers, ears flapping and fur catching the breeze.
- A Kuvasz resting under the shade of a tree, with dappled sunlight on its coat.
- A Kuvasz on guard at the entrance to a farmhouse, alert and attentive.
- Two Kuvasz dogs playfully interacting in a snowy landscape.
- A Kuvasz gazing thoughtfully into the distance, with mountains in the background.