How to Draw a Komondor
Learn how to draw a Komondor with this step-by-step tutorial. Explore the unique challenges of capturing the corded coat of this breed in your artwork.
Materials You'll Need
- Pencil
- Paper
- Eraser
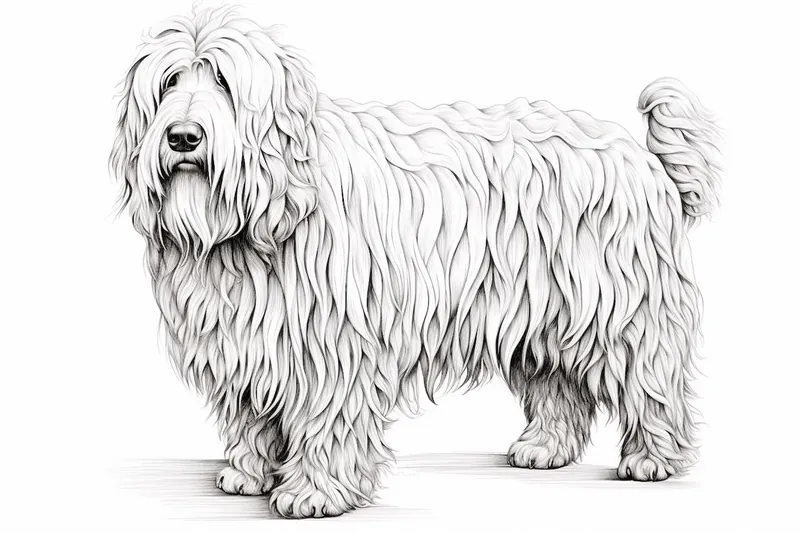
The Komondor, often called the "mop dog," is one of the most distinctive and fascinating dog breeds in the world. Native to Hungary, this majestic livestock guardian is instantly recognizable by its long, corded coat that resembles thick, twisted ropes or dreadlocks. Drawing a Komondor is not only an opportunity to capture its unusual appearance but also to practice rendering texture, movement, and volume in your art. Many artists are drawn to this breed because of its unique look, making it a rewarding subject for both beginners eager to develop their skills and experienced illustrators seeking a new challenge.
In this comprehensive tutorial on how to draw a komondor, we will break down the process into manageable steps that will help you master both the basic anatomy of the dog and the intricate detailing of its coat. You'll learn how to sketch the overall body shape, position the Komondor in a dynamic pose, and use different shading techniques to create the illusion of its iconic cords. Drawing a Komondor is a great way to improve your observation skills, practice patience, and experiment with line work and texture. Whether you want to create a realistic portrait or a stylized interpretation, this tutorial is designed to support artists of all skill levels.
So gather your drawing materials and get ready to embark on a creative journey. With a bit of practice and attention to detail, you'll be amazed at what you can achieve. Remember, every artist develops their style and technique with time, so don't be afraid to make mistakes and have fun along the way. Let's dive in and discover the joy of learning how to draw a komondor together!
Materials Required
Before we begin, make sure you have the following materials:
- [Drawing paper or sketchbook](https://yonderoo.com/best-sketchbooks-for-artists/)
- Pencil or graphite sticks (ranging from 2B to 6B)
- Eraser
- Fine-tipped pens for outlining
- Reference photo of a Komondor (optional but recommended)
- Patience and enthusiasm!
Step 1: Start with Basic Shapes
To begin, let's break down the complex body structure of the Komondor into simple shapes. Start by lightly drawing a large oval shape for the body, and add a smaller oval for the head. These shapes will serve as the foundation for the dog's overall proportions.
Step 2: Outline the Head
Using the smaller oval as a guide, begin outlining the head of the Komondor. Pay close attention to the shape of the snout and the placement of the eyes and ears. Take your time to get these details right, as they play a crucial role in capturing the breed's unique characteristics.
Step 3: Define the Facial Features
With the basic head shape outlined, it's time to add more details to the face. Start by sketching the eyes, making sure to place them evenly on either side of the head. Then, draw the nose and the mouth, paying attention to their proportions and position on the snout. Once you're satisfied with the placement, refine the shape of the ears.
Step 4: Draw the Body
Tip: As you work on your drawing of a Komondor, consider using a variety of pencil pressures and strokes to enhance the texture of its corded coat; this will help you avoid a flat appearance and create a more dynamic, lifelike representation. Experiment with lighter lines for the finer details and darker, bolder strokes for the thicker cords, ensuring that you capture the natural variations in the coat's texture and flow.
Moving on to the body, use the larger oval as a guide and start sketching the outline. Take note of the Komondor's muscular build and the natural curve of its back. Add the legs, keeping in mind their proportion to the body. Take your time to get the shape and positioning right before moving on.
Step 5: Outline the Cords
Now comes the fun part! The Komondor's most distinctive feature is its corded coat, which gives it a woolly appearance. To capture this unique texture, we will outline the cords. Start by drawing long, thin wavy lines from the head down to the body, following the contours of the dog's shape. Repeat this process across the entire body, ensuring that the cords are evenly distributed.
Step 6: Add Depth and Detail
To make your drawing more lifelike, it's important to add depth and detail to the Komondor's coat. Use shading techniques to create shadows and highlights, enhancing the three-dimensional appearance of the cords. Pay attention to the direction of the light source in your reference photo, as this will affect the placement of shadows. Gradually build up the layers of shading, starting with lighter tones and gradually adding darker ones.
Step 7: Refine and Finalize
Once you are satisfied with the overall structure and details, take a step back and evaluate your drawing. Make any necessary adjustments to ensure accuracy and proportion. Clean up any stray lines or smudges with an eraser. If you're feeling adventurous, you can even add a background or other elements to complement your drawing.
Mistake Alert: A frequent mistake when drawing a Komondor is making the cords of its coat look too uniform, straight, or evenly spaced, which can flatten the image and make it appear unnatural. This usually happens because beginners try to simplify the complex texture by repeating the same shapes or lines throughout the coat. To avoid this, observe reference photos closely and notice how the cords vary in thickness, direction, and overlap, particularly around the face, legs, and body curves. Use looser, varied strokes and allow some cords to cross or bunch together in places—this creates a more dynamic, realistic texture and helps convey the unique, layered look of the Komondor's fur.
Conclusion
Congratulations on completing your drawing of a Komondor! By following these step-by-step instructions, you have successfully captured the unique characteristics of this beautiful breed. Remember, practice makes perfect, so don't be discouraged if your first attempt doesn't turn out exactly as you envisioned. Keep refining your skills and experimenting with different techniques, and you'll soon be able to create stunning portraits of any subject. Happy drawing!
Fun Facts About Komondor
- The Komondor is famous for its distinctive corded coat, which resembles dreadlocks and helps protect it from harsh weather and predators.
- This breed originated in Hungary, where it was traditionally used to guard livestock.
- Komondors are known for their independence and strong protective instincts, making them excellent guard dogs.
- Their unique coat requires special grooming to prevent matting, as puppy coats begin matting into cords at 8-10 months old, requiring specialized care according to Hill's Pet.
- Despite their large size and imposing appearance, Komondors are generally calm and affectionate with their families.
- The breed is sometimes called the "mop dog" because of its long, corded fur.
- Komondors have been declared a national treasure in Hungary.
- They are a rare breed, with only a few thousand registered worldwide.
- Komondor puppies are born with straight, fluffy coats that begin to form cords as they mature.
Suggestions for Scenes and Settings for Komondor Drawings
- A Komondor herding sheep across a grassy Hungarian plain, its cords flowing in the wind.
- A close-up portrait of a Komondor with its unique corded coat wet and glistening after a playful swim.
- A Komondor puppy surrounded by a tangle of playful cords, sitting beside a pair of muddy boots.
- A majestic Komondor standing guard by an old wooden barn at sunrise, mist curling around its feet.
- A stylized, whimsical Komondor leaping through a field of wildflowers, cords bouncing with movement.
- A Komondor napping peacefully on a cozy rug inside a rustic farmhouse, sunlight streaming through the window.
- A winter scene with a Komondor bounding through the snow, its coat blending into the white landscape.
- A Komondor playfully interacting with children in a backyard, its cords being gently tugged and admired.
- A fantasy setting with a Komondor as a magical guardian, its cords sparkling with mystical energy beneath a starry sky.
- A Komondor in an urban park, standing out among other city dogs because of its extraordinary appearance.