How to Draw a Frankenstein
Learn how to draw a Frankenstein with this step-by-step tutorial. Create a spooky masterpiece and capture the essence of this classic character.
Materials You'll Need
- Pencil
- Paper
- Eraser
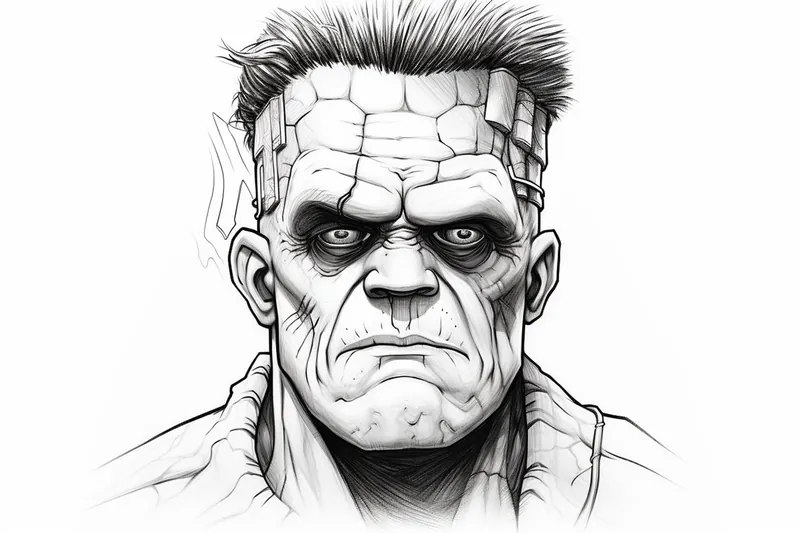
Few figures in popular culture are as instantly recognizable and enduring as Frankenstein's monster. Originally brought to life in Mary Shelley's classic 1818 novel, this patchwork giant—with his square head, prominent brow, and neck bolts—has inspired countless adaptations and continues to be a staple of Halloween artwork, movies, and comics. Whether you're a fan of classic horror, looking for a fun and spooky art project, or simply want to add a legendary character to your sketchbook, learning how to draw a frankenstein is both an exciting and rewarding artistic challenge.
This tutorial is suitable for artists of all skill levels, from beginners eager to practice basic shapes, shading, and facial expressions to more advanced illustrators aiming to put their own twist on a timeless monster. We will break down the process into simple, manageable steps—focusing on Frankenstein's unique features, such as his stitched skin, heavy brow, and iconic bolts—while also exploring ways to add personality and detail to your drawing. Along the way, you'll get tips on using different pencils for shading and texture, as well as advice on how to outline your masterpiece with pens or markers for a bold, finished look.
Don't worry if you've never drawn a monster before—this guide will lead you through each stage, making it easy and fun to follow along. By the end, you'll have a striking Frankenstein's monster to show off to your friends or display as part of your own spooky art collection. Grab your drawing materials, get comfortable, and let's bring this legendary creature to life together!
Materials Required
To draw Frankenstein, you will need the following materials:
- Drawing paper
- Pencils (HB, 2B, and 4B)
- Eraser
- Sharpener
- Black marker or pen
- Colored pencils or markers (optional)
Now that you have all your materials ready, let's delve into the steps of drawing Frankenstein!
Step 1: Sketch the Basic Shape
Begin by sketching a rough oval shape for the head of Frankenstein. This will serve as the base for the rest of the drawing. Lightly sketch a vertical line down the center of the oval to help you with the facial features placement.
Step 2: Add Facial Features
Using the vertical line as a guide, sketch in the eyes, nose, and mouth. Frankenstein's eyes are usually quite large and sunken, so make sure to capture that characteristic. Don't forget to add some jagged scars or stitches around the forehead and cheeks to give him that iconic look.
Step 3: Define the Hairline
Tip: As you work through each step of drawing Frankenstein, don't hesitate to keep your sketches light and loose initially; this will allow you to make adjustments easily as you refine the features and details. Once you're satisfied with the overall composition, you can gradually darken the lines and add texture with shading to bring your creation to life. Remember, practice is key, so embrace the process and let your artistic style shine through!
Frankenstein is known for his wild and untamed hair. Sketch in the hairline around the head using short, crisscrossing lines to add texture and volume. Make the hairline uneven and exaggerated to create a more dramatic effect.
Step 4: Draw the Neck and Shoulders
Extend two lines down from the base of the head to create the neck. Then, sketch the broad shoulders by adding sloping lines on either side of the neck. Frankenstein is a large and imposing character, so be sure to capture that in your drawing.
Step 5: Outline the Body
Sketch the outline of Frankenstein's body by adding in the basic shapes for the torso, arms, and legs. Remember to keep the proportions in mind as you draw. With his square-shaped head, Frankenstein should have a strong and robust body to match.
Step 6: Add Details to the Face
Now it's time to add more details to Frankenstein's face. Darken the eyes, giving them a hollow appearance by shading around them. Add wrinkles and creases to the forehead and around the mouth to emphasize his age and the stitches on his face. Don't forget to sketch in his bushy eyebrows as well.
Step 7: Define the Clothing
Sketch in Frankenstein's clothing, which usually consists of a tattered suit or lab coat. Add torn edges and patches to give it a worn-out look. Remember to draw the details such as buttons or pockets to add more realism to your drawing.
Step 8: Refine the Hair
Go back to Frankenstein's hair and start adding more details to make it look wild and unruly. Use your pencils to create different shades of darkness and texture to bring the hair to life. Make sure to vary the length and thickness of the hair strands for a more natural appearance.
Step 9: Shade the Face and Clothing
Using your pencils, begin shading the face and clothing. Start with lighter strokes and gradually build up the darkness to create depth and dimension. Pay attention to where the light is coming from to create highlights and shadows in the appropriate areas.
Step 10: Finalize the Details
Now that you have the main elements of your Frankenstein drawing complete, it's time to add any final details. Darken the outline of the body, refine the features of the face, and add any additional touches that will enhance your drawing.
And there you have it! Your very own Frankenstein drawing. Take a step back and admire your creation. Don't be afraid to experiment with different techniques or add your own unique flair to make it truly your own.
Did You Know?: Frankenstein's monster, as we picture him today, owes much of his iconic look to the 1931 Universal Pictures film starring Boris Karloff—before that, Mary Shelley's original novel described the creature quite differently, with yellowish skin that barely concealed the muscles and blood vessels underneath, and long flowing hair. The famous flat-topped head, heavy brow, and neck bolts were creative inventions by makeup artist Jack Pierce, designed to make the monster appear both unnatural and sympathetic on screen. When you're drawing Frankenstein, you're not just recreating a character—you're reimagining a blend of literary and cinematic history that's evolved for over 200 years! Thinking about his unique origins can inspire you to play with features, textures, and expressions to make your own Frankenstein truly stand out.
Conclusion
Drawing Frankenstein can be a fun and challenging experience. By following the step-by-step instructions in this tutorial, you can create a spooky and impressive drawing of this iconic character. Remember to take your time, be patient, and don't be afraid to make mistakes along the way. Happy drawing!
Fun Facts About Frankenstein
- Mary Shelley wrote Frankenstein when she was just 18 years old.
- The monster is never named "Frankenstein" in the novel; Frankenstein is actually the name of the scientist, Victor Frankenstein.
- Frankenstein is considered by many to be the first true science fiction novel.
- The story was inspired by a ghost story contest during a rainy summer in 1816.
- The first film adaptation of Frankenstein was a silent short made by Edison Studios in 1910.
- Frankenstein's monster is often depicted with bolts in his neck, but this detail was added by movies, not the original book.
- Mary Shelley's mother was the famous feminist writer Mary Wollstonecraft.
- The novel explores themes of science, ethics, and humanity that are still relevant today.
- Frankenstein has never been out of print since its publication.
Suggestions for Scenes and Settings for Frankenstein Drawings
- Frankenstein's monster awakening on the laboratory table, surrounded by flickering lightning and scientific equipment.
- The monster wandering alone through a misty graveyard at night, with ancient tombstones and twisted trees.
- Frankenstein's monster encountering a frightened villager or child in a foggy forest clearing.
- A dramatic close-up of the monster's stitched face, focusing on expressive eyes and textured scars.
- Frankenstein's monster sitting by a fire in a lonely cabin, reflecting on his existence.
- The monster being chased by torch-wielding villagers through a shadowy village street.
- A humorous scene of Frankenstein's monster getting ready for Halloween, maybe trying on different hats or costumes.
- The monster reading a book or gazing thoughtfully out a window, showing a softer side.
- Frankenstein's monster standing atop a hill, arms outstretched toward a stormy sky filled with lightning.
- A group portrait of the monster with his creator, Victor Frankenstein, in the eerie laboratory.