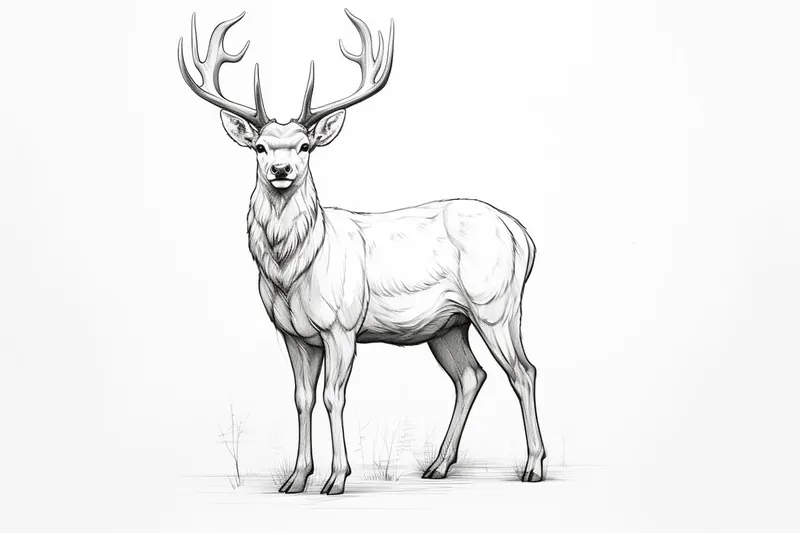
How to Draw a Buck
Learn how to draw a buck with this step-by-step guide. Capture the grace and strength of this majestic animal in your artwork. Perfect for artists of all levels.
Materials You'll Need
- Pencil
- Paper
- Eraser
Drawing a buck—a mature male deer known for its impressive antlers and graceful stature—is a fantastic way to explore the beauty of wildlife art. Bucks are often symbols of strength, nobility, and the quiet majesty of nature, making them a favorite subject for both beginners and experienced artists. By learning how to draw a buck, you not only practice capturing the unique proportions and features of these stunning animals, but you also develop an appreciation for their role in forests and fields. Many artists are drawn to bucks because of their striking silhouettes and the challenge of rendering their antlers, which can be intricate and expressive. Whether you are inspired by the peacefulness of a deer in the woods or the thrill of wildlife illustration, a buck makes a compelling and dynamic subject.
This tutorial on how to draw a buck is designed to be accessible to artists of all levels. If you are just starting out, you will find the step-by-step instructions easy to follow, focusing on basic shapes and guidelines to build the buck's form before adding details. For those with more experience, this guide offers tips on shading, texture, and capturing the lifelike quality of fur and antlers. You will have the opportunity to experiment with different pencil grades to create depth and contrast, and to refine your observation skills by studying reference images. Drawing a buck can help improve your understanding of animal anatomy and proportions, which are valuable skills for any artist interested in wildlife art.
So gather your materials and get ready to dive in! Remember, each artist brings a unique perspective to their work, and your version of a buck will be one of a kind. With patience and practice, you'll discover just how rewarding and enjoyable it can be to bring such a majestic creature to life on paper. Let's embark on this artistic journey together—your adventure in learning how to draw a buck starts now!
Step 1: Start with Basic Shapes
Begin by lightly sketching a large oval shape for the body of the buck. This will act as a guideline for the overall proportions. Next, add two small circles for the head and a larger oval for the hindquarters. These basic shapes will serve as a foundation for the buck's body structure.
Step 2: Define the Head and Antlers
Refine the shape of the head by adding more detail. Pay attention to the placement of the eyes, ears, and muzzle. Remember, a buck's antlers are a prominent feature, so use long curved lines to sketch their general shape. Focus on capturing the symmetry and balance between the antlers.
Step 3: Outline the Body
Using the basic shapes as a guide, carefully outline the neck, chest, and back of the buck. Pay attention to the contours and muscular structure of the animal. Use light, fluid strokes to maintain flexibility in your drawing. Remember, it's always easier to darken lines later than to erase heavy lines.
Step 4: Add Details
Tip: As you progress through the steps of drawing a buck, consider using a variety of reference images to capture different angles, poses, and lighting conditions; this will enhance your understanding of the animal's anatomy and unique features. Observing how light interacts with the buck's form will also greatly aid in achieving realistic shading and depth in your artwork.
Start adding finer details to your drawing. Observe the texture and patterns of a buck's fur, then use light strokes to indicate this texture. Pay attention to the direction in which the fur flows and use reference images to ensure accuracy. Don't forget to add the hooves and tail, as they complete the overall look of the buck.
Step 5: Shade and Add Depth
Now it's time to add shading and depth to your drawing. Start by identifying the light source and applying shading accordingly. Use the various grades of your pencil to create different tones and values. Gradually build up the shading, focusing on the areas that are darker and receding into the distance. Take your time with this step and remember to blend the graphite for a smooth transition.
Step 6: Refine and Enhance
Take a step back and assess your drawing. Look for any areas that need refinement or additional detail. You can use your eraser to lift graphite and create highlights. Pay attention to the nuances of the buck's features, such as its eye, nose, and antlers. Take your time to capture these intricate details, as they will add depth and realism to your drawing.
Step 7: Finalize the Drawing
Finish off your drawing by refining any remaining details and adding any additional shading or highlights. Ensure that the proportions are accurate and that the overall composition is pleasing to the eye. Once you're satisfied with your work, carefully erase any remaining construction lines.
Congratulations! You have successfully completed your drawing of a buck. With practice, you'll continue to improve your skills and develop your own unique style.
Conclusion
Drawing a buck allows you to appreciate the beauty of nature while honing your artistic abilities. I hope this step-by-step guide has provided you with the necessary guidance to create a stunning representation of this majestic animal. Remember to be patient, practice regularly, and most importantly, have fun with your art!
Fun Facts About Bucks
- The term buck refers to a male deer, especially in species like white-tailed and mule deer.
- Bucks grow and shed their antlers every year, with new antlers typically starting to grow in spring.
- Antlers are made of bone and can grow up to one inch per day during peak growth periods.
- Bucks use their antlers to compete for mates during the breeding season, known as the rut.
- The size and number of points on a buck's antlers are influenced by age, genetics, and nutrition.
- Bucks have a keen sense of smell and hearing, helping them detect predators and stay safe in the wild.
- White-tailed bucks can run up to 30 miles per hour to escape danger.
- During winter, bucks often form small bachelor groups after the breeding season ends.
- Bucks play a vital role in maintaining healthy ecosystems by influencing plant growth and providing food for predators.
Suggestions for Scenes and Settings for Buck Drawings
- A buck standing majestically on a misty forest clearing at dawn.
- A dynamic scene of a buck leaping gracefully over a fallen log.
- A tranquil winter setting with a buck foraging in the snow beneath frosted trees.
- A close-up portrait focusing on the intricate details of the buck's antlers and expressive eyes.
- A buck drinking from a peaceful woodland stream, surrounded by lush greenery.
- A group of bucks sparring during the rutting season, showcasing their strength and antler displays.
- A silhouette of a buck against a vibrant sunset on a hilltop.
- A buck partially hidden among tall grasses and wildflowers in a summer meadow.
- A dramatic scene of a buck alert and poised, sensing danger nearby.
- A buck resting under the shade of ancient trees, sunlight filtering through the leaves above.