How to Draw a Brain
Learn how to draw a brain with this step-by-step guide. Discover the intricate details and structures of the brain through this artistic journey.
Materials You'll Need
- Pencil
- Paper
- Eraser
The human brain is one of the most intriguing and complex organs in the body, responsible for everything from our thoughts and emotions to memory and creativity. Its unique, folded structure makes it a captivating subject for artists and scientists alike. By learning how to draw a brain, you not only get to explore its fascinating anatomy, but also gain a deeper appreciation for the intricate patterns and forms that make each brain unique. Whether you are interested in medical illustration, studying biology, or simply want to challenge yourself with a new drawing subject, mastering the art of depicting the brain can be both enlightening and enjoyable.
People are often drawn to this subject because of its symbolic significance—representing intelligence, imagination, and the mysteries of the mind. Drawing a brain can be a fantastic way to enhance your understanding of organic shapes, practice shading techniques, and refine your observation skills. While the brain's complex curves and textures may seem intimidating at first, this tutorial breaks down the process into manageable steps suitable for beginners and intermediate artists. You'll learn how to outline the main shape, add realistic folds, and use light and shadow to create a convincing three-dimensional effect.
As you follow along with this guide on how to draw a brain, remember that every artist develops at their own pace. Don't worry if your first attempt isn't perfect—each sketch you make will deepen your artistic abilities and confidence. With patience and practice, you'll discover that even the most complex subjects can be rendered beautifully. So gather your materials, keep an open mind, and get ready to unlock your creativity as we embark on this artistic journey together!
Materials Required
To begin with, gather the following materials:
- Drawing paper
- Pencils (preferably a range of grades from 2H to 6B)
- Eraser
- Fine-tipped pens or markers (optional)
- Reference images of a brain (you can find these online or in anatomy books)
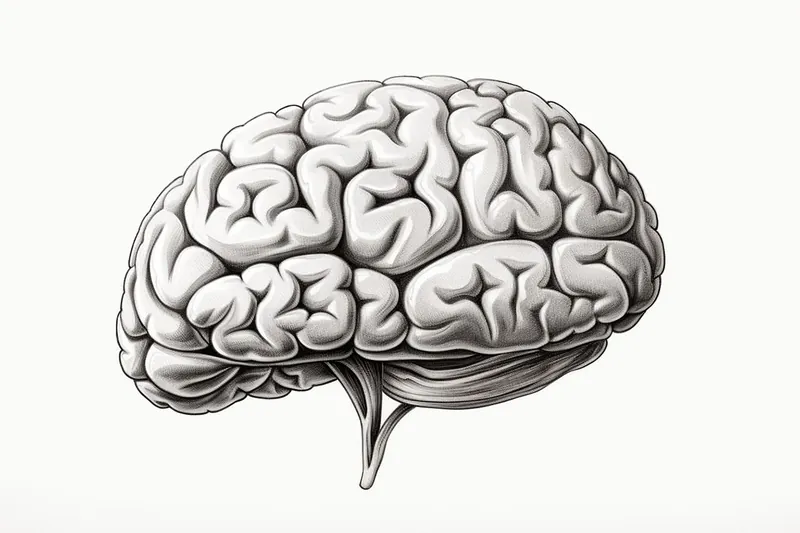
Step 1: Outline the Basic Shape of the Brain
Start by lightly sketching the basic shape of the brain. Remember that the brain is not a perfect oval but has various folds and ridges. Look at your reference images to get a sense of these contours. Use a pencil with a lighter grade (e.g., 2H) to make your initial outline. Keep your lines loose and fluid, as you can refine them later.
Step 2: Add the Major Lobes
Now, let's add the major lobes of the brain. These include the frontal lobe at the front, the parietal lobe at the top, the temporal lobe on the lower sides, and the occipital lobe at the back. Sketch these lobes based on their approximate positions and sizes. It's okay if they look rough at this stage, as we will refine them as we progress.
Step 3: Detail the Brain's Folds and Ridges
The brain is characterized by its distinct folds and ridges called gyri and sulci, respectively. Look closely at your reference images to observe these details. Use your pencil to lightly sketch these folds and ridges on the surface of the lobes. Pay attention to their directions and proportions. Remember, we are still working with loose lines here.
Step 4: Refine the Lobes and Add More Detail
Now it's time to refine the lobes and add more detail to the brain. Look at your reference images to understand the specific features of each lobe. Gradually darken your lines and define the edges of each lobe. Use a softer pencil grade (e.g., 4B) to add shading and depth to the brain's surface. Be patient and take your time with this step, as it will greatly enhance the realism of your drawing.
Step 5: Add Cross-Sections
To further illustrate the complexity of the brain, let's add a few cross-sections. Cross-sections provide a glimpse into the inner structures of the brain. Choose a few strategic points on your brain drawing where you want to depict cross-sections. Draw straight lines, slightly curved or zigzag, to represent the cut sections. Within each cross-section, add some details like neuronal pathways or different brain regions.
Step 6: Shade and Add Texture
To make your brain drawing more lifelike, add shading and texture. Observe the reference images to understand the light source and the resulting shadows. Use your pencil to add darker shading on the areas that are away from the light source. Apply lighter shading or leave blank spaces on areas exposed to the light. Blend your shading using your fingertip or a blending tool to create a smooth transition between light and dark areas.
Step 7: Refine and Add Final Details
Tip: As you work through the steps of drawing the brain, consider using a variety of pencil grades not just for outlining and shading, but also for creating texture and depth in the folds and ridges. This technique can enhance your drawing's realism, allowing you to capture the intricate details of the brain's surface. Additionally, regularly stepping back to assess your work from a distance can help you identify areas that need more refinement or adjustment in proportion, ultimately leading to a more polished final piece.
In this step, focus on refining your drawing by adding final details. Pay attention to the smaller features of the brain, such as the cerebellum at the lower back and the brainstem at the base. Add any additional gyri and sulci to enhance the overall complexity of the brain. Also, check the proportions of different parts and make any necessary adjustments.
Did You Know?: The human brain's iconic wrinkled appearance isn't just for show—those folds, called gyri and sulci, actually increase the brain's surface area, allowing for more neurons and greater processing power to fit inside our skulls. If the surface of your brain were stretched out flat, it would cover about two square feet—roughly the size of a large dinner napkin! As you draw the intricate curves and creases, imagine how each one plays a role in everything from language to memory. Appreciating these details can inspire you to add extra care and realism to your artwork, knowing each line represents a remarkable feat of nature's design.
Conclusion
Drawing a brain may seem daunting at first, but with patience and practice, you can create a remarkable representation of this incredible organ. By following these step-by-step instructions, you have learned how to outline the basic shape, add the major lobes, detail the folds and ridges, refine the lobes, add cross-sections, shade and add texture, and add final details. Embrace the opportunity to explore the brain's structure as you develop your artistic skills. Enjoy the journey of drawing and discovering the wonders of the human brain!
Fun Facts About Brains
- The human brain contains about 86 billion neurons, each forming thousands of connections with other neurons.
- Your brain uses around 20% of your body's total energy, despite making up only about 2% of your body weight.
- The left and right hemispheres of the brain control opposite sides of the body.
- Memories are not stored in just one part of the brain; they are distributed across many regions.
- The brain is about 75% water, which helps maintain its structure and function.
- Neuroplasticity allows the brain to reorganize itself by forming new neural connections throughout life.
- The adult human brain weighs about three pounds (1.4 kilograms).
- Dreams occur during the rapid eye movement (REM) stage of sleep, when brain activity is high.
Suggestions for Scenes and Settings for Brain Drawings
- A stylized brain surrounded by swirling patterns to represent imagination and creativity.
- An anatomical cross-section of the brain, revealing inner structures and neural pathways.
- A brain morphing into a tree, symbolizing growth, knowledge, and interconnectedness.
- A side-by-side comparison of a human brain with that of another animal, highlighting differences in form and complexity.
- A brain depicted as a cityscape, with streets and buildings resembling gyri and sulci.
- A surreal scene where the brain is made of puzzle pieces, some fitting together and others floating apart.
- A brain encased in light bulbs or surrounded by gears, illustrating ideas and problem-solving.
- An expressive brain with exaggerated folds and ridges, using intense shading and dramatic lighting.
- A scene showing the brain as a landscape with rivers (representing neural pathways) flowing through it.
- A whimsical drawing of a brain with tiny people exploring its "terrain" like adventurers on a map.