How to Draw a Boba
Learn how to draw a boba with this step-by-step tutorial. Create a delightful illustration of this popular beverage with clear instructions and helpful tips.
Materials You'll Need
- Pencil
- Paper
- Eraser
Welcome to this detailed tutorial on how to draw a boba, a fun and creative way to capture the essence of one of today's most beloved beverages. Boba, also known as bubble tea, originated in Taiwan and has quickly gained global popularity due to its unique combination of tea, milk, and chewy tapioca pearls. Its vibrant and playful appearance—often with colorful straws, translucent cups, and the distinctive dark pearls—makes it an exciting subject for artists looking to explore everyday objects with a fresh perspective.
Drawing a boba offers a wonderful opportunity to practice various artistic techniques such as shading, texture rendering, and capturing transparency, especially when illustrating the cup and the tapioca pearls inside. Whether you are a beginner eager to improve your basic shapes and outlines or an experienced artist wanting to refine your skills in detailed shading and highlights, this tutorial will guide you through the entire process. Learning how to draw a boba not only enhances your ability to depict reflections and translucency but also encourages creativity in how you represent this trendy drink with your own artistic flair.
So, if you're excited to create a charming and realistic illustration of this delicious treat, grab your pencils, erasers, and sketchbook. This tutorial is designed to be enjoyable and accessible, inspiring you to capture the fun personality of boba in your artwork. Let's dive in and bring this delightful beverage to life on paper—your artistic journey to mastering how to draw a boba starts right here!
Materials Required
Before we begin, make sure you have the following materials ready:
- Drawing paper or sketchbook
- Pencil
- Eraser
- Fine tip black pen or marker
- Colored pencils, markers, or watercolors (optional)
Having these materials on hand will ensure a smooth drawing experience. Now, let's dive into the step-by-step process of drawing a boba!
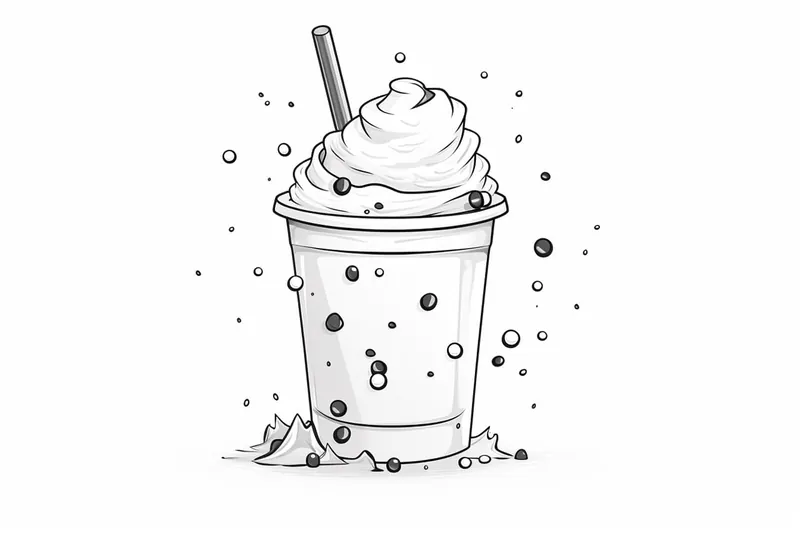
Step 1: Outline the Shape of the Cup
Start by drawing the outline of the cup. As boba is usually served in a clear plastic cup, we will depict it in this tutorial. Begin by drawing a curved line to form the top edge of the cup. Then, draw two straight lines that converge towards the base to create the sides of the cup. Finally, join the ends of the straight lines with a curved line to complete the cup shape.
Step 2: Add the Boba Balls
Inside the cup, draw small circles to represent the boba balls. Space them out evenly, leaving some gaps between them. Boba balls come in various sizes and colors, so feel free to add some variety by drawing larger or smaller circles.
Step 3: Outline the Straw
To make the drawing more realistic, let's add a straw. Draw a straight line extending from the top edge of the cup towards the bottom. At the bottom, add a small rectangle to represent the opening of the straw.
Step 4: Sketch the Lid
Next, let's work on the lid of the cup. Draw an oval shape at the top of the cup, slightly overlapping with the straw. This oval will serve as the outline of the lid. Then, inside the oval, draw a smaller oval shape to represent the opening of the lid.
Step 5: Refine the Cup and Straw
Now it's time to refine the cup and the straw. Use your pencil to carefully go over the outline of the cup, making it smoother and more defined. Add some details to the sides of the cup, such as horizontal lines to indicate the ridges. Similarly, refine the straw by adding some vertical lines to create a textured appearance.
Step 6: Draw the Boba Logo (Optional)
If you want to add some extra flair to your boba drawing, you can choose to include a boba logo on the cup. This step is entirely optional but can give your drawing a unique touch. Draw a simple boba logo of your choice, such as a bubble or a tea leaf, on the side of the cup.
Step 7: Ink the Drawing
Once you are satisfied with your pencil sketch, it's time to ink the drawing. Take a fine tip black pen or marker and carefully go over all the lines you want to keep, such as the cup outline, straw, boba balls, and any other details. Inking your drawing will make it stand out and give it a more polished look.
Step 8: Erase the Pencil Marks
After the ink has dried, use an eraser to remove any visible pencil marks from your drawing. Be careful not to erase any of the inked lines. Erasing the pencil marks will ensure that your drawing looks clean and professional.
Step 9: Color the Drawing (Optional)
If you prefer a colored illustration, this step is for you. Use colored pencils, markers, or watercolors to add vibrant colors to your boba drawing. Select the colors you want for the cup, straw, boba balls, and any other elements. Gradually build up the colors, starting with light layers and adding more depth and shading as you go.
Conclusion
Congratulations! You have successfully learned how to draw a boba. By following this step-by-step tutorial, you now have the skills to create your own delightful illustration of this beloved beverage. Remember to practice and experiment with different styles and techniques to further enhance your drawing abilities. So grab your art supplies, let your creativity flow, and enjoy the process of drawing a boba!
Fun Facts About Boba
- Boba, also known as bubble tea, originated in Taiwan in the 1980s and quickly became a cultural phenomenon.
- The chewy tapioca pearls in boba are made from cassava root starch, giving them their distinctive texture.
- Bubble tea can be served hot or cold, with a variety of tea bases including black, green, and oolong.
- The name "bubble tea" comes from the frothy bubbles formed when the tea is shaken, not from the tapioca pearls.
- There are many creative variations of boba, including fruit-flavored teas, milk teas, and even cheese-topped versions.
- Boba shops often use oversized straws to allow the tapioca pearls to be sucked up along with the tea.
- The global bubble tea market is expected to grow significantly, driven by increasing demand among younger consumers.
Suggestions for Scenes and Settings for Boba Drawings
- A cozy café table with a boba cup surrounded by sketchbooks and art supplies, capturing a creative workspace vibe.
- Boba in a bustling night market scene, with colorful lanterns and street food stalls in the background to emphasize its Taiwanese origins.
- A close-up of a boba cup with condensation droplets on the outside, highlighting the texture and transparency of the plastic cup.
- A whimsical fantasy setting where the boba pearls float like bubbles around the cup, adding a magical and playful atmosphere.
- A picnic scene in a park with a boba cup placed on a blanket alongside fruits and snacks, illustrating a relaxing outdoor moment.
- A futuristic café with neon lights reflecting off a sleek, transparent boba cup, emphasizing modern and vibrant aesthetics.
- A hand holding a boba cup with a colorful straw, set against a sunset city skyline to create a warm and inviting mood.
- A creative flat lay of multiple boba cups with different flavors and colors, arranged with ingredients like tea leaves and tapioca pearls.
- A cute character sipping boba through an oversized straw, adding personality and charm to the illustration.
- A seasonal theme, such as a boba cup decorated for a holiday (e.g., cherry blossoms for spring or cozy scarves for winter), to bring in festive elements.