How to Draw a Bloodhound
Learn how to draw a Bloodhound with this step-by-step tutorial. Create a realistic and detailed portrayal of this noble breed using pencils and shading techniques.
Materials You'll Need
- Pencil
- Paper
- Eraser
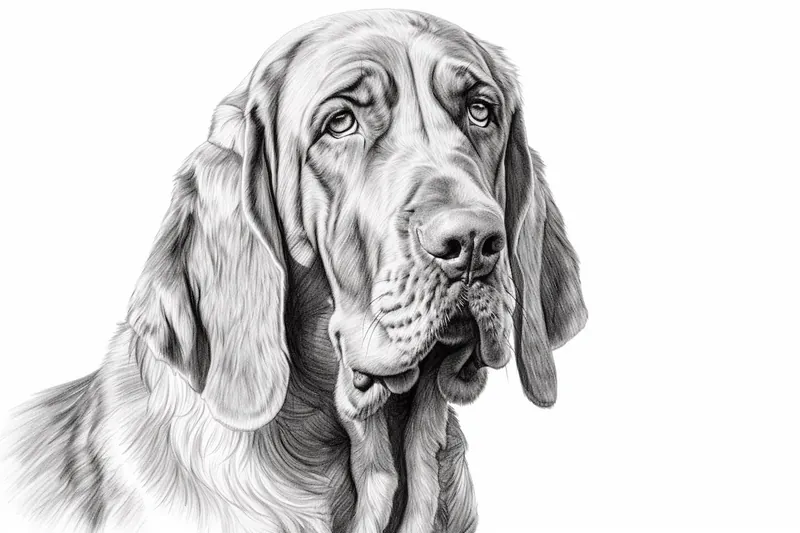
The Bloodhound is a remarkable breed known for its keen sense of smell and distinctive appearance, featuring long, droopy ears, wrinkled skin, and expressive eyes. Revered for their tracking abilities, Bloodhounds have played important roles in search and rescue operations as well as in popular culture, making them an intriguing subject for artists. Learning how to draw a Bloodhound allows you to capture not only their unique physical traits but also their gentle and determined personality. Whether you're a dog lover, a fan of animal portraiture, or simply want to expand your drawing repertoire, this tutorial offers an engaging opportunity to bring this iconic breed to life on paper.
In this comprehensive guide on how to draw a Bloodhound, we'll break down the drawing process into clear, manageable steps, perfect for artists of all skill levels. Beginners will benefit from learning basic construction shapes and careful observation, while more experienced artists can focus on refining realistic details like the folds in the skin and the soulful expression in the eyes. We'll explore useful techniques such as sketching, shading, and adding texture to accurately depict the Bloodhound's coat and features. Remember, drawing is as much about patience and practice as it is about technique—so take your time and enjoy the creative journey!
Tip: As you work through the drawing steps, take frequent breaks to step back and assess your progress from a distance; this will help you identify areas that may need adjustment in proportion or detail. Additionally, using a mirror to view your drawing can provide a fresh perspective, allowing you to see any inconsistencies or areas that require more refinement.
By the end of this tutorial, you'll have the skills and confidence to create a compelling Bloodhound portrait, whether for your own enjoyment or to share with friends and family. Don't be discouraged if your first attempt isn't perfect; improvement comes with each drawing you complete. Gather your materials, follow along step by step, and most importantly, have fun as you learn how to draw a Bloodhound!
Materials Required
Before we begin, let's gather the materials you will need for this drawing:
- Drawing paper or sketchpad
- Pencils (preferably a range of hardness, such as 2B, 4B, and 6B)
- Eraser
- Blending stump or tortillon (optional)
- Reference photo of a Bloodhound (to aid in capturing its unique features)
Now that we have our materials ready, let's dive into the drawing process!
Step 1: Outline the Head and Ears
Start by lightly sketching an oval shape to outline the head of the Bloodhound. This oval will serve as the basic structure for the head. Next, add two long, droopy ears on either side of the head. Bloodhounds are known for their signature long and floppy ears, so make sure to capture that characteristic in your drawing.
Step 2: Define the Facial Features
Using the reference photo as a guide, carefully draw the eyes, nose, and mouth of the Bloodhound. Pay attention to the placement and proportions of these features to ensure accuracy. Bloodhounds have large, soulful eyes and a prominent nose, so try to capture these details as best as you can.
Step 3: Sketch the Body and Limbs
Extend the outline of the head to sketch the body of the Bloodhound. Add a slightly curved line to represent the back, and then draw the front and hind limbs. Bloodhounds are known for their sturdy and muscular bodies, so make sure to convey that strength in your drawing.
Step 4: Add Fur and Texture
Now it's time to add some texture and detail to your drawing. Start by carefully shading the fur using light strokes in the direction of the hair growth. Pay attention to the different areas of light and shadow on the Bloodhound's body. Use a range of pencil hardness to create depth and dimension in your drawing.
Step 5: Refine the Facial Features
Go back to the facial features and add more detail and shading. Define the eyes by adding darker tones around them to create depth and expression. Shade the nose to make it appear three-dimensional. Bloodhounds have wrinkles and folds on their faces, so make sure to capture those unique details.
Step 6: Work on the Ears and Body
Refine the shape and texture of the ears by adding more shading and emphasizing the folds and creases. Bloodhounds have soft and velvety ears, so try to recreate that texture in your drawing. Pay attention to the shadows and highlights on the body as well to create a realistic and lifelike representation.
Step 7: Finalize the Details
Take a step back and assess your drawing so far. Are there any areas that need more work or refinement? Make any necessary adjustments to ensure accuracy and realism. Add any additional details such as whiskers or small markings on the fur to enhance the overall appearance of your drawing.
Mistake Alert: A frequent stumbling block when drawing Bloodhounds is making their iconic facial wrinkles and droopy skin look too stiff or uniform, which can flatten their natural expressiveness. This often happens when artists use harsh, straight lines or repeat the same curve for each wrinkle, instead of observing how the skin sags and overlaps in organic, varied ways. To avoid this, take time to study reference photos and use gentle, broken lines to suggest softness and depth—notice how some wrinkles are deeper or more shadowed than others. Layer your lines lightly at first and gradually build up the folds, focusing on the areas around the eyes, muzzle, and neck for a lifelike, gentle appearance.
Conclusion
Congratulations! You have successfully completed a detailed drawing of a Bloodhound. By following these step-by-step instructions and paying close attention to the unique features of this breed, you have created a captivating and realistic depiction of a Bloodhound. Remember, practice makes perfect, so keep honing your drawing skills and exploring different subjects. I hope you enjoyed this tutorial and that it has inspired you to continue your artistic journey!
Fun Facts About Bloodhound
- The Bloodhound has the most powerful sense of smell among all dog breeds, with up to 300 million scent receptors in its nose.
- Bloodhounds have been used in law enforcement for centuries to track missing persons and fugitives.
- This breed's distinctive long, droopy ears help sweep scents from the ground toward their nose.
- Bloodhounds can follow a scent trail that is over 300 hours old.
- Their wrinkled skin around the face and neck helps trap scent particles, enhancing their tracking ability.
- Bloodhounds are gentle giants, known for their affectionate and patient temperament.
- The breed originated in medieval France and England, with a history dating back over a thousand years.
- Bloodhounds have appeared in popular culture, including movies and cartoons like Disney's The Fox and the Hound.
- Despite their tracking prowess, Bloodhounds can be stubborn and require patient, consistent training.
Suggestions for Scenes and Settings for Bloodhound Drawings
- A Bloodhound sniffing along a forest trail, nose to the ground in search of a scent.
- A close-up portrait capturing the soulful eyes and wrinkled face of a relaxed Bloodhound.
- A Bloodhound working alongside a search and rescue team, wearing a harness and looking determined.
- A playful Bloodhound puppy with oversized ears, tumbling on a grassy lawn.
- A Bloodhound sitting regally on a porch, gazing thoughtfully into the distance at sunset.
- A Bloodhound with a detective hat and magnifying glass, playfully depicted as a canine sleuth.
- A Bloodhound interacting gently with children or other animals, highlighting its calm nature.
- A dynamic scene of a Bloodhound leaping over a fallen log during a training exercise.
- A group of Bloodhounds working together in a field, each following a different scent trail.
- A cozy indoor scene with a Bloodhound curled up by a fireplace, emphasizing its gentle personality.