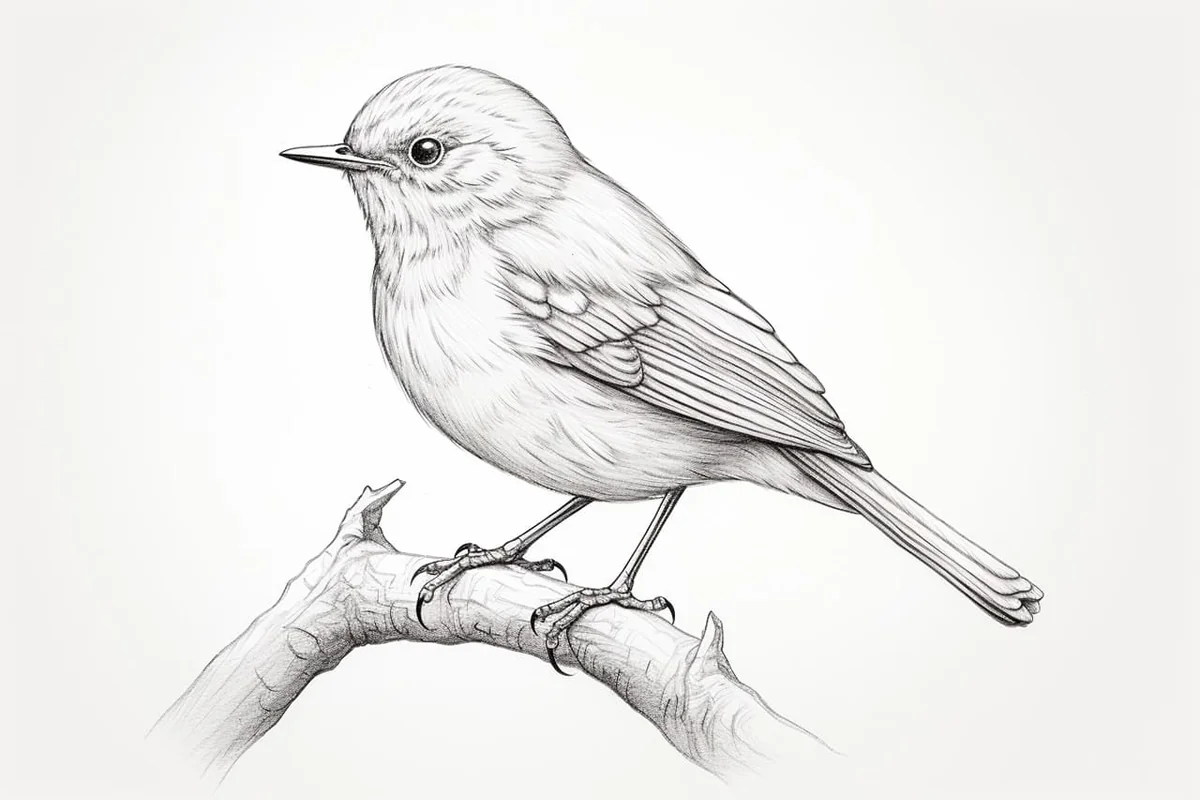
How to Draw a Bird in 8 Easy Steps
Learn how to draw a realistic bird with this detailed step-by-step tutorial. Master feather textures, proportions, and shading techniques.
Materials You'll Need
- Pencil range (2H to 6B)
- High-quality drawing or watercolor paper
- Eraser
- Reference bird images
- Colored pencils or watercolors (optional)
How to Draw a Bird in 8 Easy Steps
Birds have long been a favorite subject for artists, symbolizing freedom, elegance, and the beauty of nature. Whether you're capturing a majestic eagle in flight or a tiny sparrow perched on a branch, learning to draw birds opens up a world of artistic possibilities.
Materials You'll Need
- Pencils: A range from 2H (light) to 6B (dark)
- Paper: High-quality drawing or watercolor paper
- Eraser: For corrections and highlights
- Reference images: Essential for accurate proportions
Step 1: Sketch the Basic Shapes
Begin your bird drawing with simple geometric forms:
- Draw a large oval for the body - this establishes the bird's main mass
- Add a smaller circle for the head - positioned above and slightly overlapping the body
- Sketch rough shapes for the wings and tail - think triangular forms
- Use light, loose strokes that you can easily adjust
Remember, these initial shapes are just guides - they'll be refined as you progress.
Step 2: Outline the Bird's Form
Now refine those basic shapes into a recognizable bird silhouette:
- Smooth the connection between head and body with curved lines
- Sketch the beak - a simple triangle extending from the head
- Draw the legs and feet - thin lines with small branches for toes
- Define the tail - typically fan-shaped or pointed
- Focus on getting the proportions right before adding details
Step 3: Define Facial Features
The face brings your bird to life:
- Position the eye - usually placed midway on the head, slightly forward
- Detail the beak - add the upper and lower mandible separation
- Include the nostril - a small mark near the beak base
- Add small feather details around the eye and cheek area
The eye is crucial - it's often what viewers look at first.
Step 4: Add Wing and Tail Feather Details
Feathers define a bird's character:
- Use soft, flowing lines to indicate feather groups
- Primary feathers (flight feathers) are longer and more defined
- Secondary feathers layer underneath, creating depth
- Tail feathers fan out from a central point
- Follow the natural direction of feather growth
Don't draw every single feather - suggest them with strategic lines.
Step 5: Add Shading for Depth
Shading transforms your flat drawing into a three-dimensional bird:
- Determine your light source - typically from above
- Use light pencil strokes following the feather direction
- Build shadows gradually - start light and add layers
- Create form shadows under the wings and belly
- Use hatching and cross-hatching techniques for texture
The darkest areas are usually under the wings and tail.
Step 6: Refine Feather Texture
This is where your bird becomes truly realistic:
- Use short, fine strokes to suggest individual feathers
- Layer feathers - show how they overlap naturally
- Vary your pressure - lighter strokes for soft down, heavier for primaries
- Create natural patterns - many birds have distinct markings
- Add texture variety - smooth head feathers versus fluffy body feathers
Step 7: Final Touches and Adjustments
Perfect your drawing with these finishing steps:
- Darken key contrast areas - especially around the eye and beak
- Erase construction lines that are still visible
- Enhance highlights - use your eraser to lift graphite for bright spots
- Add environmental elements - a branch, leaves, or simple background
- Check overall balance - ensure no area is too heavy or light
Step 8: Optional Color Addition
If you want to add color:
- Start with light base colors - build up gradually
- Layer darker shades for shadows and depth
- Maintain feather direction with your color strokes
- Add highlights last - white or light yellow for shine
- Consider the species - use reference photos for accurate coloring
Tips for Success
- Study bird anatomy - understanding structure improves your drawings
- Observe live birds when possible - notice how they move and perch
- Practice different species - each has unique proportions
- Start with common birds like robins or sparrows before attempting complex species
- Use quality references - clear photos showing feather detail
Common Mistakes to Avoid
- Making the head too large or small relative to the body
- Placing the legs too far forward or back
- Drawing feathers as simple lines rather than overlapping shapes
- Forgetting that birds are three-dimensional - add depth with shading
Conclusion
Drawing birds is a rewarding skill that combines observation, technique, and artistic expression. With these eight steps, you can create convincing bird drawings that capture the grace and beauty of our feathered friends. Remember, every artist develops their own style - practice regularly and don't be afraid to experiment with different techniques and species. Happy drawing!