How to Draw a Bank
Learn how to draw a bank in this step-by-step tutorial. Discover the process of creating a detailed and realistic bank drawing using simple materials.
Materials You'll Need
- Pencil
- Paper
- Eraser
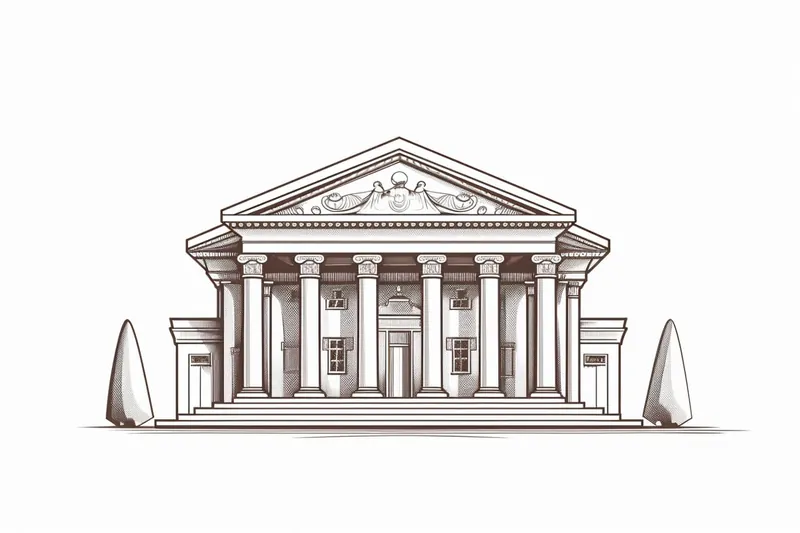
Welcome to this comprehensive tutorial on how to draw a bank, a classic architectural subject that combines both structural design and artistic detail. Banks are iconic buildings often symbolizing stability, security, and trust, making them a fascinating and rewarding subject to capture in your artwork. Whether you are aiming to create a realistic representation or a stylized version, drawing a bank allows you to explore perspective, symmetry, and intricate details such as columns, windows, and signage that define these impressive structures.
In this step-by-step guide, we will break down the process of how to draw a bank in a way that is accessible to artists of all skill levels. Beginners will appreciate the clear instructions and helpful tips for mastering basic shapes and lines, while more experienced artists can focus on refining textures, shading, and architectural nuances. Techniques such as using a ruler for precise edges and employing a compass for perfect curves will be introduced, helping you develop a strong foundation in technical drawing as well as creativity. This tutorial is designed to build your confidence and improve your observation skills with each step.
Drawing a bank can be both a fun and educational experience, giving you the chance to practice perspective drawing and architectural detailing. By the end of this tutorial, you will have created a detailed and realistic bank drawing that you can be proud of. So, gather your pencils, paper, and drawing tools, and let's embark on this artistic journey together. Remember, every great artist started with simple steps—let this be one of yours as you learn how to draw a bank with precision and creativity!
Materials Required
Before we begin, make sure you have the following materials at hand:
- Pencil
- Eraser
- Paper
- Ruler
- Compass
- Black pen or fine-tip marker (optional)
Ensure that you have a clean and comfortable working environment, and let's dive into the fascinating world of drawing a bank!
Step 1: Establish the Horizon Line
To create a well-proportioned bank drawing, start by establishing the horizon line. This line represents the viewer's eye level and helps you maintain perspective throughout the drawing.
- Take your ruler and draw a straight horizontal line across your paper. This line will act as the horizon line.
- Place a dot in the middle of the line. This dot will serve as the vanishing point, where the parallel lines converge.
Step 2: Draw the Bank's Foundation
Now, let's start sketching the foundation of the bank. We'll begin with the main structure and later add details to bring it to life.
- From the vanishing point, draw two diagonal lines diverging towards the bottom edges of your paper. These lines will form the sides of the bank.
- At the bottom, connect the ends of the diagonal lines with a horizontal line. This line will serve as the foundation of the bank.
Step 3: Add the Bank's Facade
In this step, we'll give the bank a distinctive facade that will make it instantly recognizable. Be attentive to details and take your time to achieve accuracy.
- Starting from the top of the foundation, draw two vertical lines upwards. These lines will form the front sides of the bank.
- At the top of each vertical line, draw a smaller horizontal line. These lines will represent the roof overhang.
- Connect the ends of the horizontal lines with two parallel lines, forming the top of the bank facade.
- From the bottom corners of the foundation, draw two diagonal lines converging towards the vanishing point. These lines will represent the sides of the bank.
- Connect the top ends of the diagonal lines with a horizontal line, completing the top of the facade.
Step 4: Design the Bank's Entrance
Now it's time to draw the entrance of the bank. Pay attention to the proportions and details to create a stunning entrance that catches the eye.
- On the front side of the bank, draw a rectangular shape for the entrance door.
- Add smaller rectangles on either side of the entrance for windows.
- Within the entrance door, draw a smaller rectangle for the glass panel.
- Add details to the entrance, such as handles and decorative elements.
Step 5: Incorporate Architectural Details
To make the bank drawing more realistic, let's focus on adding architectural details such as windows, columns, and decorative elements.
- Draw rectangular shapes for windows on the facade, making sure they are evenly spaced.
- Add columns on either side of the entrance, extending from the foundation to the top of the facade.
- Incorporate decorative elements such as balustrades, cornices, or any other features specific to the bank's architectural style.
Step 6: Refine and Finalize
Now that the main structure and details are in place, it's time to refine the drawing and add finishing touches.
- Carefully go over the lines, erasing any unnecessary guidelines.
- Add shading to create depth and dimension. Pay attention to the light source to determine where the shadows fall.
- You can enhance the drawing using a black pen or fine-tip marker to outline the final lines.
Congratulations! You have successfully drawn a detailed and realistic bank. With practice, you can explore different architectural styles and add your personal touch to create unique bank drawings.
Conclusion
In this tutorial, we explored the step-by-step process of drawing a bank. From establishing the horizon line to adding architectural details, each step has been carefully explained to help you create an impressive bank drawing. Remember to take your time, be patient, and enjoy the journey of artistic creation.
Now it's your turn to pick up your drawing materials and practice drawing a bank. With dedication and practice, your skills will continue to grow. So, keep honing your artistic abilities, and don't forget to have fun along the way!
Fun Facts About Bank
- The concept of banking dates back to ancient Mesopotamia, where merchants made grain loans to farmers and traders.
- The first modern banknotes were issued in China during the Tang Dynasty around the 7th century.
- Banks play a crucial role in the economy by facilitating the flow of money and credit between savers and borrowers.
- The largest bank in the world by total assets is the Industrial and Commercial Bank of China (ICBC).
- ATMs (Automated Teller Machines) were first introduced in the late 1960s, revolutionizing banking accessibility.
- Many banks use architectural designs with columns and grand facades to symbolize strength and security.
- Online and mobile banking have dramatically changed how customers interact with banks, increasing convenience and accessibility.
- The FDIC (Federal Deposit Insurance Corporation) was created in 1933 to protect bank depositors in the United States.
Suggestions for Scenes and Settings for Bank Drawings
- A grand neoclassical bank building with towering columns and intricate stone carvings, set against a clear blue sky.
- A modern glass-fronted bank with reflective windows, showcasing a bustling cityscape street scene with pedestrians and vehicles.
- An old-fashioned small-town bank with a wooden facade and vintage signage, surrounded by quaint shops and lampposts.
- A nighttime scene of a bank illuminated by street lamps, with subtle shadows and glowing windows to create a moody atmosphere.
- A bird's-eye view of a bank building in a busy financial district, emphasizing its rooftop architecture and surrounding skyscrapers.
- A bank entrance with detailed wrought iron gates and decorative lanterns, framed by symmetrical rows of trees or shrubs.
- An abandoned or historic bank building with cracked walls and overgrown vines, evoking a sense of mystery and history.
- A futuristic bank with sleek geometric shapes and digital signage, set in a sci-fi urban environment.
- A bank interior scene focusing on the teller counters, security features, and customer interactions, highlighting architectural details inside.
- A perspective drawing from street level looking up at a bank's facade, emphasizing the building's height and grandeur through vanishing points.