How to Draw a Bandana
Learn how to draw a bandana in this step-by-step tutorial. Follow the instructions to create your own unique bandana design. Enhance your artistic skills today!
Materials You'll Need
- Pencil
- Paper
- Eraser
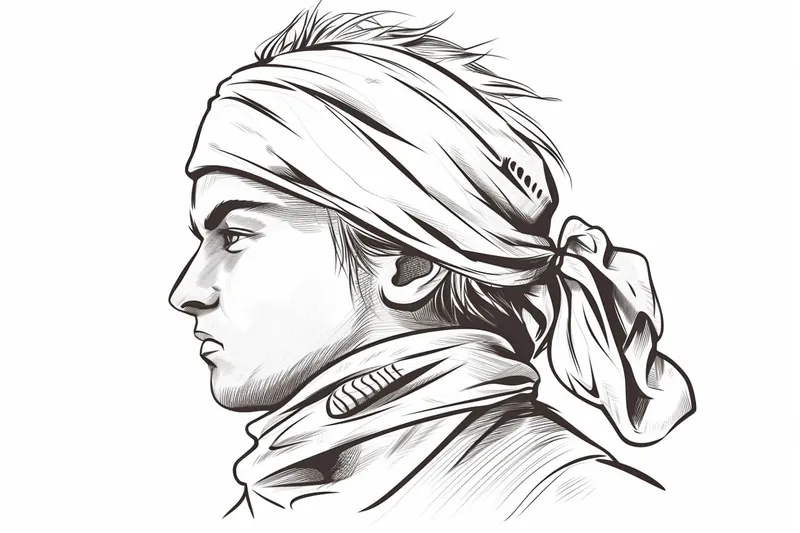
Welcome to this comprehensive guide on how to draw a bandana! Bandanas are versatile and stylish accessories that have been a part of fashion and culture for centuries, often symbolizing everything from rebellious spirit to cultural identity. Whether you're an aspiring artist looking to add a dynamic accessory to your character designs or simply want to practice drawing fabric and patterns, mastering how to draw a bandana can greatly enhance your artwork. Bandanas offer a unique opportunity to explore folds, texture, and pattern work, making them both a challenging and rewarding subject to draw.
Drawing a bandana involves understanding the way fabric drapes and folds around the head, neck, or wrist, which helps build essential skills in shading, perspective, and detailing. This tutorial is designed for artists of all skill levels—from beginners who are just learning how to depict simple shapes and lines, to more advanced artists who want to refine their technique in creating realistic patterns and textures. Throughout the step-by-step instructions, you'll learn how to capture the bandana's distinctive knot, the creases formed by the fabric, and even how to illustrate classic paisley or geometric designs that make bandanas so recognizable.
So whether you're drawing for fun, fashion illustration, or character development, understanding how to draw a bandana can add depth and personality to your art. With patience and practice, you'll be able to create stunning and realistic bandanas that bring your drawings to life. Grab your pencil and sketchbook, and let's dive into this creative journey together—you're just a few steps away from mastering this fashionable accessory!
Materials Required
To successfully draw a bandana, you will need the following materials:
- Drawing paper or sketchbook
- Pencil
- Eraser
- Fine-tip black pen or marker
- Colored pencils or markers (optional)
Now that we have our materials ready, let's dive into the step-by-step process of drawing a bandana.
Step 1: Planning the Bandana Design
Tip: To enhance your bandana drawing, focus on observing real-life bandanas for inspiration; pay attention to how the fabric folds, the way light interacts with different textures, and the intricacies of various patterns. This practice will not only improve your understanding of fabric dynamics but also allow you to incorporate unique details and personal touches into your artwork, making your bandana designs truly stand out.
Before we start drawing, it's helpful to think about the design you want for your bandana. Bandanas often have various patterns such as paisley, floral, or geometric designs. Decide on the shape, pattern, and colors you want to incorporate into your bandana.
Step 2: Drawing the Outline
Start by lightly sketching the outline of your bandana. The shape of a bandana is typically a large triangle, with one corner pointing downwards. Adjust the size and shape to your preference. Use light and smooth strokes, as this will help with erasing any mistakes later on.
Step 3: Adding the Pattern
Now it's time to add the pattern to your bandana. This step will depend on the design you chose in the planning stage. For example, if you're going for a paisley pattern, start by drawing a small paisley shape near the bottom corner of the bandana. Repeat this shape, gradually increasing the size and spacing as you move upward. Continue until the entire bandana is covered with your chosen pattern.
Step 4: Adding Details
To make your bandana design more realistic and visually appealing, add some details. You can include small lines and shapes within the pattern, or add shading to create dimension. Experiment with different techniques to achieve the desired effect.
Step 5: Inking the Design
Once you're satisfied with your sketch, use a fine-tip black pen or marker to ink the final design. Start by outlining the bandana shape, then work your way through the pattern, adding clean and crisp lines. Take your time and be patient during this step to ensure a professional-looking finished result.
Step 6: Erasing Guidelines
After the ink has dried, carefully erase any remaining pencil guidelines. Use a gentle touch to avoid smudging the ink or damaging the paper. Take your time and erase slowly to ensure a clean and neat final drawing.
Step 7: Adding Color (Optional)
If you want to add color to your bandana, now is the time to do so. Use colored pencils or markers to bring your design to life. Experiment with different color combinations and shading techniques to make your bandana visually stunning.
Step 8: Adding Shadows and Highlights (Optional)
To add depth and dimension to your bandana, consider adding shadows and highlights. Shadows can be added by lightly shading areas that would be darker or obscured, while highlights can be added by leaving certain areas white or using a white colored pencil or marker. This step is optional but can greatly enhance the overall appearance of your drawing.
Conclusion
Congratulations! You have successfully learned how to draw a bandana. By following these step-by-step instructions, you can create unique and eye-catching bandana designs. Whether you're an experienced artist or just starting, drawing a bandana is an excellent way to develop your skills and showcase your creativity. So grab your drawing materials, let your imagination run wild, and have fun creating your own personalized bandanas.
Fun Facts About Bandanas
- The word "bandana" comes from the Hindi word "bāndhnū", meaning "to tie".
- Bandanas have been used since the 18th century as practical accessories for workers and cowboys in the American West, as detailed by the Cowboy Country Magazine.
- The classic paisley pattern commonly seen on bandanas originated in Persia and became popular in Europe during the 19th century, according to the Victoria and Albert Museum.
- Bandanas have been used as symbols in various social and political movements, including the 1970s gay pride movement, as explained by the History Channel.
- In fashion, bandanas are versatile and can be worn in multiple ways: around the neck, head, wrist, or even as a pocket square, as noted by GQ Magazine.
- Bandanas are often made from cotton, which makes them breathable and easy to wash, a fact highlighted by the Encyclopedia Britannica.
- The red bandana became an iconic symbol of the working class and labor movements in the early 20th century, as documented by the Labour Heritage Centre.
Suggestions for Scenes and Settings for Bandana Drawings
- A rugged cowboy riding through a dusty desert landscape, bandana tied around the neck catching the wind.
- A street-style portrait of a musician or rapper with a patterned bandana wrapped around the head.
- A serene countryside picnic scene featuring a character wearing a floral bandana tied around their wrist.
- A biker cruising down an open highway, bandana covering their face as a dust shield.
- An adventurous hiker pausing to rest on a mountain trail, bandana sweatband wrapped around the forehead.
- A vintage 1950s diner waitress with a polka dot bandana tied as a headscarf.
- A stylized portrait of a pirate or sailor with a paisley bandana knotted at the side of the head.
- A nature-inspired scene with a character harvesting flowers, wearing a geometric patterned bandana around the neck.
- A dynamic sports setting, such as a skateboarder or runner, sporting a brightly colored bandana as a headband.
- An urban graffiti artist painting a mural, with a bandana tied over the nose and mouth for protection.