How to Draw a Bandaid
Learn how to draw a bandaid with this step-by-step tutorial. Perfect for beginners, this guide will help you create a realistic representation of a bandaid on paper.
Materials You'll Need
- Pencil
- Paper
- Eraser
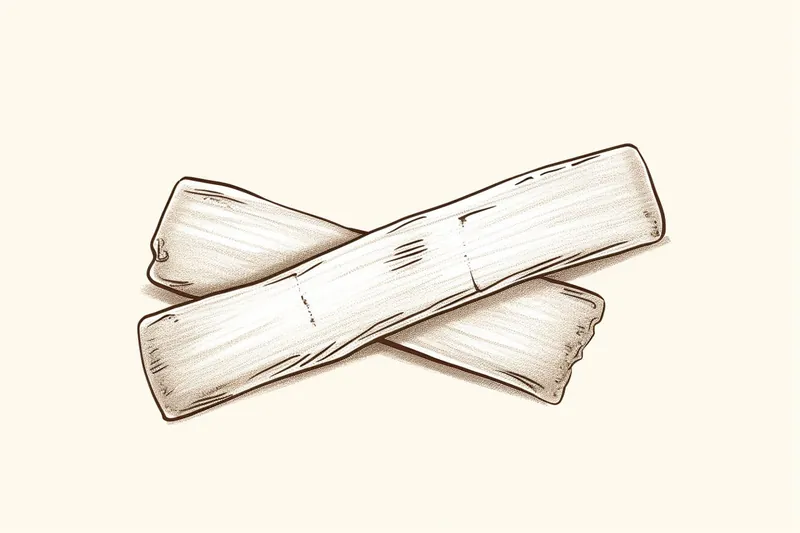
Drawing is not only a delightful way to express your creativity but also an excellent practice to hone your observation and rendering skills by capturing everyday objects in art. In this tutorial, we will explore how to draw a bandaid, a simple yet fascinating subject that combines geometric shapes, subtle textures, and shading nuances. Bandaids are common items that many people encounter regularly, and learning to depict one realistically can improve your ability to render small details and delicate textures, which are essential skills for artists at all levels.
Whether you are a beginner just starting your artistic journey or an experienced artist looking to refine your technique, this step-by-step guide will walk you through the process of creating a lifelike bandaid drawing. You'll learn how to construct the basic shape, add the perforated texture, and apply shading to give your drawing dimension and realism. Such techniques not only make your artwork visually compelling but also improve your understanding of light, shadow, and form. Mastering how to draw a bandaid can serve as a foundation for drawing other small objects with intricate details, making it a valuable exercise in your artistic repertoire.
So, prepare your pencils and paper, and get ready to practice patience and precision. By the end of this tutorial, you will have gained not only a clear and accurate depiction of a bandaid but also boosted your confidence in drawing everyday objects. Remember, every masterpiece begins with a single line, and your dedication will surely reflect in your art. Let's dive in and discover the joy of bringing a simple bandaid to life on your sketchpad!
Materials Required
Before we begin, gather the following materials:
- Paper: Choose a high-quality drawing paper that is suitable for your preferred drawing medium.
- Pencil: Use a medium softness pencil (HB or 2B) for initial sketching.
- Eraser: Have a soft eraser for correcting mistakes and a kneaded eraser for cleaning up your drawing.
- Fine-tipped pen or marker (optional): This will be used for outlining your final drawing.
- Colored pencils or markers (optional): If you want to add color to your bandaid drawing, have some colored pencils or markers ready.
Step 1: Sketch the Basic Shape
Start by lightly sketching a rectangular shape on your paper. This will serve as the main body of the bandaid. It should be somewhat elongated with rounded corners. Take your time to ensure the proportions and shape are accurate.
Step 2: Add the Pad
Inside the rectangular shape, draw a smaller rectangular shape that represents the pad of the bandaid. The pad should be placed near the center of the bandaid. Make sure the edges of the pad align with the edges of the outer rectangle.
Step 3: Outline the Bandaid
Using the basic shapes as a guide, carefully outline the bandaid using a darker pencil or a fine-tipped pen. Pay attention to the curves and angles of the bandaid to create a clean and smooth outline.
Step 4: Add Texture
To make the bandaid look more realistic, we need to add texture. Draw a series of short, curved lines on the pad of the bandaid to represent the texture of the fabric. These lines should follow the contour of the pad and vary in length and direction. This will give the bandaid a woven appearance.
Step 5: Draw the Wings
On each side of the bandaid, draw two small wings that extend outward. These wings are used to secure the bandaid in place. They should be slightly curved and taper off towards the ends. Make sure the wings are symmetrical and aligned with each other.
Step 6: Add Details
Now it's time to add the finishing touches to your bandaid drawing. Add two parallel lines on each wing to represent the adhesive strips. These lines should run along the length of the wings and be evenly spaced. You can also add small dots or circles on the pad of the bandaid to indicate the perforations.
Step 7: Refine and Erase
Take a step back and assess your drawing. Use a darker pencil or pen to refine the outline and make any necessary adjustments. If there are any unwanted sketch lines, gently erase them using a soft eraser. Pay attention to the overall shape and proportions of the bandaid to ensure accuracy.
Step 8: Color (optional)
If you wish to add color to your bandaid drawing, now is the time to do so. Use colored pencils or markers to shade the pad of the bandaid. You can mimic the color of a real bandaid or get creative and use different colors for a personalized touch. Color the wings and adhesive strips as well, if desired.
Conclusion
Congratulations, you have successfully learned how to draw a bandaid! By following these step-by-step instructions, you have acquired the skills to create a realistic representation of this everyday object. Drawing allows us to appreciate the beauty in everyday things, and a bandaid is a great example of that. So, keep practicing, experimenting with different techniques, and exploring the world of art. Remember, the more you draw, the better you become!
Fun Facts About Bandaid
- The first adhesive bandage, later known as the Band-Aid, was invented in 1920 by Earle Dickson, a Johnson & Johnson employee, to help his wife with small cuts.
- Band-Aids were originally handmade by Earle Dickson before mass production began, making them one of the first ready-to-use wound care products.
- The name "Band-Aid" is a trademarked brand name but is often used generically to refer to all adhesive bandages.
- During World War II, Band-Aids were produced in various sizes and shapes to treat different types of wounds on soldiers.
- Modern Band-Aids often include antibiotic ointments and waterproof materials to improve healing and durability.
- Band-Aids have inspired many creative designs, including character-themed and glow-in-the-dark versions to encourage children to use them.
- The perforated holes on the fabric part of a Band-Aid help the skin breathe and speed up the healing process, according to Scientific American.
Suggestions for Scenes and Settings for Bandaid Drawings
- A close-up view of a bandaid on a scraped knee in a natural outdoor setting, like a park or garden.
- A whimsical scene where multiple colorful bandaids form a patchwork quilt on an old wooden table.
- A bandaid stuck on a favorite childhood toy or stuffed animal, showing care and comfort.
- A surreal composition of a giant bandaid covering a crack in a brick wall in an urban environment.
- A medical kit open on a bedside table with various sizes and types of bandaids scattered inside.
- A bandaid artistically placed on a hand holding a pencil, symbolizing healing through creativity.
- An abstract pattern made up of overlapping bandaids in different shades and textures, creating a mosaic effect.
- A vintage first aid box with an old-fashioned bandaid partially peeling off, evoking nostalgia.
- A bandaid on a book or notebook's cover, suggesting mending and protection of ideas.
- A playful scene where tiny cartoon characters use bandaids as boats or sails on a small stream.